
Mountaineer AWD V6-4.0L (2008)
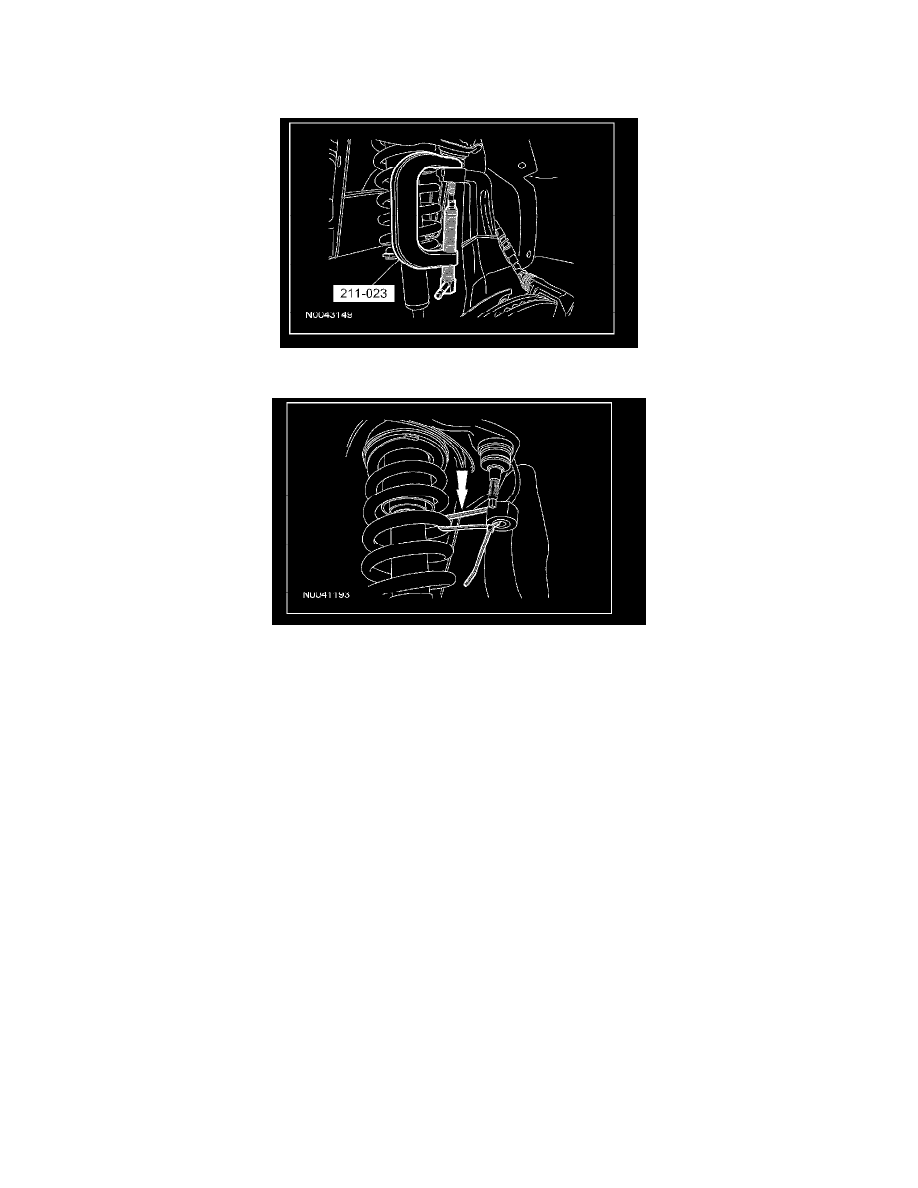
CAUTION: Do not damage the ball joint boot while installing the special tool.
Using the special tool, separate the upper ball joint from the wheel knuckle.
6. Using a plastic tie strap, support the suspension at the wheel knuckle.
7. Remove and discard the 2 upper arm bolts and flag nuts and the upper arm.
Installation
CAUTION: Before tightening any suspension bushing fasteners, use a suitable jack to raise the suspension until the distance between the
center of the hub and the lip of the fender is equal to the measurement taken in Step 1 (curb height). This will prevent incorrect clamp load
and bushing damage.
1. NOTE: Do not tighten the bolt at this time.
Position the upper arm and install the 2 upper arm bolts and flag nuts.
2. Remove the plastic tie strap.
3. Connect the upper ball joint to the wheel knuckle and install the upper ball joint nut.
^
Tighten to 55 Nm (41 lb-ft).
4. Using a suitable jack, raise the suspension until the distance between the center of the hub and the lip of the fender is equal to the measurement
taken in Step 1 (curb height).
5. Tighten the 2 upper arm bolts to 150 Nm (111 lb-ft).
6. Install the wheel and tire.
7. Check and if necessary, align the front end.