
Mountaineer AWD V6-4.0L VIN K Flex Fuel (2003)
NOTE:
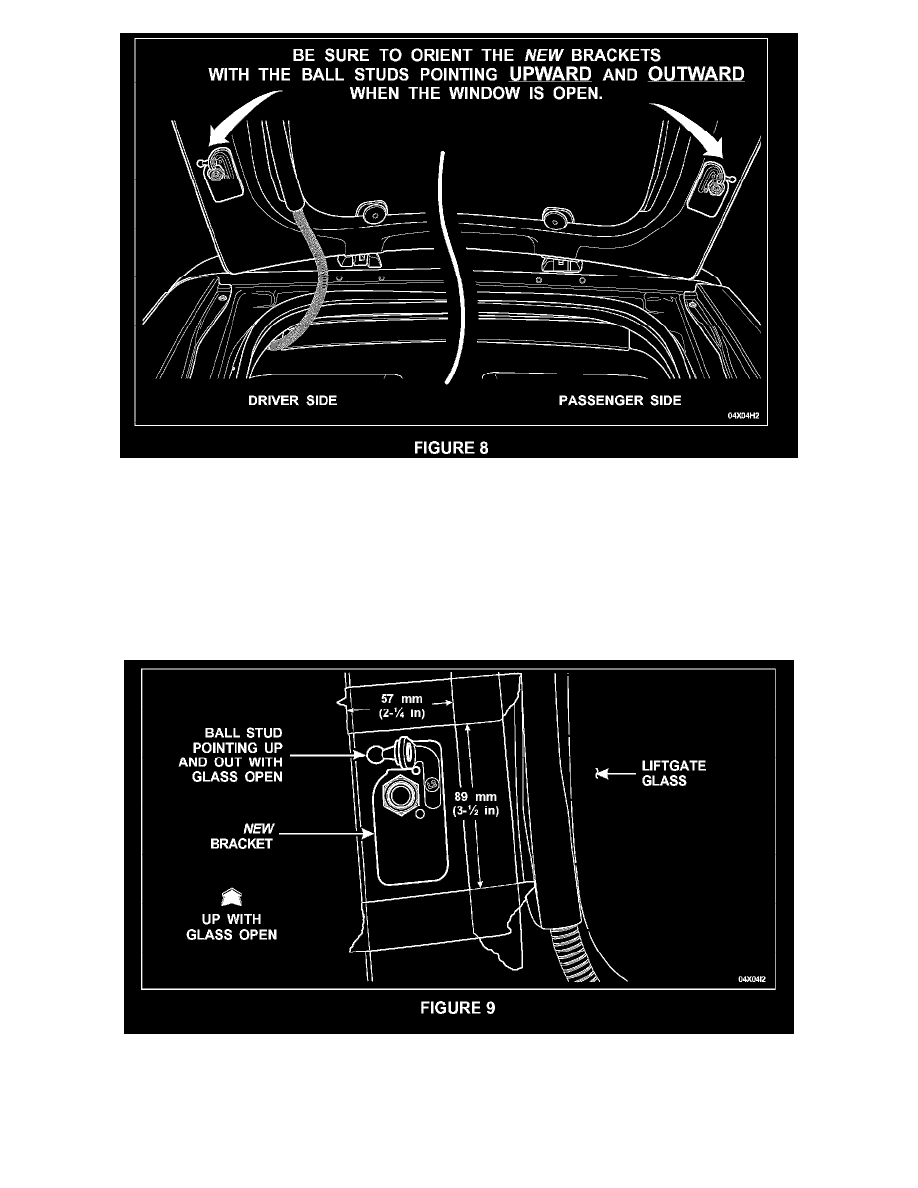
With the liftgate glass open, be sure to properly orient the new brackets with the ball stud pointing upward and outward. See Figure 8.
3.
Hold the new bracket in position on the glass with the ball stud pointing UP and OUT (with the liftgate glass open). Mark the area around the
bracket using masking tape or vinyl tape. Leave a space approximately 7 mm (1/4 in) between the edge of the bracket and the tape. The taped-off
area should be approximately 57-mm (2-1/4 in) wide and 89-mm (3-1/2 in) high. See Figure 9 for proper placement and dimensions. After the tape
is applied, remove the bracket. The tape will be used as an alignment guide, therefore, keep the tape in place until completing the final bracket
alignment.
4.
CAUTION: Care should be taken to avoid damage to the frosted coating on the glass.
Completely remove all existing adhesive from the glass using a sharp razor blade scraper. Clean the area of any residual adhesive using the
supplied Scotch Brite(R) scuff pad. See Figure 10.