
Mountaineer AWD V6-4.0L VIN K Flex Fuel (2003)
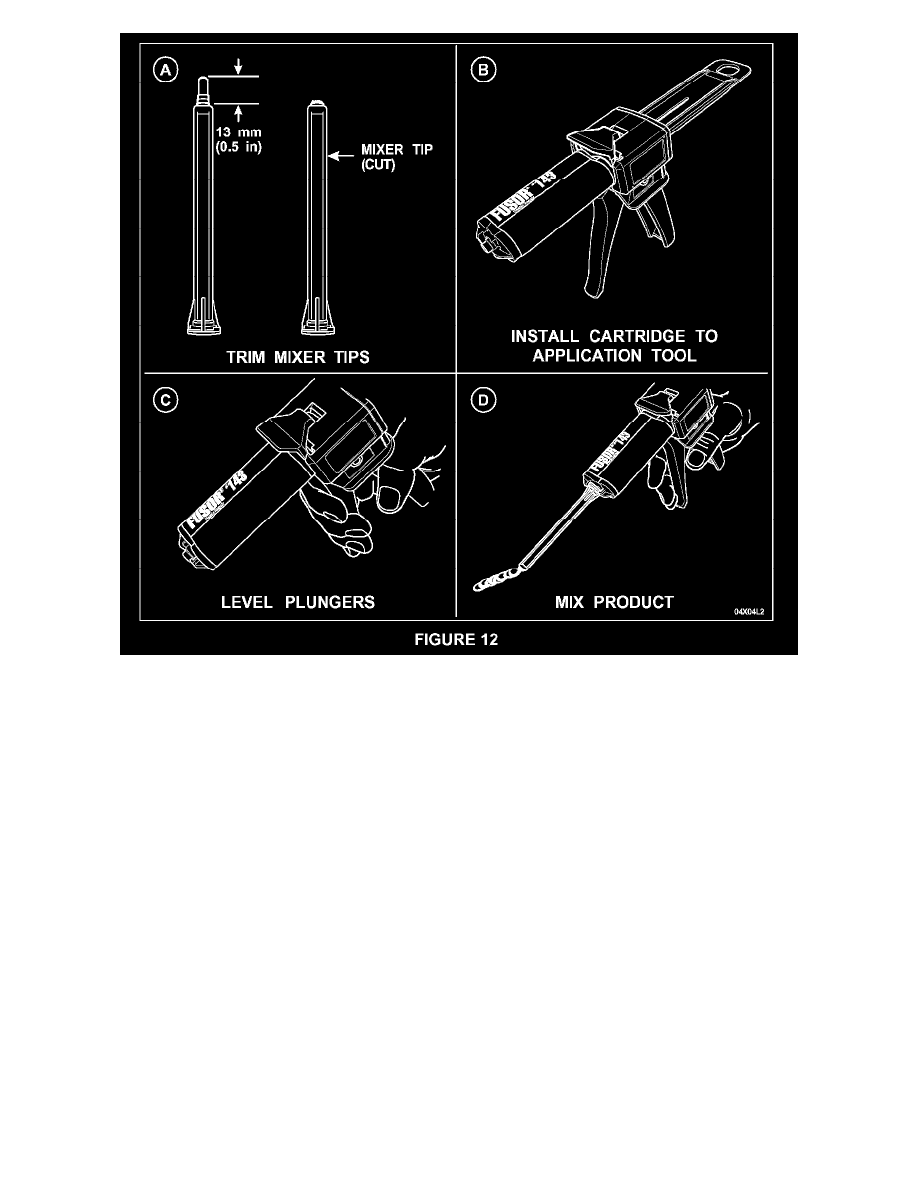
A)
Trim approximately 13 mm (0.5 in) off the top of both mixer tips, down to the last ring. See Figure 12.
B)
Install the Fusor(R) # 143 adhesive cartridge into the application tool (No. 501-040).
C)
Dispense a small amount of adhesive from the cartridge onto a piece of scrap cardboard to level the plungers and to ensure an even flow of
both components.
D)
Install one (1) mixer tip onto the cartridge and dispense a 75-mm (3-in) bead of the adhesive onto a piece of scrap cardboard (until the
product is evenly mixed and the color is consistent).
NOTE:
Due to the working times involved and the necessity of changing mixing tips on the application tool, these instructions are written to perform
installation of the left-side bracket first, then the right-side bracket. Please review these instructions and understand the process before
proceeding with adhesive application and bracket installation.
10.
CAUTION: The adhesive used to install the liftgate glass ball stud brackets will require at least two (2) hours to cure at 21° C (70° F) or higher. If
the vehicle must be moved to a much colder environment before two hours has elapsed, cure time will increase substantially before the liftgate
glass struts can be reattached. The following guidelines must be followed in order to ensure properly cured adhesive:
^
Two (2) hour cure time at 21° C (70° F) (Preferred)
^
Three (3) hour cure time at 10° C (50° F)
^
Seven (7) hour cure time at 0° C (32° F)
^
Below 0°C (32° F), call the Special Service Support Center to review the particular circumstances and obtain further direction.
NOTE: