
Mountaineer AWD V6-4.0L VIN K Flex Fuel (2003)
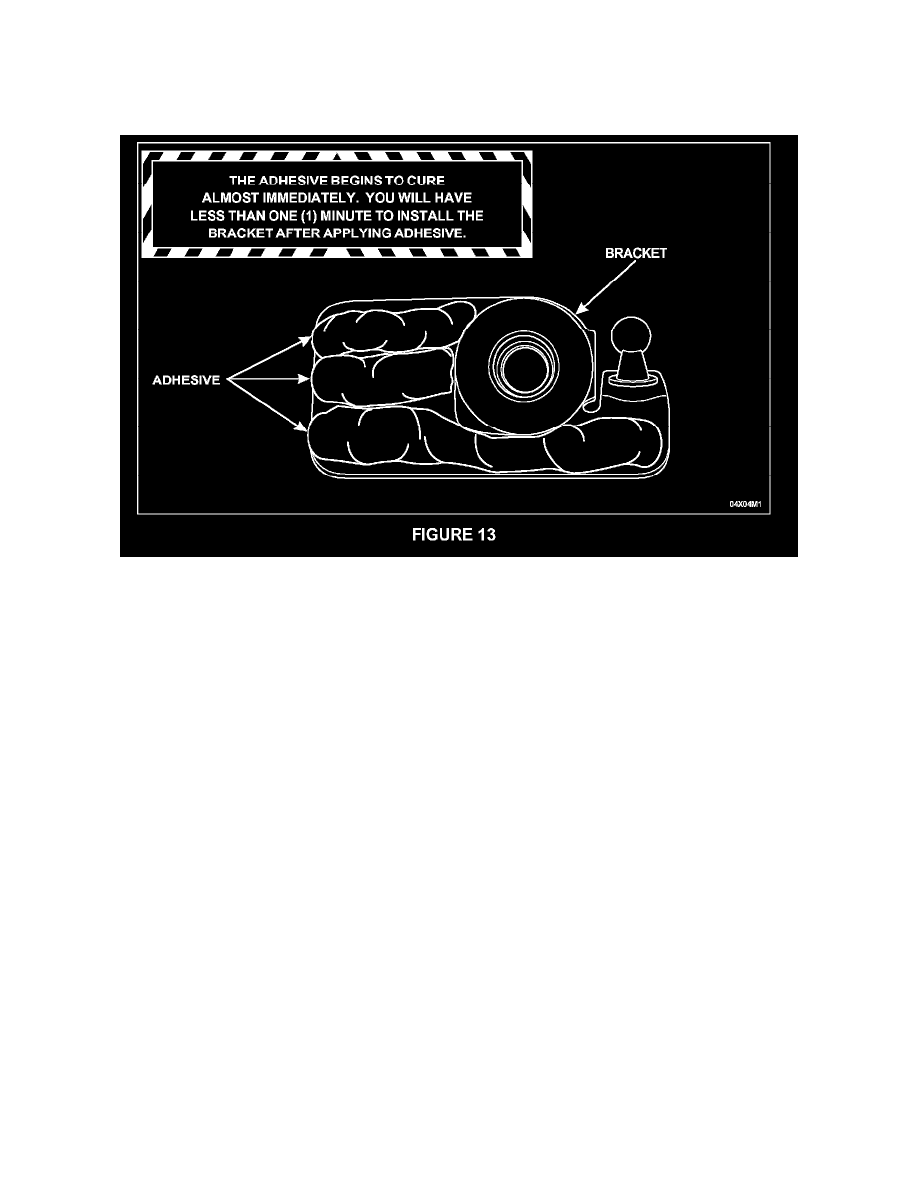
Once the adhesive mixes. you will have less than one (1) minute to install the new bracket before the adhesive begins to set. The adhesive will
require at least two (2) hours at 70°F or higher to cure before the liftgate glass support struts can be attached.
NOTE:
Keep the used mixer tip attached to the cartridge after use.
After the primer has dried for fifteen (15) minutes, apply three (3) large beads (9-10 mm in diameter) of adhesive to the backside of the new
left-side bracket. See Figure 13.
11.
NOTE: Left side bolts and brackets have left-hand threads.
NOTE:
Once the bracket is in position, DO NOT lift it from the glass. You may twist or turn the bracket slightly, but it must remain in contact with the
glass to prevent the formation of air bubbles in the adhesive.
With the correct left-hand thread beauty bolt and plastic washer ready in one hand, position the new left-side bracket onto the glass and align it
with the beauty bolt hole and parallel with the edge of the glass. Install the beauty bolt and snug it down hand tight.
CAUTION:
While tightening the bolt, some adhesive will be squeezed out from under the bracket.
DO NOT WIPE AWAY THE EXCESS ADHESIVE.
CAUTION:
When working with glass, the torque specifications are very critical. Be sure the torque wrench used during this service has recently been calibrated
so the fasteners are not over-tightened or under-tightened. Failure to use a calibrated torque wrench may result in glass shattering either during the
repair or possibly after the repair is completed.