
Mountaineer AWD V6-4.0L VIN K Flex Fuel (2003)
13. Position the RH C-pillar trim panel.
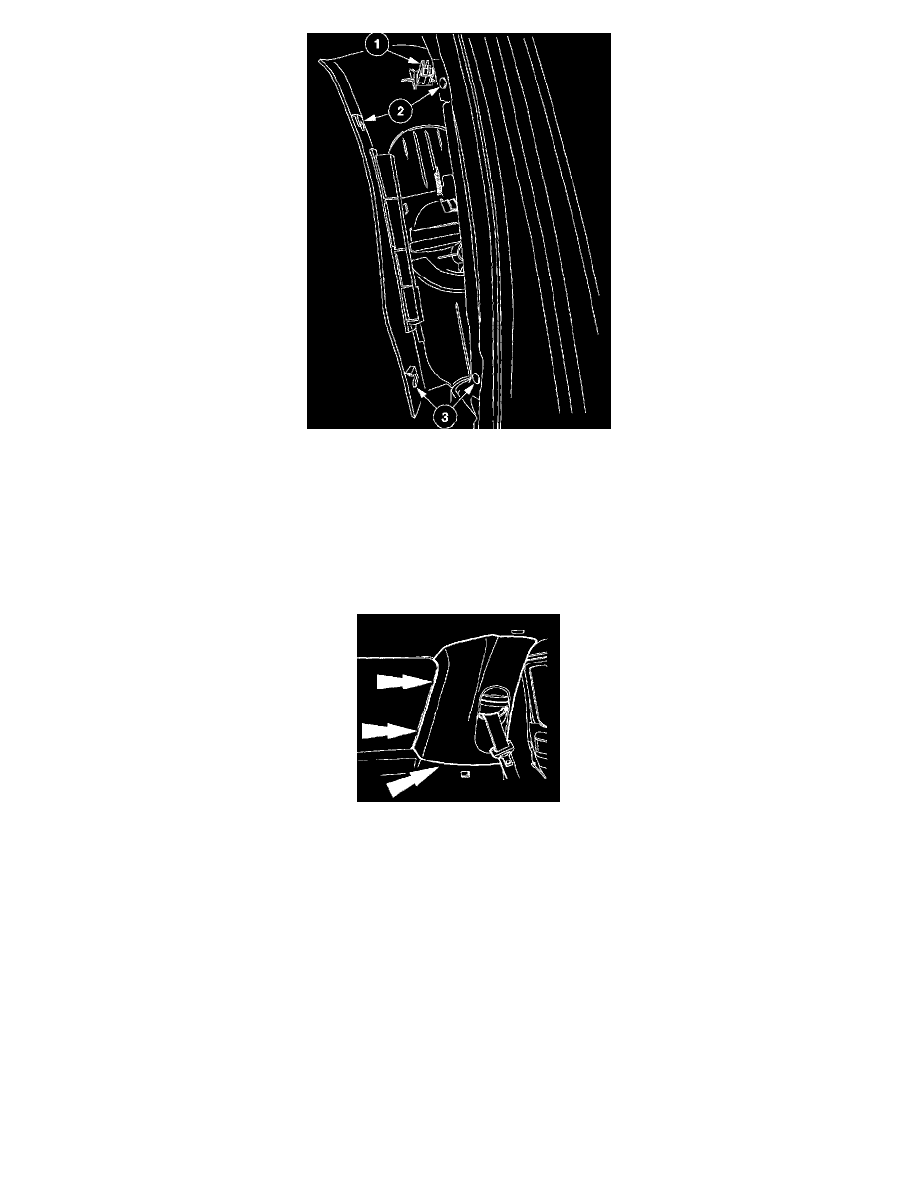
1
With the book aligned to the sheet metal, position the top of the C-pillar trim panel to the sheet metal.
-
Make sure the safety belt shoulder height adjuster and the C-pillar trim panel sliding insert are at their most upward position of travel to aid
installation.
2
Align and slide down, engaging the front upper trim panel retainer.
-
The C-pillar trim panel sliding insert circular recess must align to the safety belt guide bolt.
3
Align and push in, engaging the front lower trim panel retainer.
14. Push in, seating the retainers.
-
After the C-pillar trim panel is reinstalled, make sure the safety belt shoulder height adjuster button activation and the vertical movement of the
trim panel sliding insert is smooth.
Vehicles with power seats
15. Connect the battery ground cable.
All vehicles
16. Position the front seats rearward.
Vehicles with power seats
17. WARNING: To avoid accidental deployment and possible personal injury, the backup power supply must be depleted before repairing
or replacing any front or side air bag supplemental restraint system (SRS) components and before servicing, replacing, adjusting or
striking components near the front or side air bag sensors, such as doors, instrument panel, console, door latches, strikers, seats and hood
latches.