
Mountaineer AWD V8-4.6L (2010)
Communications Control Module: Removal and Replacement
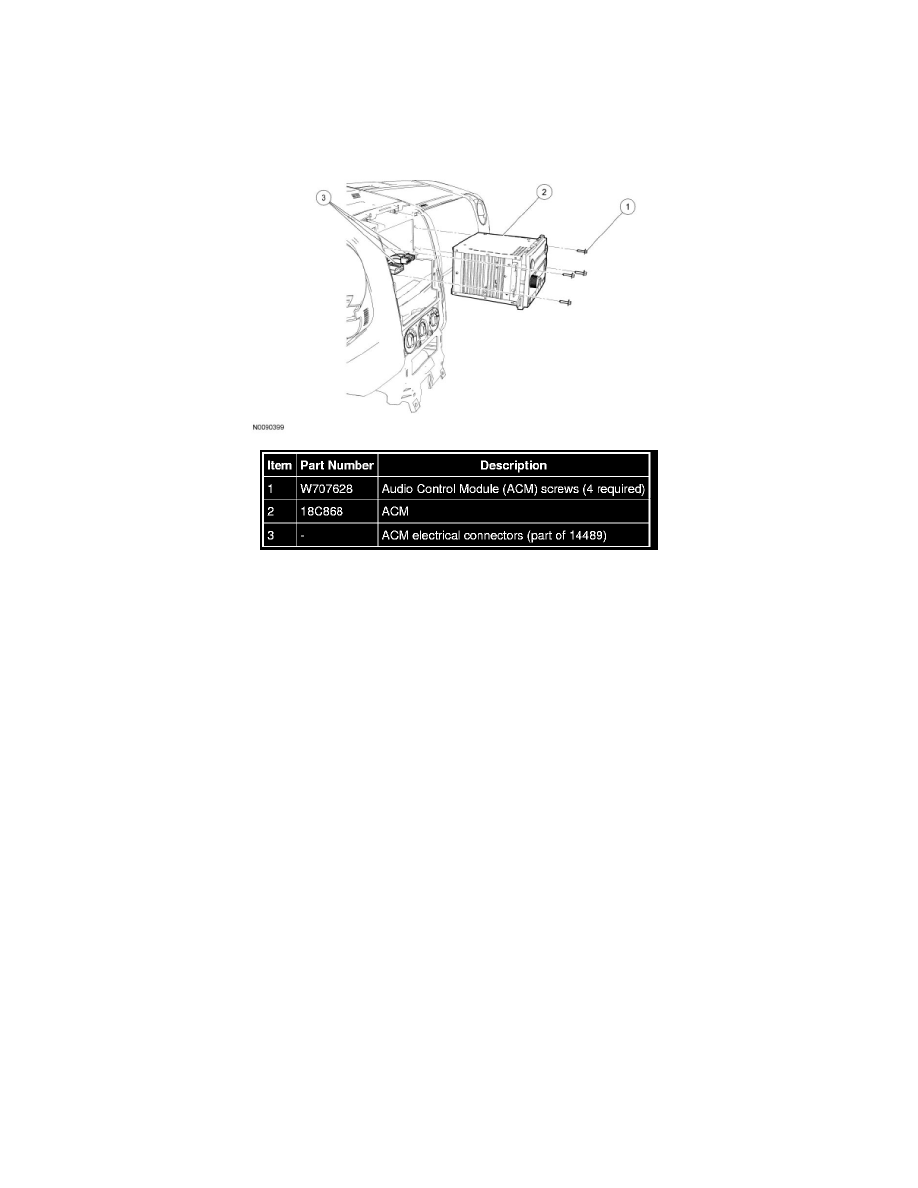
Audio Control Module (ACM)
Audio Control Module (ACM)
Removal and Installation
NOTE: It is not necessary to remove the Audio Control Module (ACM) to retrieve the part number. For additional information, refer to Audio Control
Module (ACM) Self-Diagnostic Mode See: Procedures/Audio Control Module (ACM) Self-Diagnostic Mode.
1. NOTE: Module configuration is required when a new ACM is being installed.
Upload the ACM configuration information to the scan tool. For additional information, refer to Programmable Module Installation (PMI) in
Information Bus. See: Powertrain Management/Computers and Control Systems/Information Bus/Testing and Inspection/Programming and
Relearning/Programmable Module Installation (PMI)
2. Remove the instrument panel center finish panel. For additional information, refer to Instrument Cluster / Carrier &/or Interior Moulding / Trim.
3. Remove the 4 screws and the ACM.
-
Disconnect the ACM electrical connectors.
4. To install, reverse the removal procedure.
-
Download the configuration information to the ACM. For additional information, refer to PMI in Information Bus. See: Powertrain
Management/Computers and Control Systems/Information Bus/Testing and Inspection/Programming and Relearning/Programmable Module
Installation (PMI)
Accessory Protocol Interface Module (APIM)
Accessory Protocol Interface Module (APIM)
Floor Console Components