
Mountaineer AWD V8-4.6L (2010)
backrest frame crossmember.
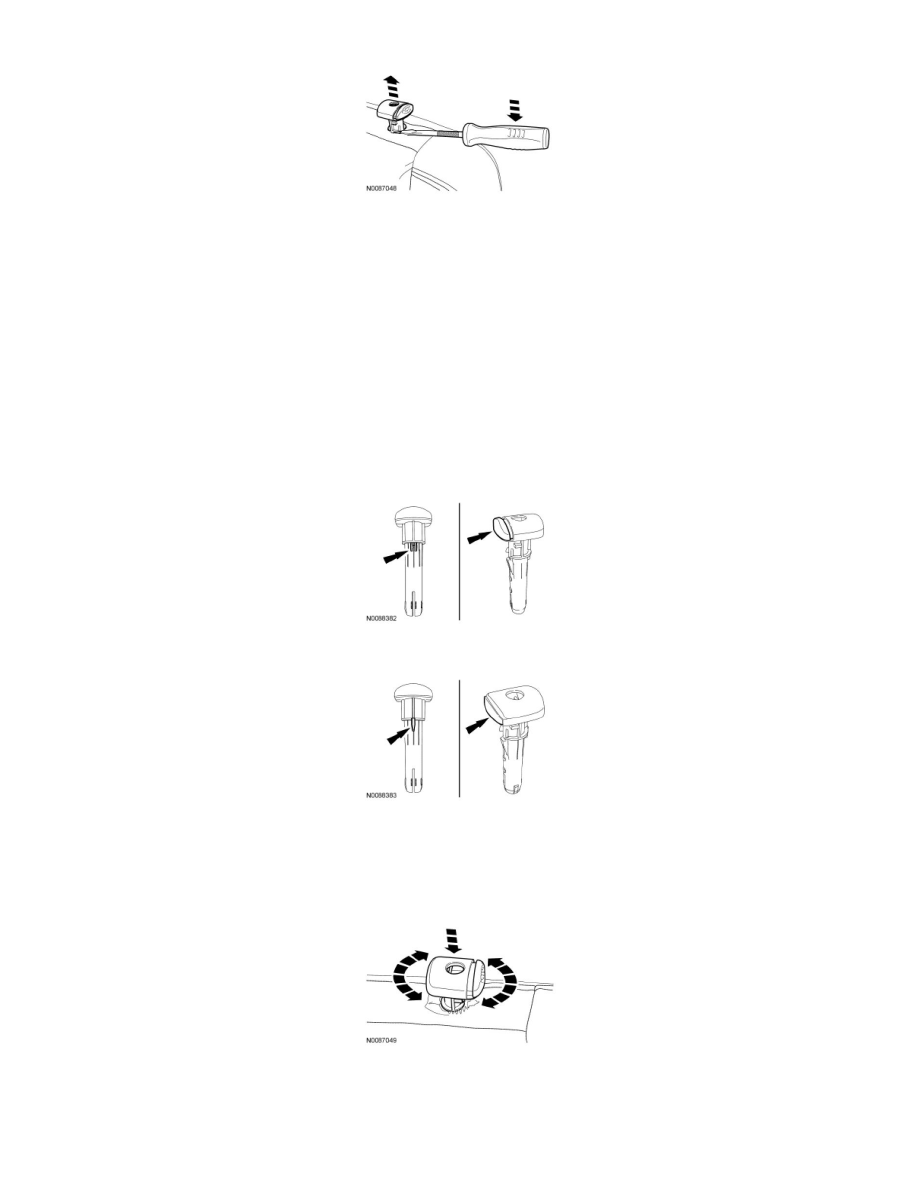
8. Remove the head restraint guide sleeve.
-
Discard the head restraint guide sleeve.
9. Repeat these steps for the head restraint guide sleeve on the opposite side.
Installation
NOTICE: Always install new head restraint guide sleeves. Difficult adjustment of the head restraint may occur. Failure to follow these
instructions may result in component failure.
NOTICE: The head restraint guide sleeves are not interchangeable. Failure to install the correct head restraint guide sleeve at the correct
position may result in component failure.
1. Make sure the holes in the backrest foam pad and backrest trim cover are aligned to the holes in the backrest frame.
2. Install the head restraint guide sleeve with the large button and wide key on the LH side of the seat.
3. Install the head restraint guide sleeve with the small button and thin key on the RH side of the seat.
4. NOTICE: Do not attempt to seat the head restraint guide sleeve by hand. This may result in excessive head restraint adjustment efforts
and permanent damage to the head restraint guide sleeve.
To allow the head restraint guide sleeve to slide freely through the backrest foam pad and backrest trim cover, twist the head restraint guide sleeve
while pushing it into the backrest frame hole as far as it will go with hand pressure.
5. NOTICE: Striking effort should not result in any type of damage or distortion to the head restraint guide sleeve. If a head restraint guide
sleeve is damaged, install a new one.
Using a non-marring mallet, strike the top of the head restraint guide sleeve with moderate force, seating it in the backrest frame.