
Mountaineer AWD V8-4.6L (2010)
Removal and Installation
1. With the vehicle in NEUTRAL, position it on a hoist. For additional information, refer to Vehicle Jacking and Lifting.
2. Drain the engine coolant. For additional information, refer to Cooling System &/or Engine Block Heater.
3. Release the 2 heater hose clamps and disconnect the heater hoses.
4. Remove the rear quarter trim panel.
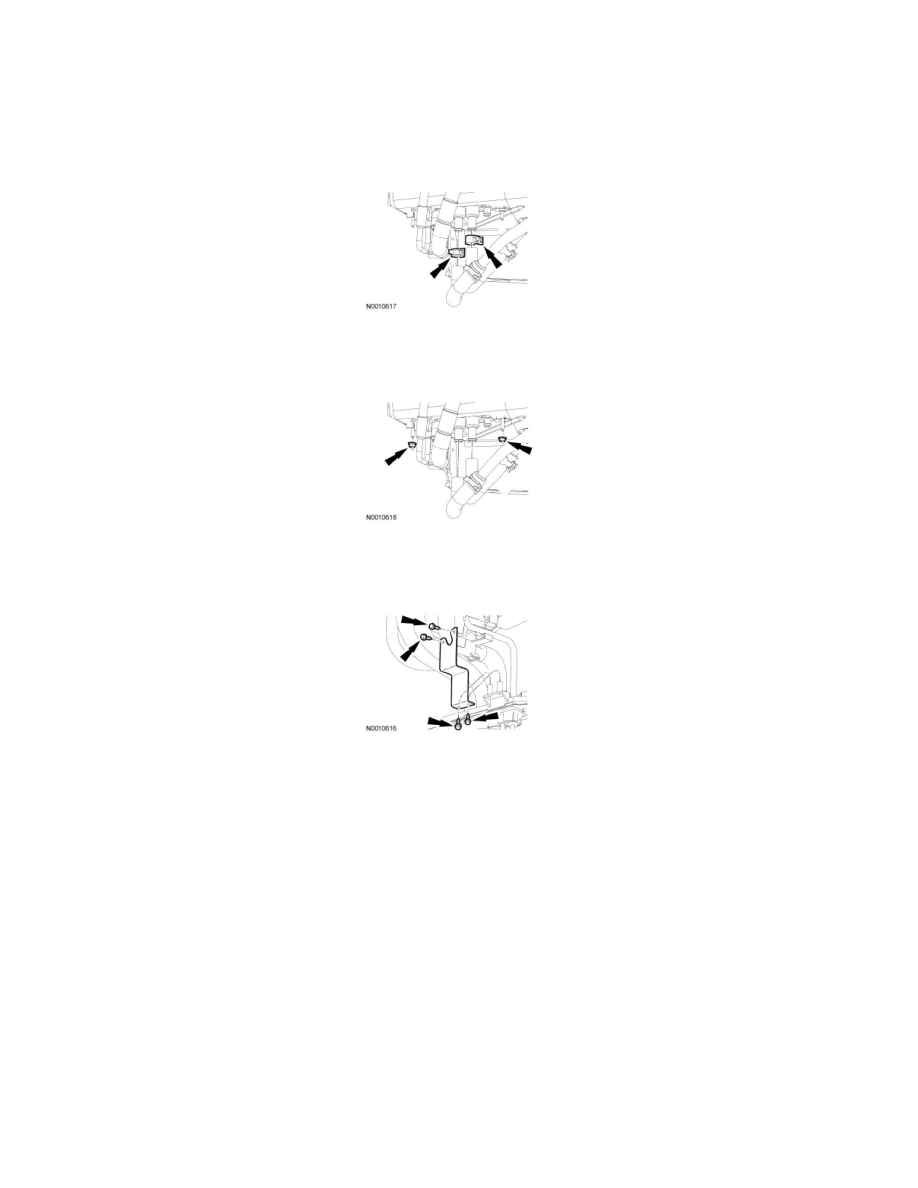
5. Remove the 2 auxiliary line floorpan bracket nuts.
6. NOTE: The screw and line bracket are located inside the vehicle above the floorpan line bracket.
Remove the 4 line bracket screws and the line bracket.
7. Disconnect the auxiliary harness electrical connector.
8. Remove the 2 auxiliary heater core and evaporator core housing bolts and auxiliary heater core and evaporator core housing nut.
-
To install, tighten to 6 Nm (53 lb-in).
9. Disconnect the 2 auxiliary actuator electrical connectors.
10. Remove the 3 auxiliary mode door actuator screws.
11. Remove the auxiliary mode door actuator.
12. Remove the 3 auxiliary temperature blend door actuator screws.
13. Remove the auxiliary temperature blend door actuator.
14. Remove the 4 heater core cover screws.
15. Remove the heater core cover.
16. Disconnect the 2 heater core hose clamps.
17. Remove the auxiliary heater core.