
Mountaineer AWD V8-4.6L (2010)
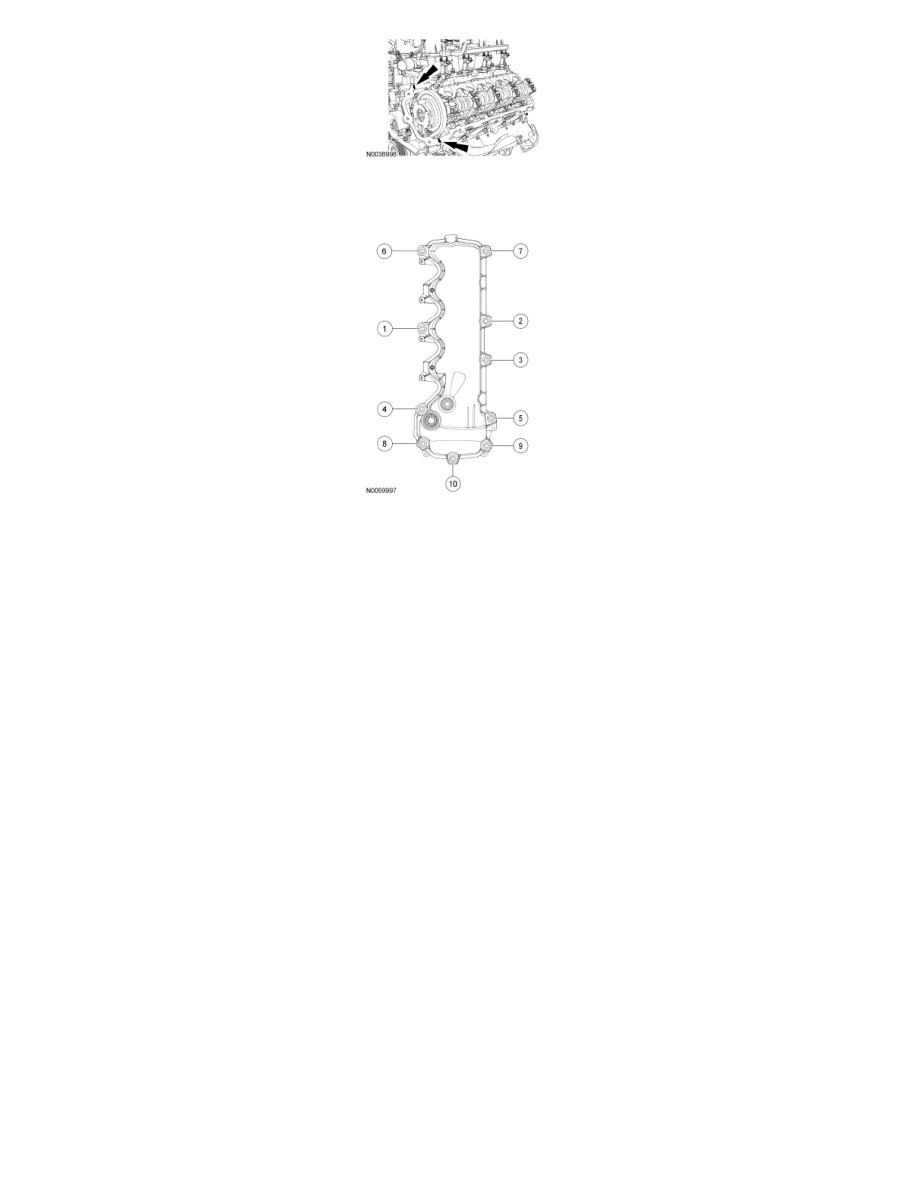
4. Position the 10 LH valve cover with a new gasket and tighten the 10 bolts in the sequence shown.
-
Tighten to 10 Nm (89 lb-in).
5. Connect the EVAP canister-to-EVAP canister purge valve EVAP hose to the EVAP canister purge valve.
6. Connect the EVAP canister purge valve electrical connector.
7. Attach the wiring harness retainers to the valve cover studs.
8. Connect the VCT solenoid electrical connector.
9. Connect the 2 pin-type retainers to the valve cover.
10. Position the cooling fan wiring harness bracket and install the nut.
-
Tighten to 25 Nm (18 lb-ft).
11. Connect the PCV hose to the valve cover.
12. Connect the EVAP tube to the intake manifold.
13. Position the oil level indicator tube and install the bolt.
-
Tighten to 10 Nm (89 lb-in).
14. Install the LH ignition coils. For additional information, refer to Ignition System.