Mountaineer AWD V8-4.6L (2010)

Installation
1. NOTICE: Do not use metal scrapers, wire brushes, power abrasive discs or other abrasive means to clean the sealing surfaces. These tools
cause scratches and gouges which make leak paths. Use a plastic scraping tool to remove all traces of old sealant.
Clean the mating surfaces with silicone gasket remover, metal surface prep and a plastic scraping tool. Follow the directions on the packaging.
2. NOTICE: Do not use metal scrapers, wire brushes, power abrasive discs or other abrasive means to clean the sealing surfaces. These tools
cause scratches and gouges which make leak paths. Use a plastic scraping tool to remove all traces of old sealant.
NOTE: If the engine front cover is not secured within 4 minutes, the sealant must be removed and the sealing area cleaned. To clean the sealing
area, use silicone gasket remover and metal surface prep. Follow the directions on the packaging. Failure to follow this procedure can cause future
oil leakage.
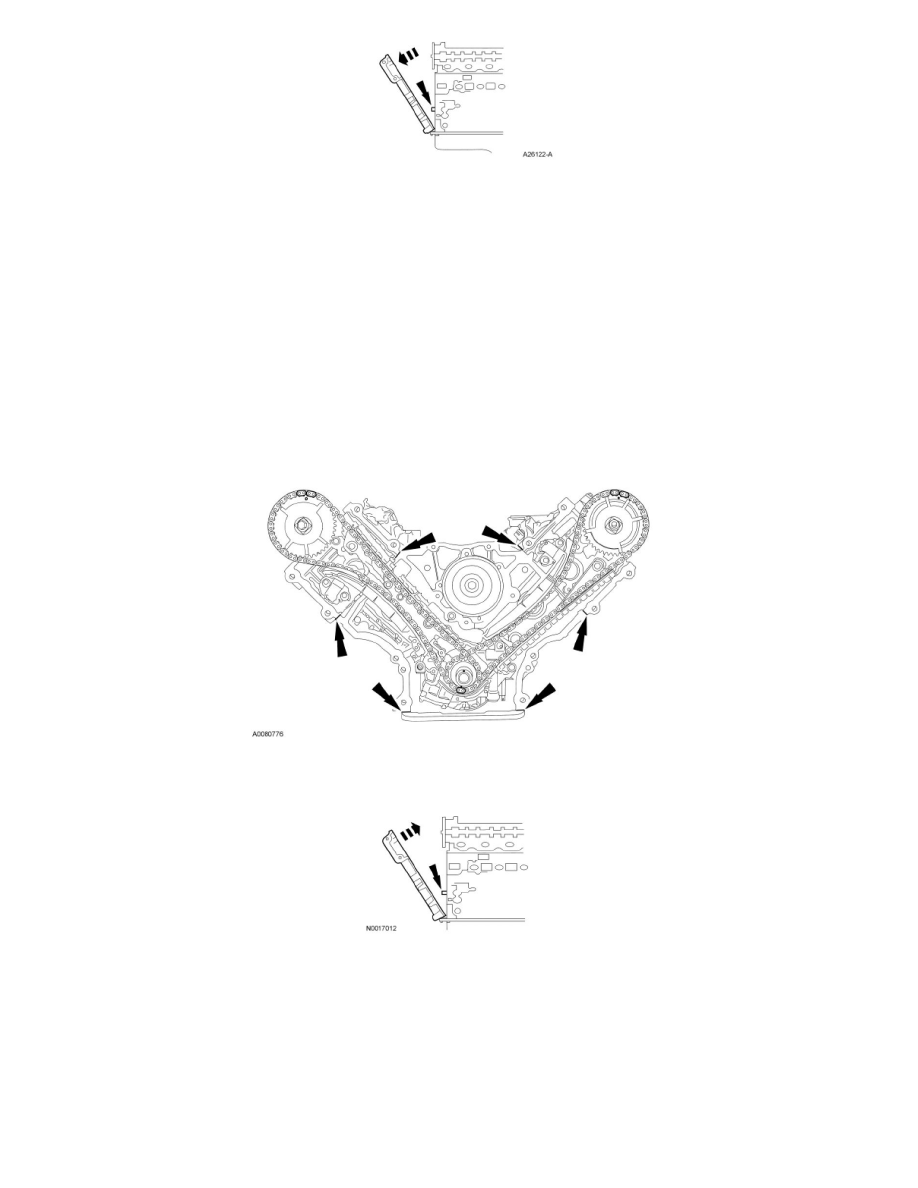
Apply a bead of silicone gasket and sealant along the cylinder head-to-cylinder block mating surface and the oil pan-to-cylinder block mating
surface at the locations shown.
3. Install new engine front cover gaskets on the engine front cover. Position the engine front cover onto the dowels. Install the 15 fasteners
finger-tight.
4. Tighten the 15 engine front cover fasteners in the sequence shown to 25 Nm (18 lb-ft).
