
Mountaineer AWD V8-4.6L (2010)
3. NOTE: The new CV flange bolts and washers are not available and the originals are not damaged, they can be reused if the threads are coated
with threadlock and sealer.
NOTE: If new U-joint strap bolts are not available and the original bolts are not damaged, they can be reused if the threads are coated with
threadlock and sealer.
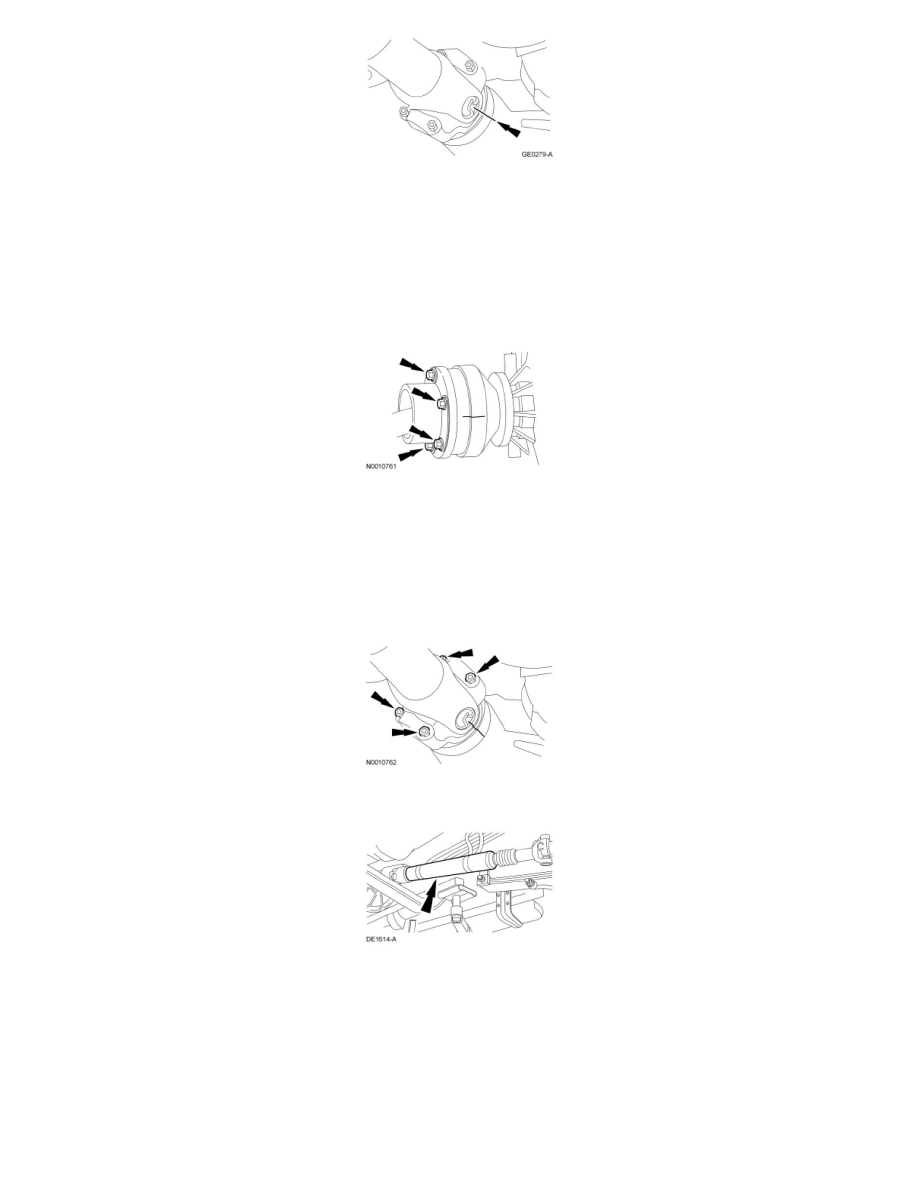
Remove and discard the 6 CV flange bolts and 3 CV joint washers.
-
To install, tighten the new bolts to 30 Nm (22 lb-ft).
4. NOTE: If new U-joint strap bolts are not available and the original bolts are not damaged, they can be reused if the threads are coated with
threadlock and sealer.
Remove the 4 U-joint strap bolts and remove the 2 U-joint straps.
-
Discard the bolts.
-
To install, tighten the new bolts to 19 Nm (168 lb-in).
5. Remove the front driveshaft.
6. NOTICE: Tighten the Constant Velocity (CV) joint bolts evenly in a cross pattern or damage will occur to the CV joint.
NOTE: The can (domed CV joint housing cover) is pressed into the CV joint housing at the factory. When housed correctly, the can will appear
as shown in the cut-away illustration (top box). Do not reseat the can in the CV joint housing if the can's flange is above the CV joint housing as
shown in the cut-away illustration (bottom box), install a new driveshaft.
NOTE: The CV joint is not serviceable. Install a new driveshaft if damaged.
To install, reverse the removal procedure.