
Mountaineer AWD V8-4.6L SOHC VIN W (2002)
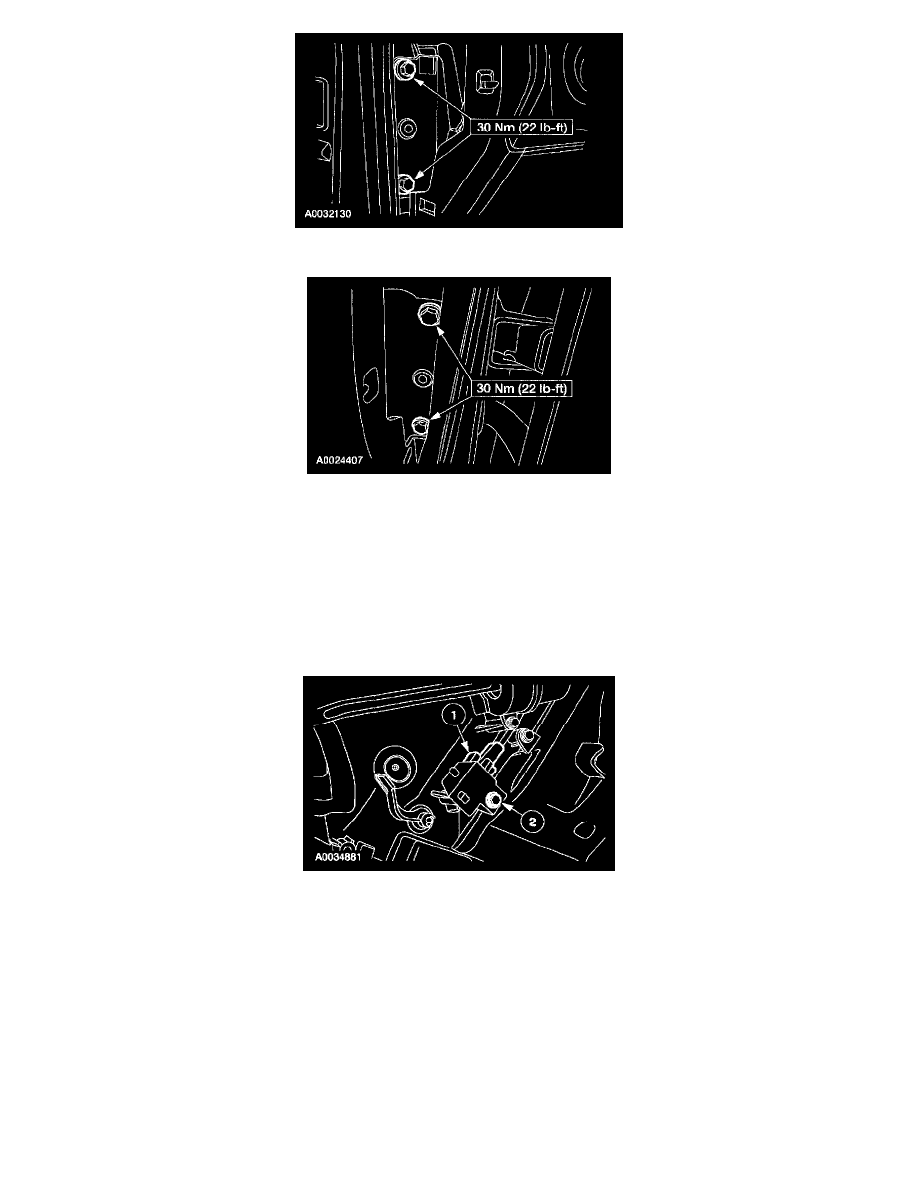
13. Loosen half way the LH instrument panel side support bolts.
14. Correctly support the instrument panel and remove the RH instrument panel support bolts to allow the instrument panel to be pulled away from the
dash panel.
CAUTION:
-
Be sure the instrument panel is properly supported to avoid possible damage to the instrument panel wiring and components.
-
To avoid damage to the instrument panel wiring or components, do not use excessive force when moving the instrument panel away from the
dash panel.
NOTE: The instrument panel may be supported by installing threaded rods or equivalent, with the same diameter and thread pitch, in place of the
instrument panel support bolts.
15. Remove the heater control valve vacuum switch.
1
Disconnect the vacuum connector.
2
Remove the screw.
-
Remove the heater control valve vacuum switch.
INSTALLATION
1. To install, reverse the removal procedure.
2. Reactivate the supplemental restraints system (SRS).