
Mountaineer AWD V8-4.6L SOHC VIN W (2002)
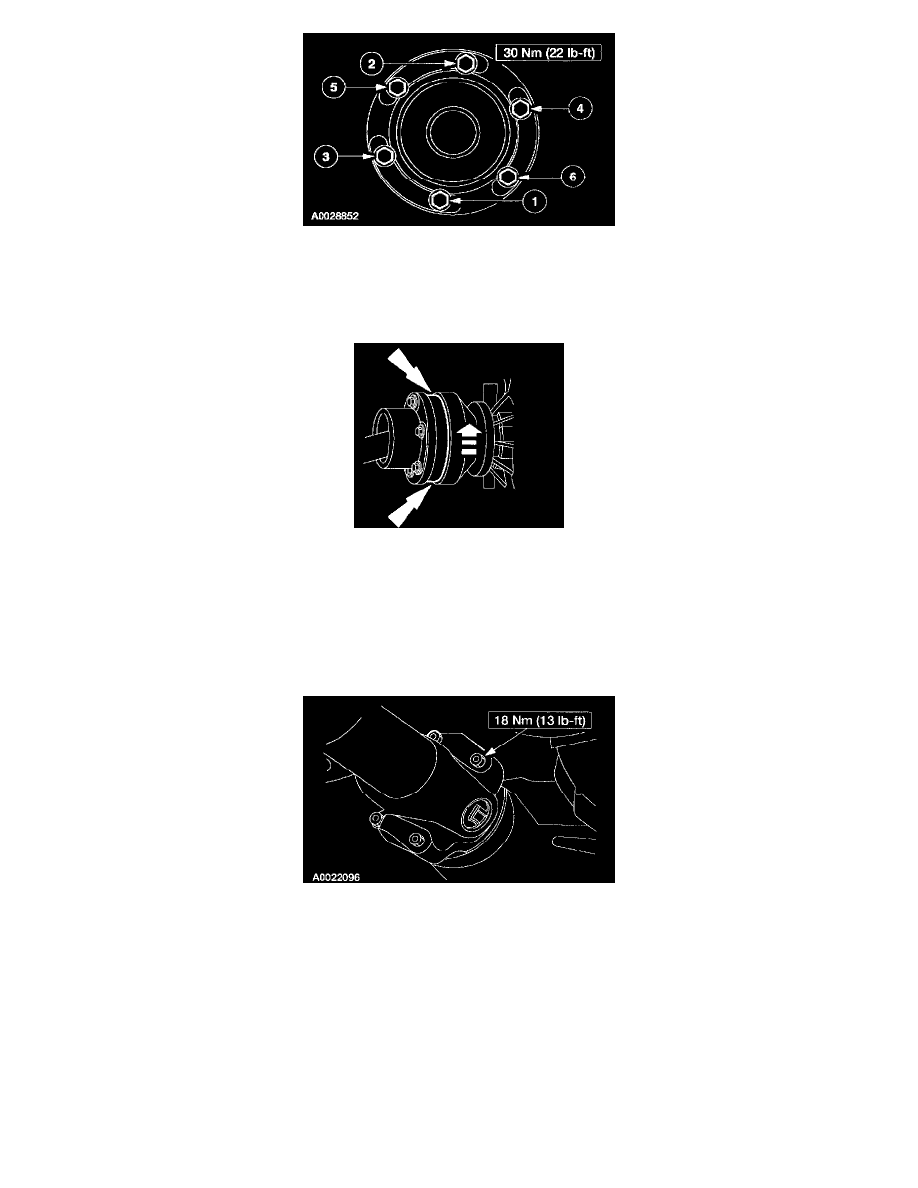
3. CAUTION: Tighten the bolts evenly in a cross pattern or damage will occur to the CV joint.
NOTE: Install new washers and bolts. If new bolts are not available, coat the threads of the original bolts with threadlock and sealer.
Install the new washers and bolts. Tighten the bolts evenly in a cross pattern as shown.
4. Verify that the CV joint has seated squarely in the transfer case flange.
^
Check that the space between the end of the CV joint cap and the end of the transfer case flange is equal from the top to the bottom of the two
components.
^
Rotate the driveshaft 1/4 turn.
^
Check that the space between the end of the CV joint cap and the end of the transfer case flange is equal from the top of the bottom of the two
components.
^
Repeat this procedure several times.
^
If the space is not equal at any point in the attachment, remove and reinstall the driveshaft.
5. NOTE: Install new universal joint retainers and bolts. If new bolts are not available, coat the threads of the original bolts with threadlock and
sealer.
Install the new universal joint retainer and bolts.