Mountaineer RWD V6-4.0L (2008)

-
Always tighten the fasteners of the restraints control module (RCM) and impact sensor (if equipped) to the specified torque. Failure to do so
may result in incorrect restraint system operation, which increases the risk of personal injury or death in a crash.
CAUTION: When installing a new RCM, it is necessary to carry out programmable module installation (PMI). System failure may occur if
PMI is not performed.
NOTE:
-
When installing a new restraints control module (RCM), always make sure the correct RCM is being installed. If an incorrect RCM is installed,
erroneous DTCs will result.
-
The air bag warning indicator illuminates when the RCM fuse is removed and the ignition switch is ON. This is normal operation and does not
indicate a supplemental restraint system (SRS) fault.
-
The SRS must be fully operational and free of faults before releasing the vehicle to the customer.
-
Repair is made by installing a new part only. If the new part does not correct the condition, install the original part and carry out the diagnostic
procedure again.
1. Carry out the steps necessary to prepare for programmable module installation (PMI).
2. Depower the SRS.
3. Remove the front floor console.
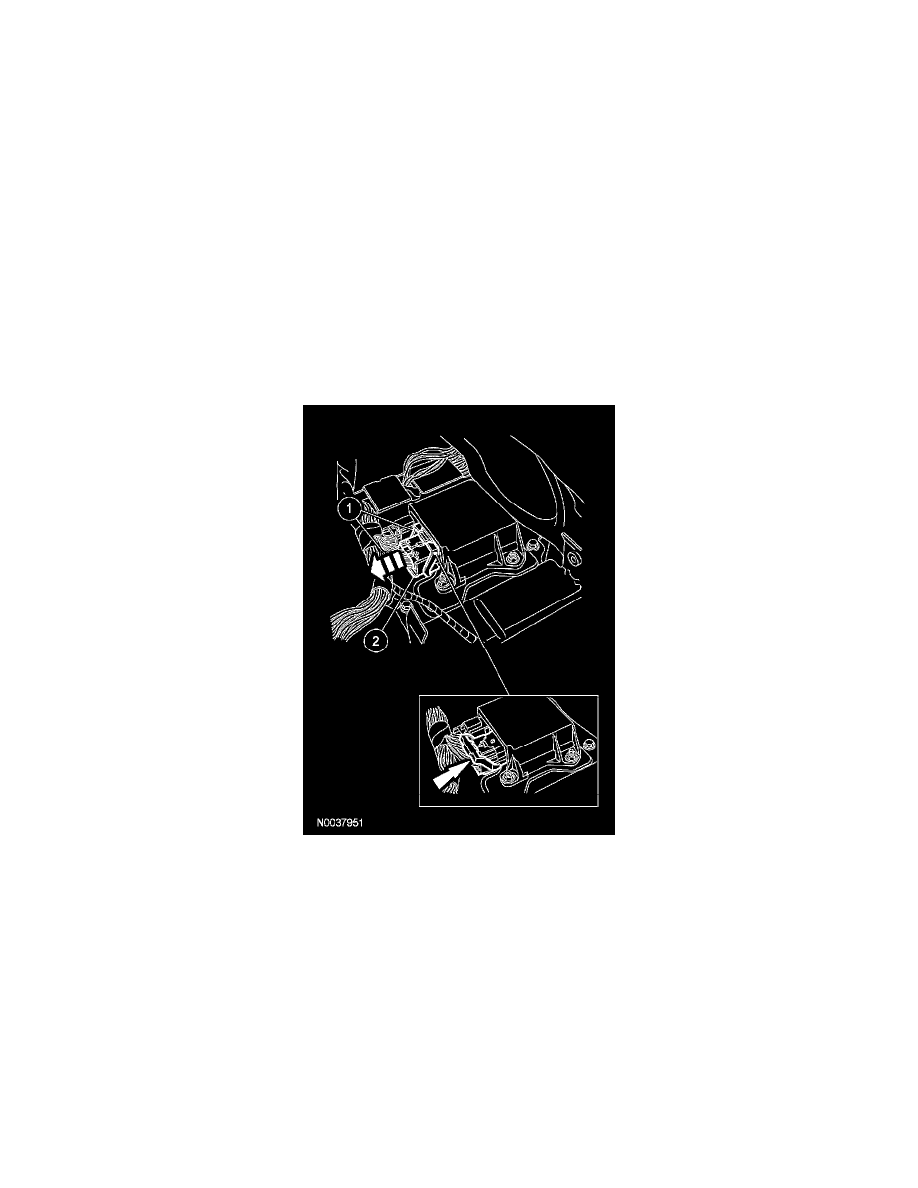
4. Disconnect the large RCM electrical connector.
1
Pinch the thumb tab and pivot the large RCM electrical connector position assurance lever all the way back until it stops.
2
Pull out and disconnect the large RCM electrical connector.
5. Press to release the locking tab and disconnect the small RCM electrical connector.
6. Remove the 3 RCM nuts.
7. Remove the RCM.
Installation
1. Install the RCM.
2. Install the 3 RCM nuts.
-
Tighten to 12 Nm (9 lb-ft).
3. Connect the small RCM electrical connector.
4. NOTE: The RCM has been removed for clarity.
On the large RCM electrical connector, place the connector position assurance lever in the full release position.
