
Mystique L4-122 2.0L DOHC VIN 3 SFI (1995)
Constant Velocity Joint Boot: Service and Repair
Inboard
REMOVAL
1. Remove both clamps from inner joint boot.
2. Pull inner joint outer housing out of boot and off tripot assembly.
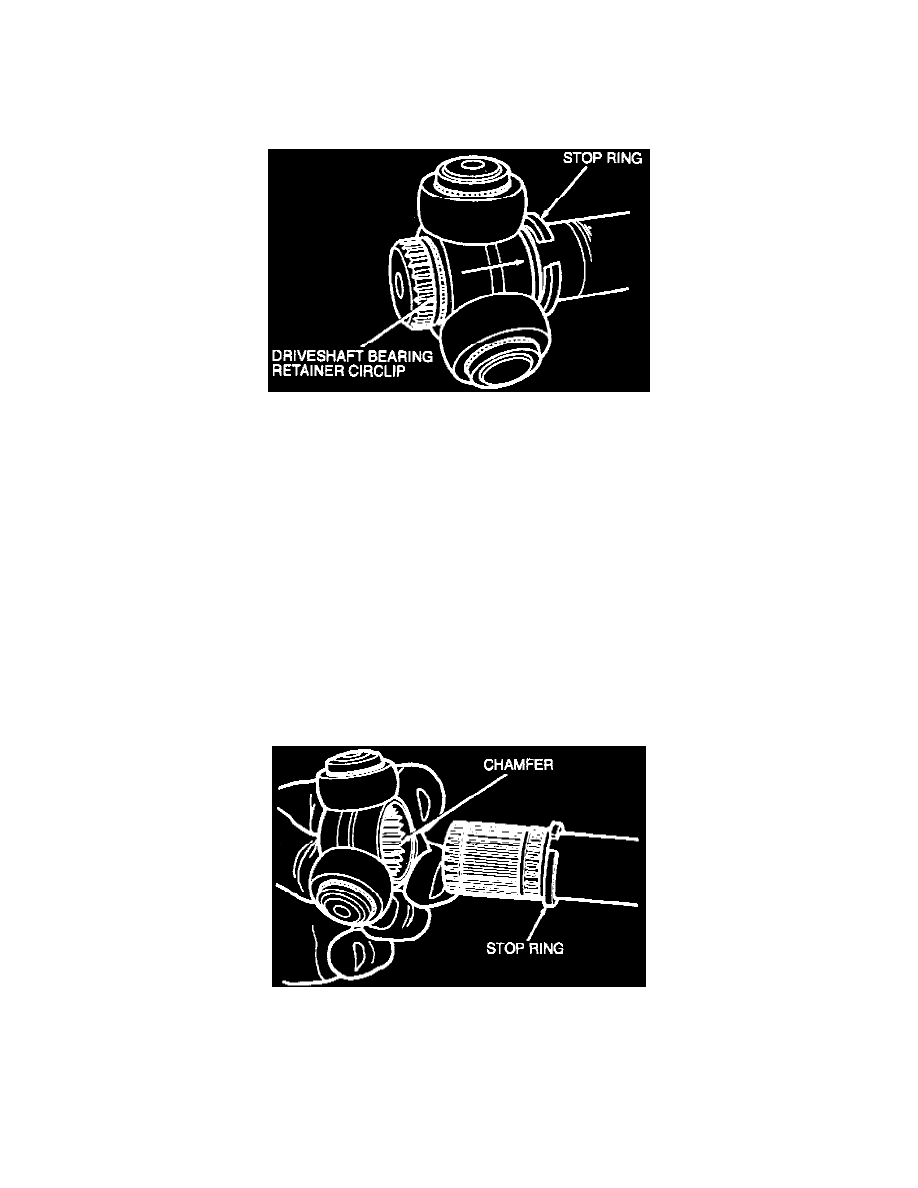
Removing Stop Ring
3. Use suitable snap ring pliers to remove stop ring from groove, then slide ring inward on shaft.
5. Slide tripot assembly inward on shaft splines to expose driveshaft bearing retainer circlip.
6. Remove and discard driveshaft bearing retainer circlip, then remove tripot assembly from shaft.
7. Remove stop ring, then inner joint boot from shaft.
INSPECTION
1. Clean and dry all components.
2. Inspect boot for cracks, splits and abrasion.
3. Inspect joint components for wear, cracks and broken parts.
4. Inspect shaft for worn splines and bending.
INSTALLATION
1. Place small boot clamp on shaft, then slide boot onto shaft and into position groove on shaft.
2. Place small clamp into position on boot, then using suitable boot clamp ring pliers, tighten clamp ring securely. Use caution not to overtighten
clamp ring and cut or deform boot.
3. Place stop ring onto shaft, slide stop ring past stop ring groove to allow room for installation of tripot assembly and driveshaft bearing retainer
circlip.
Installing Tripot
4. Slide tripot assembly onto shaft splines, ensure chamfered side of tripot assembly is toward stop ring.
5. Place a new driveshaft bearing retainer circlip onto shaft. Use caution not to stretch or deform circlip during installation.
6. Pull tripot assembly into position over driveshaft bearing retainer circlip. It may be necessary to compress driveshaft bearing retainer circlip to
allow tripot assembly to move into position.
7. Place stop ring into place using suitable snap ring pliers.