
Mystique L4-122 2.0L DOHC VIN 3 SFI (1995)
3.
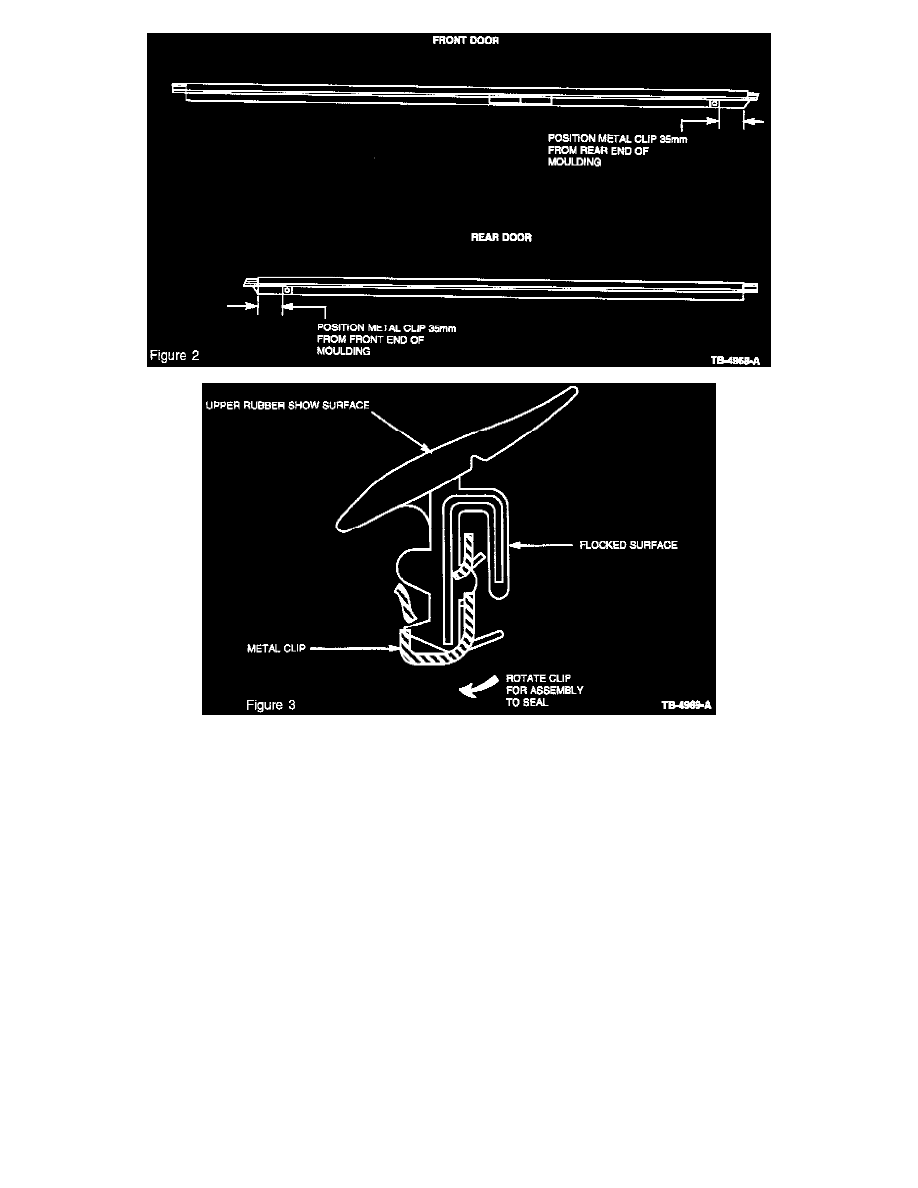
Position Secondary Metal Clip (F7RZ-5421S452-AA) 35 mm from the B-pillar end of the moulding (Figure 2). The clip should be installed with
the longer side behind the flocked flange surface. Rotate the clip into position over the rubber rib of the moulding (Figure 3).
4.
Raise the front door glass to the full up position.
5.
Carefully slide the weatherstrip under the mirror to the point where the rear end of the seal aligns with the B-pillar end of the door and glass run
lip. Starting at the A-pillar end, gently press the moulding into the door channel at 50 mm intervals. Press down firmly at the metal clip position to
fully seat the clip in the door metal channel. Use caution to avoid bending the moulding during installation.
REAR DOORS
1.
Lower the door glass to the full down position.
NOTE:
LIFTING THE BELT LINE MOULDING EXCLUSIVELY AT ONE END WILL BEND THE MOULDING. A BENT MOULDING REQUIRES
REPLACEMENT.
2.
Carefully remove the belt line moulding by gradually lifting it from the door metal channel. Lift gently at 50 mm intervals starting at the B-pillar
end to avoid bending the aluminum framework of the moulding (Figure 1).
3.
Position Secondary Metal Clip (F7RZ-5421S452-AA) 35 mm from the B-pillar end of the moulding (Figure 2). The clip should be installed with
the longer side behind the flocked flange surface. Rotate the clip into position over the rubber rib of the moulding (Figure 3).
4.
Install the moulding under the outer sail plate trim panel to the point where the forward end of the seal aligns with the B-pillar end of the door and