
Mystique V6-153 2.5L DOHC VIN L SFI (1999)
Brake Bleeding: Service and Repair
Manual Bleeding
CAUTION: Make sure that the vehicle is supported on a level surface.
CAUTION: If brake fluid is spilt on the paint work, the affected area must be immediately washed down with cold water.
NOTE: The system consists of separate circuits for each front and diagonally opposite rear wheel. Each front to rear circuit and each wheel circuit
can be bled individually of each other.
NOTE: If the ABS hydraulic unit needs to be purged, first bleed the system conventionally and then run the bleed option on the NGS diagnostic
menu following the instructions given.
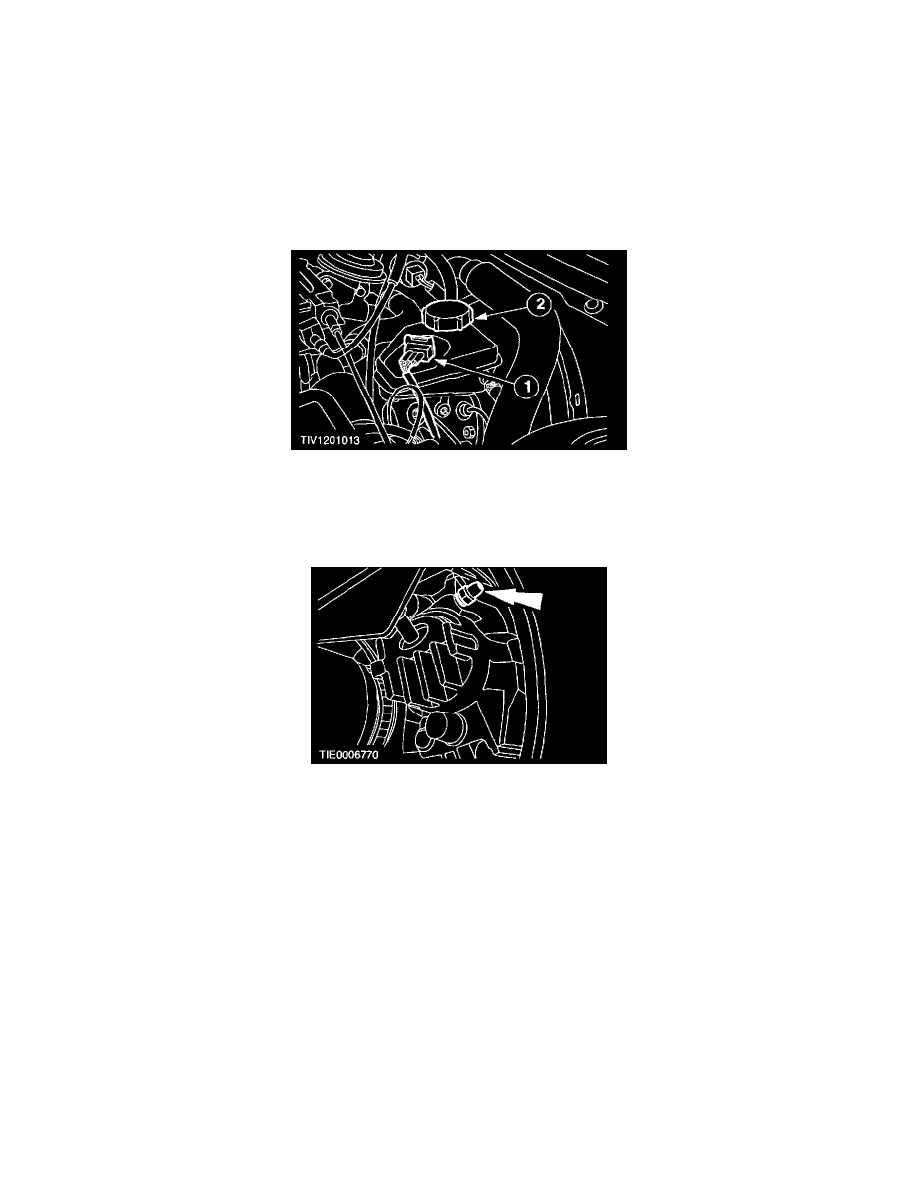
1. CAUTION: Make sure that the filler cap does not become contaminated.
Remove the reservoir filler cap.
1
Disconnect the low fluid level warning indicator switch electrical connector.
2
Remove the cap.
2. Fit a bleed tube to the front left-hand brake caliper bleed nipple.
3. NOTE: The master cylinder must remain filled with new, clean brake fluid at all times during bleeding.
Bleed the circuit.
-
Make sure the bleed tube is a firm fit.
-
Immerse the end of the tube in a bleed jar containing a small quantity of approved brake fluid.
-
Position the bleed jar base at leased 300 mm above the bleed nipple to maintain fluid pressure and prevent air leaking past the bleed nipple.
-
Unscrew the bleed nipple by one turn.
-
Depress the brake pedal fully (pumping brake fluid and air into the bleed jar) and allow the pedal to quickly return to the rest position.
-
Fill up the master cylinder.
-
Continue pumping the brake pedal until air-free fluid is being pumped into the jar.
-
With the pedal fully depressed tighten the bleed nipple.
4. Repeat the procedure for the rear right, front right and rear left-hand brake circuits.