
Sable V6-182 3.0L (1986)
1. Position suitable jack or hoist under vehicle, then raise just enough to contact body.
2. Working in trunk, loosen, but do not remove, the three strut-to-inner body attaching nuts.
3. Raise and support vehicle, then remove tire and wheel assembly from side being worked on.
4. Remove brake differential valve-to-control arm attaching bolt.
5. Using suitable wire suspend control arm to body to ensure proper support after strut removal.
6. Remove brake hose-to-shock strut bracket attaching clip and position hose aside.
7. If equipped with stabilizer bar, remove U-bracket from body, then the stabilizer bar attaching nut, washer and insulator. Separate stabilizer bar
from link.
8. Remove tension strut-to-spindle attaching nut, washer and insulator, then move spindle rearward enough to separate it from tension strut.
9. Remove strut-to-spindle pinch bolt, then using a pry bar or other suitable tool, separate pinch joint as necessary to allow for strut removal.
10. Remove strut from pinch joint, then lower vehicle as necessary to allow removal of bolts loosened in step 2. Remove strut from vehicle.
CAUTION: During strut removal, use care not to stretch the rear brake hose or kink the steel brake line.
11. Remove link attaching nut, washer and insulator, then the link from the strut.
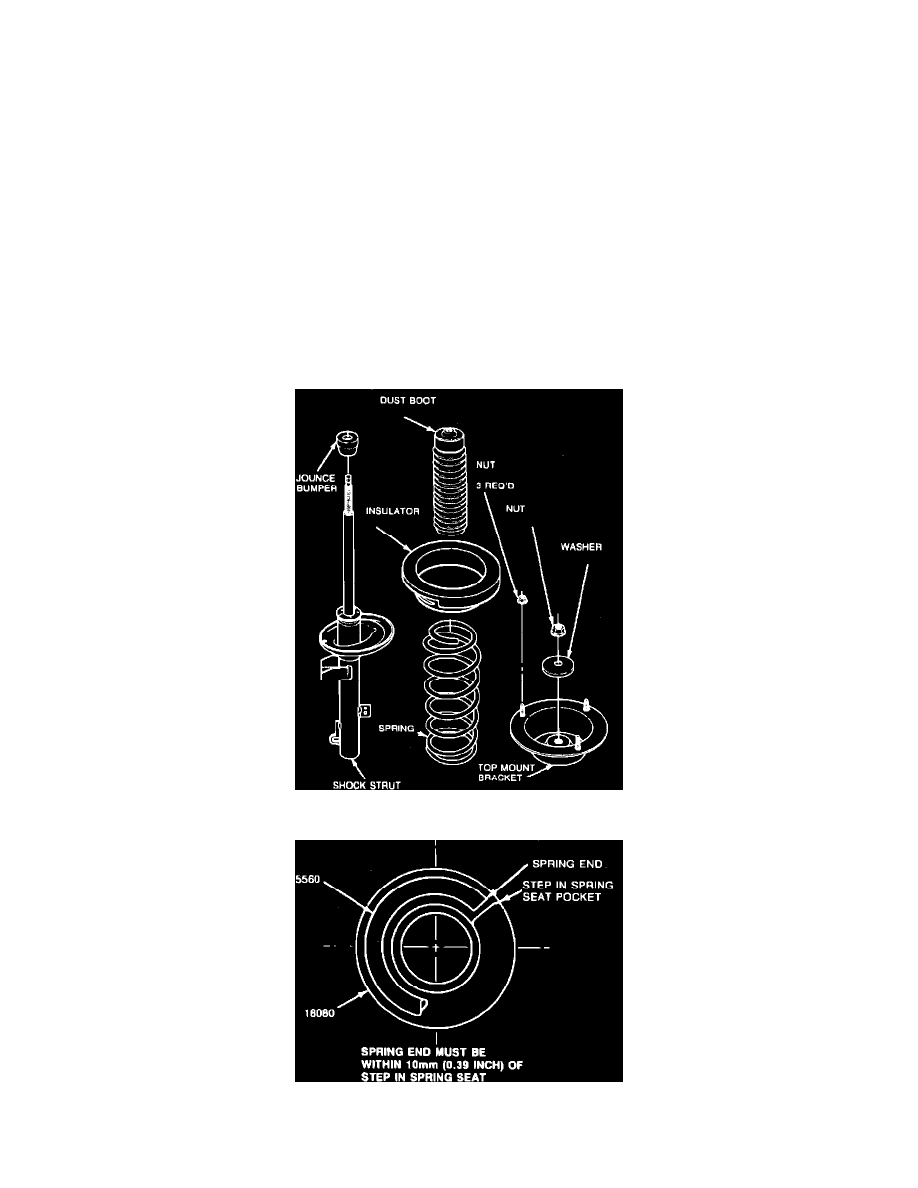
12. Mark location of insulator to top mount, then place strut, spring and upper mount assembly in suitable spring compressor and compress spring.
13. While restraining strut shaft from turning, remove strut upper shaft mounting nut.
CAUTION: If strut is to be reused, do not use vise grips or pliers to hold strut shaft as damage will result.
Fig. 3 MacPherson strut components. Sedan models
Fig. 4 Coil spring installation
14. Carefully loosen spring compressor tool, then remove top mount bracket assembly, spring insulator and spring, Fig. 3.