
Sable V6-183 3.0L VIN U FI (1998)
Rocker Arm Assembly: Service and Repair
REMOVAL
1. Remove upper intake manifold and valve covers.
2. Remove rocker arm seat retaining bolt of rocker arm to be replaced.
3. Remove rocker arms. If more than one rocker arm is to be removed, identify rocker arms' location.
NOTE: Rocker arms should be installed in their original location and position during reassembly.
INSTALLATION
1. Clean mating gasket surfaces of lower intake manifold and upper intake manifold. After scraping, carefully remove any gasket particles to prevent
them from entering lower intake manifold. Use Metal Surface Cleaner F4AZ-19A536-RA or equivalent meeting Ford specification
WSE-M5B392-A to remove old silicone sealant.
CAUTION: Aluminum components gouge easily which may cause gasket leaks. Always use care when scraping aluminum gasket surfaces.
NOTE: Lightly oil all retaining bolt and stud bolt threads with clean engine oil meeting Ford specification WSS-M2C153-G before installation
except those specifying special sealant.
2. Lubricate push rods and rocker arms with Engine Assembly Lubricant D9AZ-19579-D or equivalent meeting Ford specification ESR-M99C80-A.
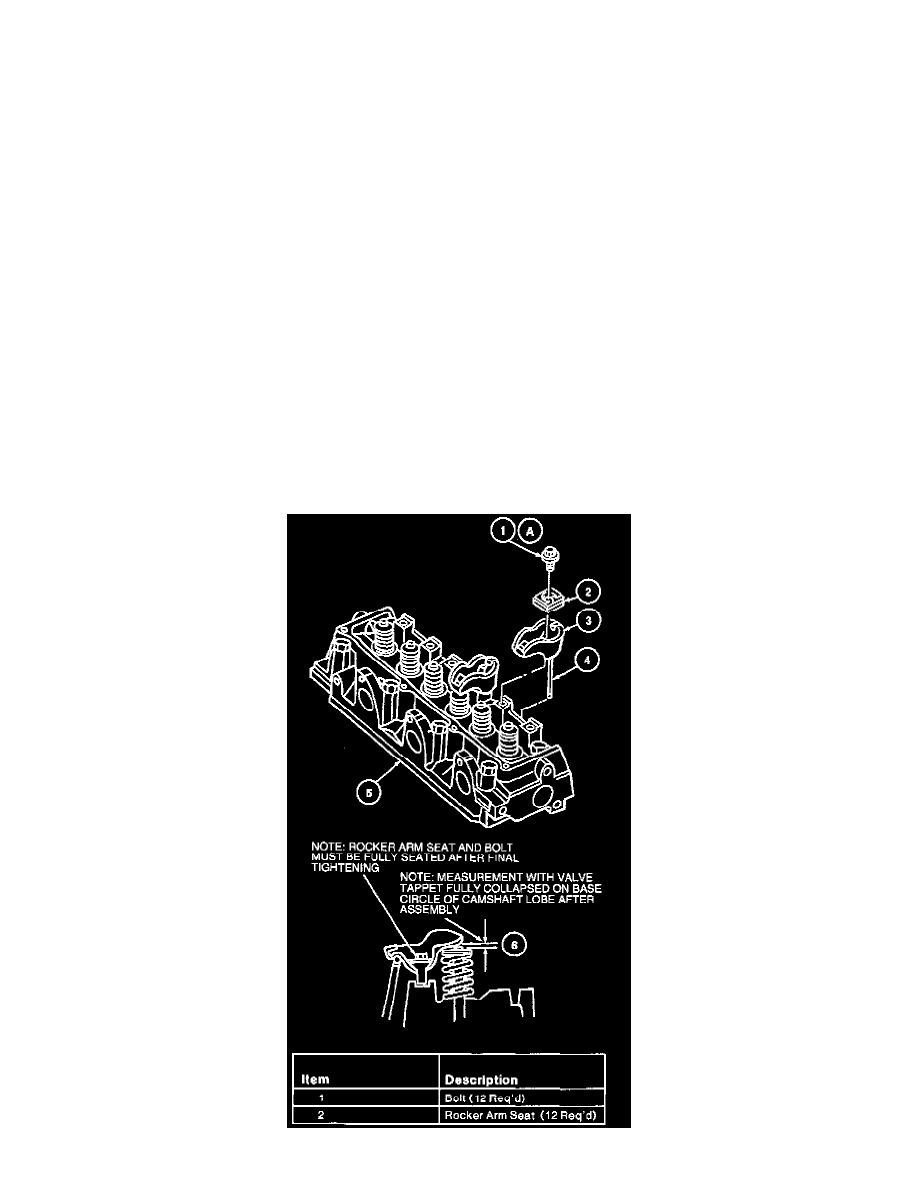
NOTE: Rocker arm seats must be fully seated into cylinder head and push rod must be fully seated in rocker arm and valve tappet sockets prior to
final tightening.
3. Install rocker arms into position with push rods and snug retaining bolt. Rotate crankshaft to position camshaft lobes straight down and away from
rocker arm.
-
Tighten rocker arm seats into cylinder head retaining bolt to 7-15 Nm (6-11 ft. lbs.).
-
Final-tighten bolt to 26-38 Nm (20-28 ft. lbs.) in any position.