
Sable V6-183 3.0L VIN U FI (1998)
Timing Chain Guide: Service and Repair
Installation
1. Clean and inspect all parts before installation.
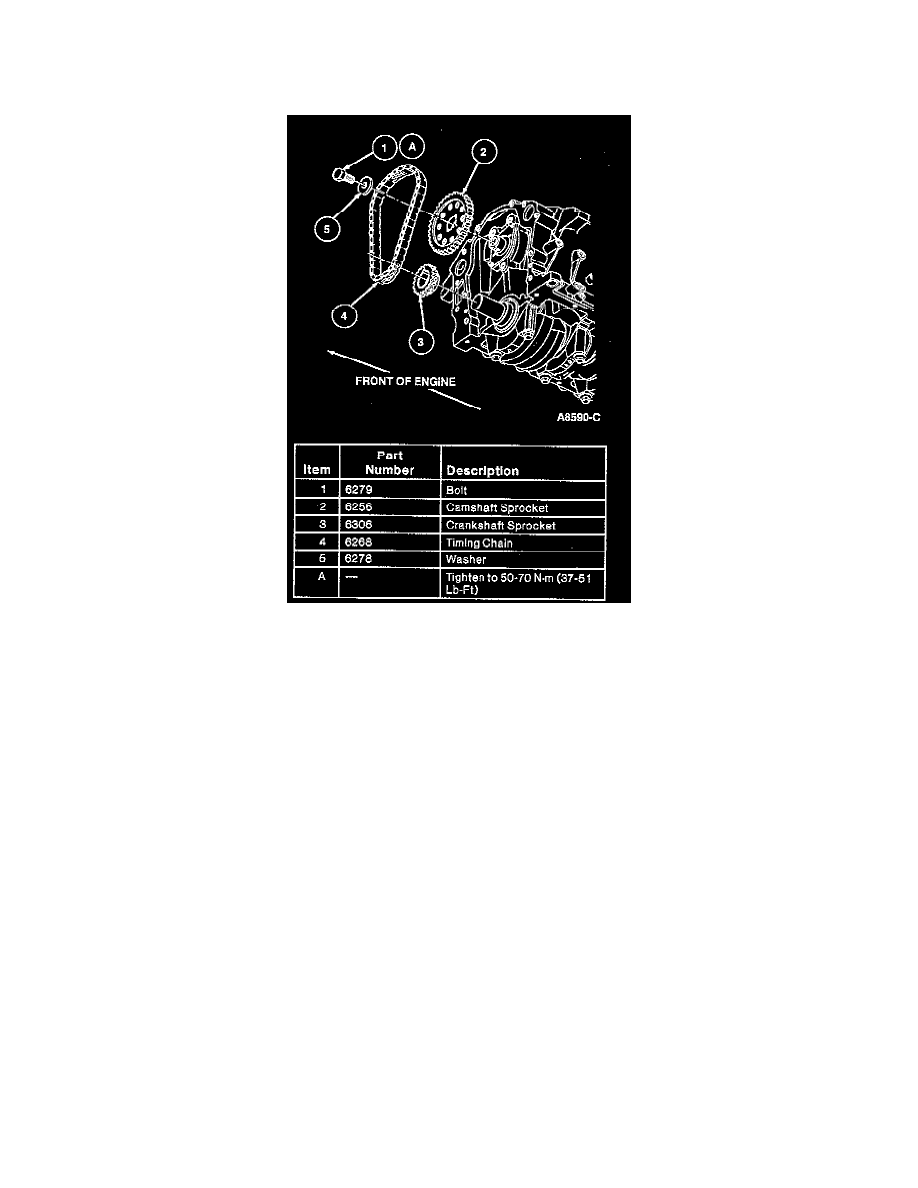
2. Slide camshaft sprocket, crankshaft sprocket and timing chain on as an assembly with timing marks aligned as illustrated.
3. Install camshaft sprocket retaining bolt and washer. Tighten bolt to 50-70 Nm (37-51 ft. lbs.). Lubricate timing chain, crankshaft sprocket and
camshaft sprocket with clean engine oil meeting Ford specification WSS-M2C 153-G.
CAUTION: The camshaft bolt has a drilled oil passage in it for timing chain lubrication. If damaged, do not replace with standard bolt or damage
to engine may occur. Clean oil passage with solvent.
4. Inspect crankshaft front seal for burrs or cuts. If required, replace crankshaft front seal using Front Cover Seal Replacer T70P-6B070-A.
5. Position engine front cover gasket onto cylinder block alignment dowels.
6. Install engine front cover onto cylinder block using caution to not damage crankshaft front seal.
7. Install engine front cover retaining cover bolts and tighten.
8. Install oil pan and new oil pan gasket.
9. Install water pump if removed.
10. Install crankshaft damper and crankshaft pulley.
11. Install crankshaft pulley and damper.
12. Fill crankcase to the proper level with clean engine oil XO-5W30-QSP or equivalent meeting Ford specification WSS-M2C153-G.
13. Fill and bleed engine cooling system.
14. Connect battery ground cable.
15. Start engine and check for coolant, oil and exhaust leaks.