
Sable V6-183 3.0L VIN U FI (1998)
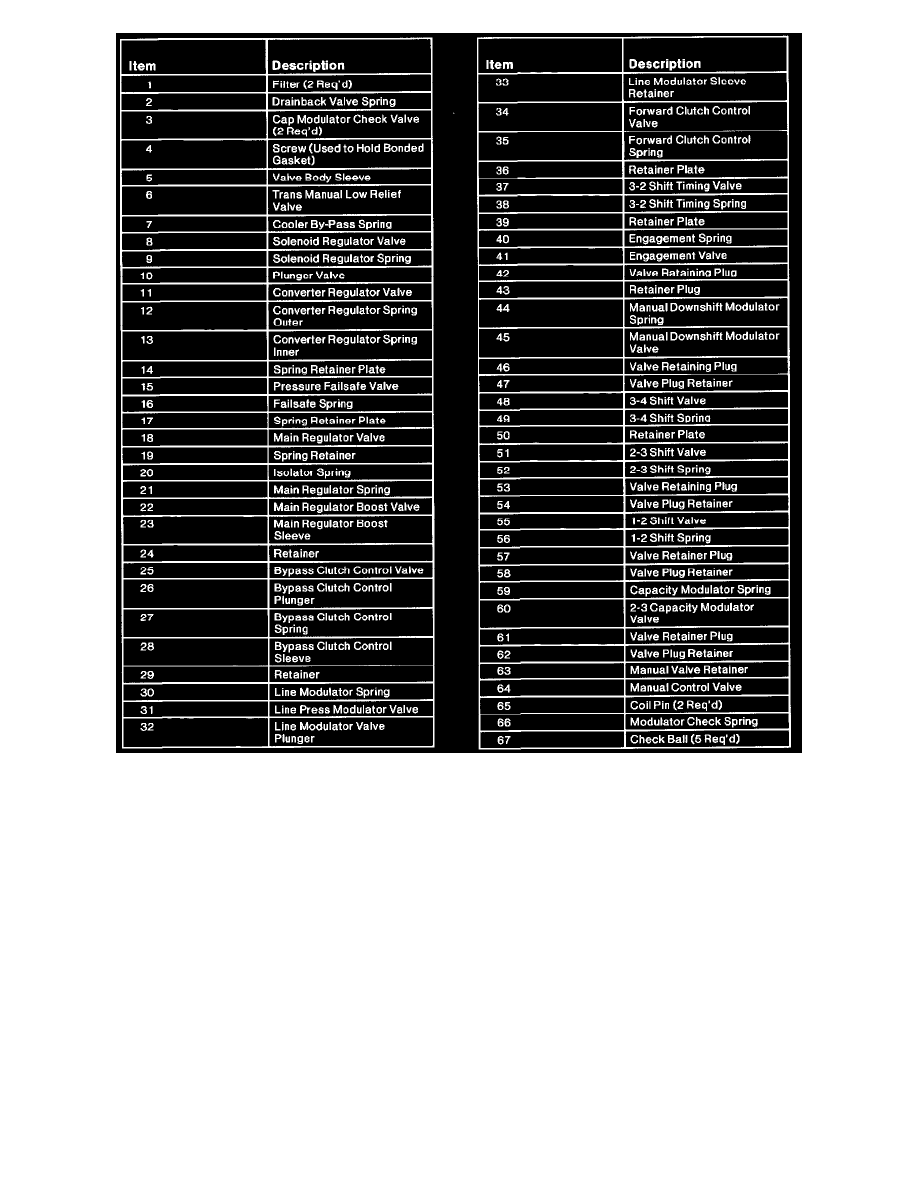
8. The individual valves and springs are removed by removing retaining clips and bore plugs. Refer to the illustrations for valve and spring locations.
Clean valves, springs and main control valve body.
CAUTION: Most valves are aluminum and cannot be removed using a magnet. Remove valves by tapping valve body on palm of hand to slide
valves out of bores. It may be necessary to remove valves and springs using a pick. If it is necessary to use a pick, use extreme caution to prevent
damaging valves or valve bores. If necessary, disassemble parts of main control valve body in small groups. Take special care when handling main
control components, since they are the most precise and delicate parts of the transaxle. Neatly arrange parts as they are removed to avoid mixing
similar pieces.
CAUTION: Do not stone or polish any valves. If valves do not move freely, replace assembly.
Assembly
1. Assemble valves and springs into main control valve body.
CAUTION: Do not stone or polish any valves. If valves do not move freely, replace assembly.