
Sable V6-232 3.8L (1988)
2.
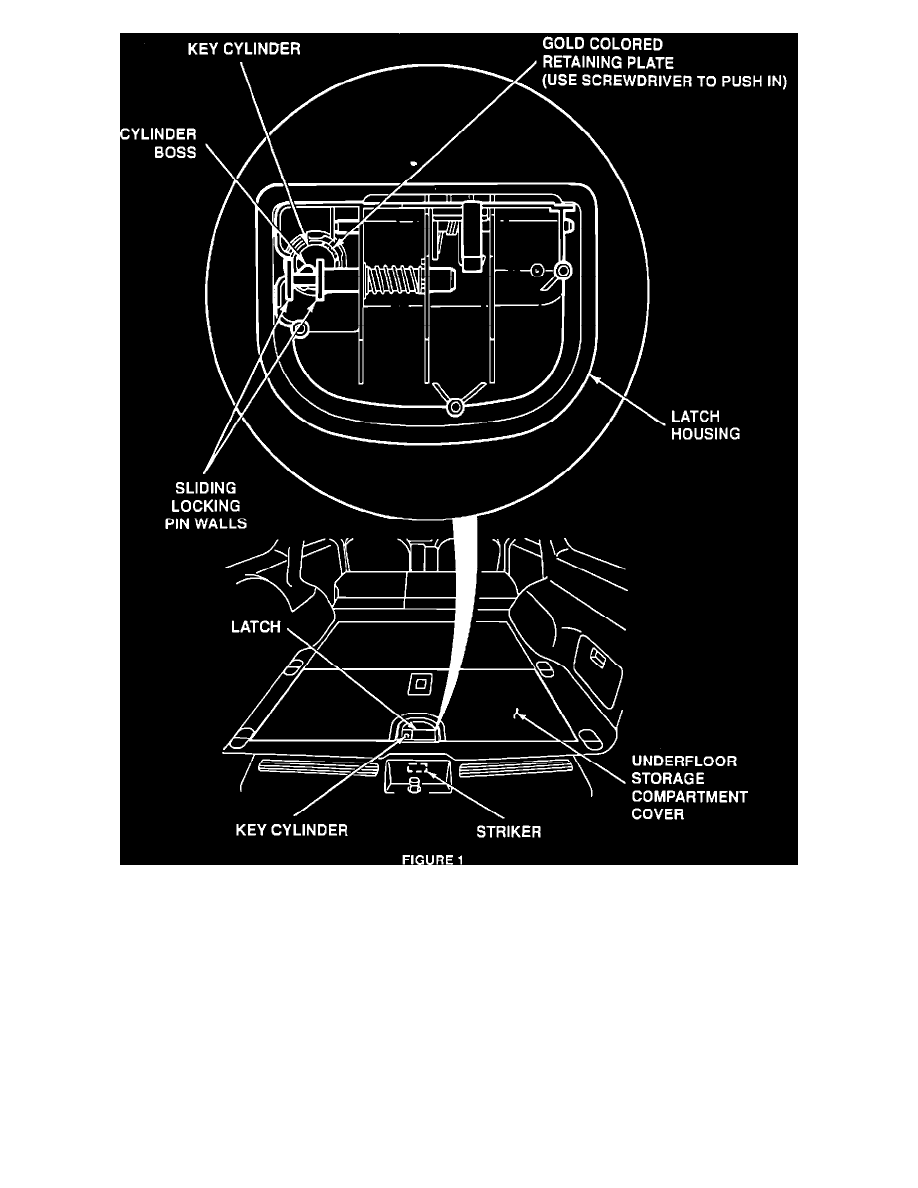
Remove the three storage compartment latch attaching screws and remove the latch. See Figure 1. Retain screws for new latch installation.
3.
Remove the key cylinder from the old latch and reinstall it into the new latch assembly as follows:
^
From the bottom of the latch assembly, use a small screwdriver to push the gold colored retaining plate toward the center of the key cylinder.
While holding the retaining plate in, push the cylinder out of the housing. Discard the old latch.
^
To install the key cylinder into the new latch, align the boss at the end of the cylinder so it is positioned between the two walls of the sliding
locking pin. Then, push the cylinder in to engage the retaining plate. Insert and rotate the key to check if the cylinder boss and the sliding
locking pin are engaged.
4.
Position the latch assembly to the storage compartment cover and secure with the three screws previously removed.
5.
Remove and discard the striker and the two attaching screws if they were not previously removed.