
Sable V6-232 3.8L (1988)
Backing Plate: Service and Repair
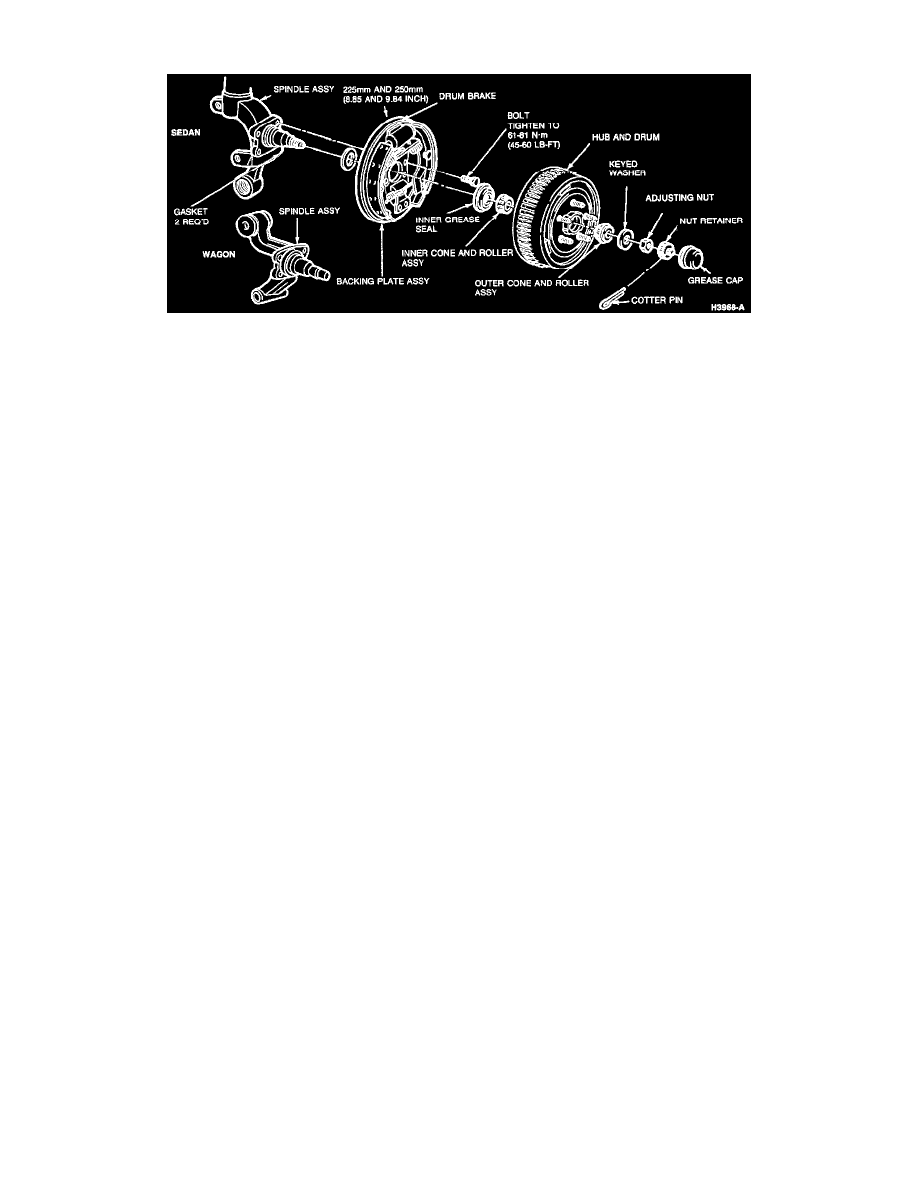
Rear Drum Brakes
REMOVE
1. Remove wheel/tire assembly.
2. Remove brake hub and drum. See Brake Drum / Service and Repair. See: Brake Drum/Service and Repair
3. Disconnect brake line from brake cylinder.
4. Remove brake shoes and adjuster assemblies. See Brake Shoe / Service and Repair. See: Brake Shoe/Service and Repair
5. Remove wheel cylinder, and parking brake cable from backing plate. See: Wheel Cylinder/Service and Repair
6. Remove bolts retaining backing plate to spindle.
7. Remove backing plate and foam gasket.
INSTALL
1. Install new foam gasket on spindle.
2. Install backing plate with new attaching bolts. Tighten bolts to 60-80 Nm (45-60 ft lb).
3. Install wheel cylinder, and connect brake line. See Wheel Cylinder / Service and Repair. See: Wheel Cylinder/Service and Repair
4. Install brake shoes and adjuster assemblies. Insert parking brake cable through backing plate. Prongs must be securely locked in place. Connect
parking brake cable to lever. See Brake Shoe / Service and Repair. See: Brake Shoe/Service and Repair
5. Adjust brake shoes. See Brake Shoe / Adjustments. See: Brake Shoe/Adjustments
6. Install brake drum. See Brake Drum / Service and Repair. See: Brake Drum/Service and Repair
7. Install wheel and tire assembly. Torque lug nuts to 109-142 Nm (80-105 ft lb).
8. Perform system brake bleeding procedures.