
Sable V6-232 3.8L (1988)
Brake Proportioning/Combination Valve: Adjustments
Brake Pressure Control Valve
Sedan
1. Drive vehicle on a hoist or alignment machine, so that vehicle is at curb load level and wheels are on a flat surface.
2. Loosen valve adjuster setscrew.
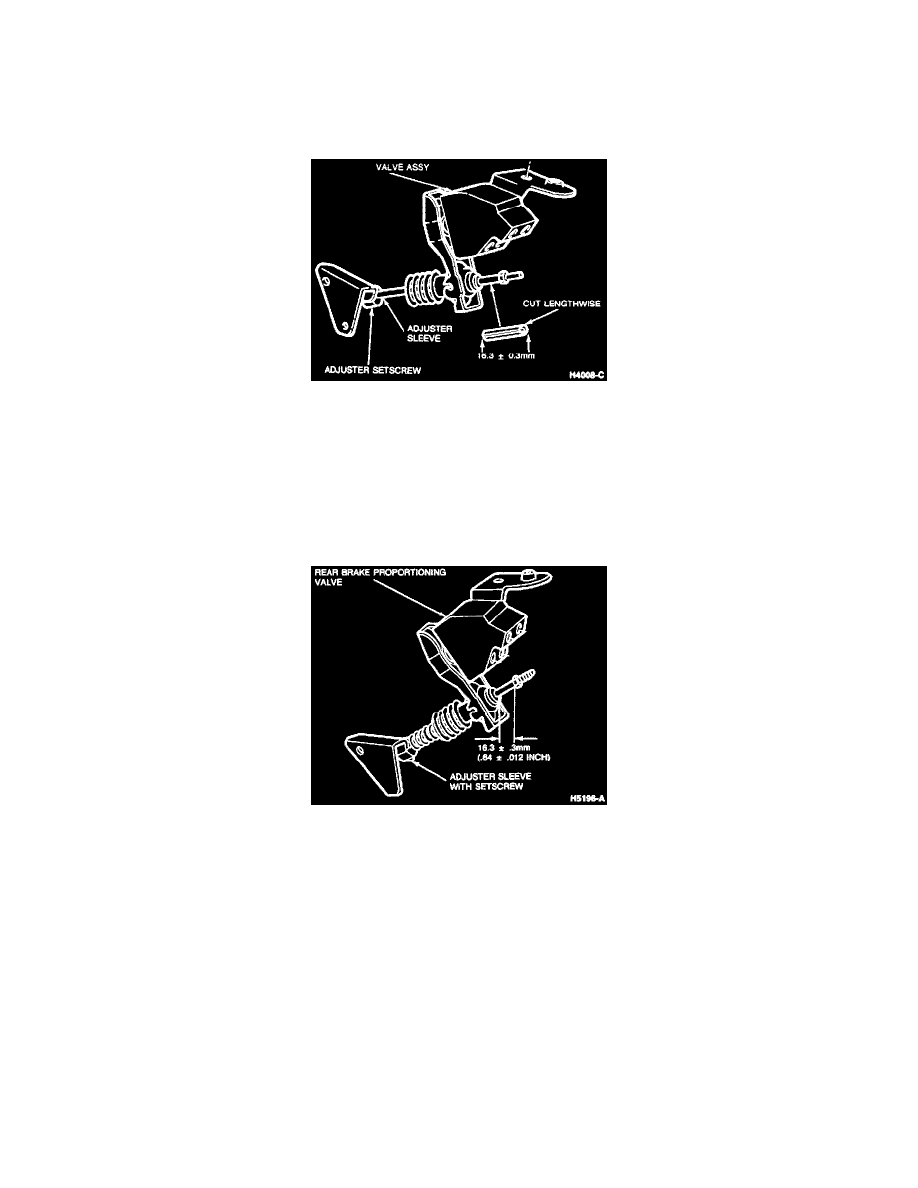
3. Obtain a piece of rubber or vacuum hose or plastic tubing 3/8-inch OD x 1/4-inch ID. Cut a piece 16.3 mm ± 0.3 mm and slice it lengthwise as
shown.
4. Place this length of hose or tubing on valve operating rod. Refer to illustration above Step 3.
5. Ensure the adjuster sleeve is resting on the lower mounting bracket. Tighten setscrew to specification. The dimension will position the valve for
normal operation. Remove hose or tube.
NOTE: DO NOT change position of the upper nut on valve operating rod.
If further adjustment is necessary refer to the following procedures:
Decrease Pressure at Rear Brakes
1. Ensure suspension is at curb height.
2. Loosen adjuster setscrew.
3. Move adjuster sleeve UP toward valve body on the operating rod 1 mm for each 413 kPa (60 psi) pressure decrease.
4. Tighten setscrew in adjuster sleeve in desired position.
Increase Pressure at Rear Brakes
1. Ensure suspension is at curb height position.
2. Loosen adjuster setscrew.
3. Move adjuster sleeve DOWN away from the valve body on the operating rod 1 mm for each 413 kPa (60 psi) pressure increase.
4. Tighten setscrew in desired position.