
Sable V6-232 3.8L (1988)
15.
Remove two lower instrument panel-to-cowl side retaining screws both both sides of instrument panel.
16.
Disconnect under hood connectors from main wiring harness. Disengage main harness rubber grommet from dash panel, then feed wiring harness
and its connector halves into instrument panel area.
17.
Remove one (1) bolt attaching instrument panel to floor brace above LH side of tunnel.
18.
Remove two (2) lower instrument panel-to-cowl side retaining screws at both LH and RH side
19.
Snap out left and right front speaker opening covers and defroster grill, then remove three upper instrument panel attaching screws.
20.
Remove instrument panel and lay it on front seat.
REMOVE HEATER CASE
21.
Remove instrument panel to heater case shake brace attaching screw, then the instrument panel shake brace.
22.
Remove floor register or rear seat adapter to heater case attaching bolts, then the floor register.
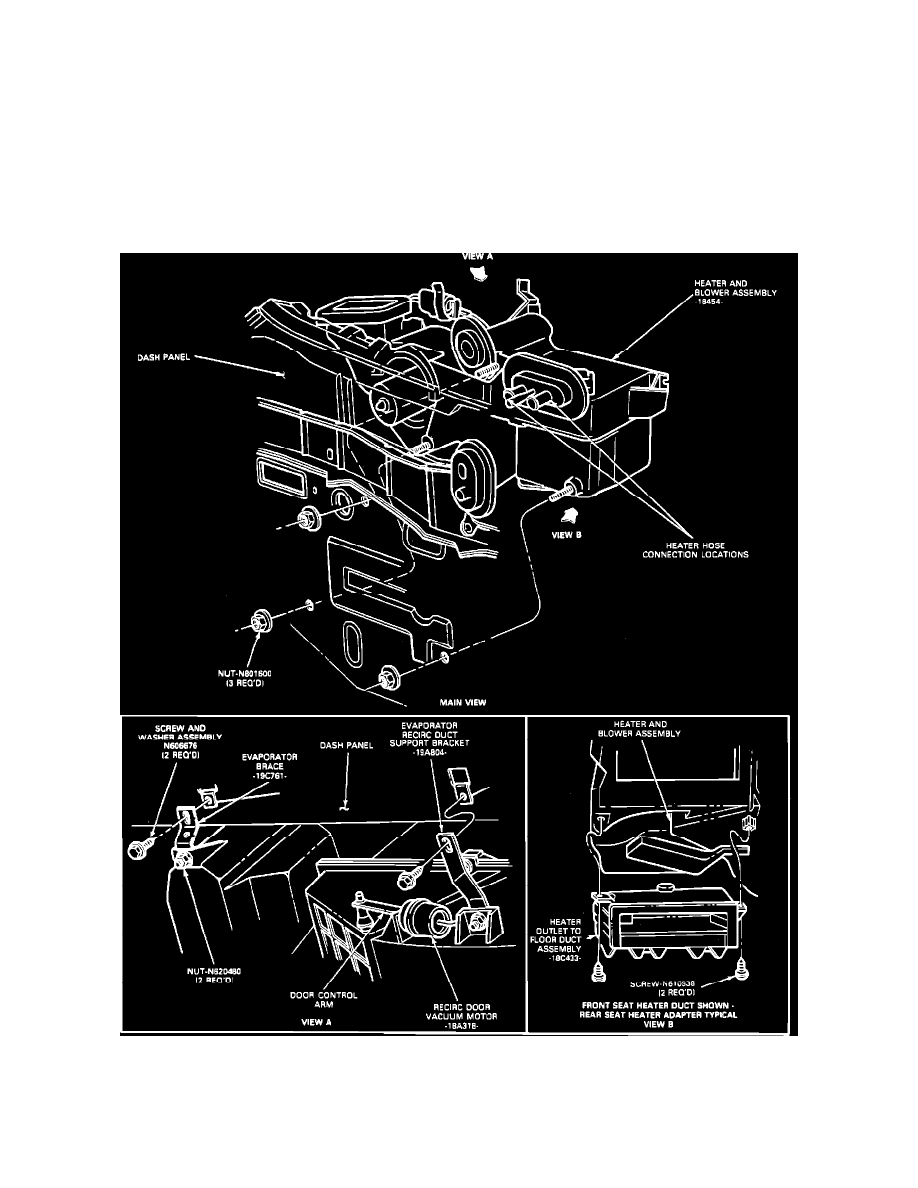
Heater Case Assembly
23.
Remove three (3) heater case-to-dash panel attaching nuts located in engine compartment.
24.
Remove two (2) screws attaching top brackets to cowl top panel, then carefully pull heater assembly from dash panel and remove from vehicle.
25.
Remove vacuum source line from heater core tube seal, then remove heater core tube seal.