
Sable V6-232 3.8L (1988)
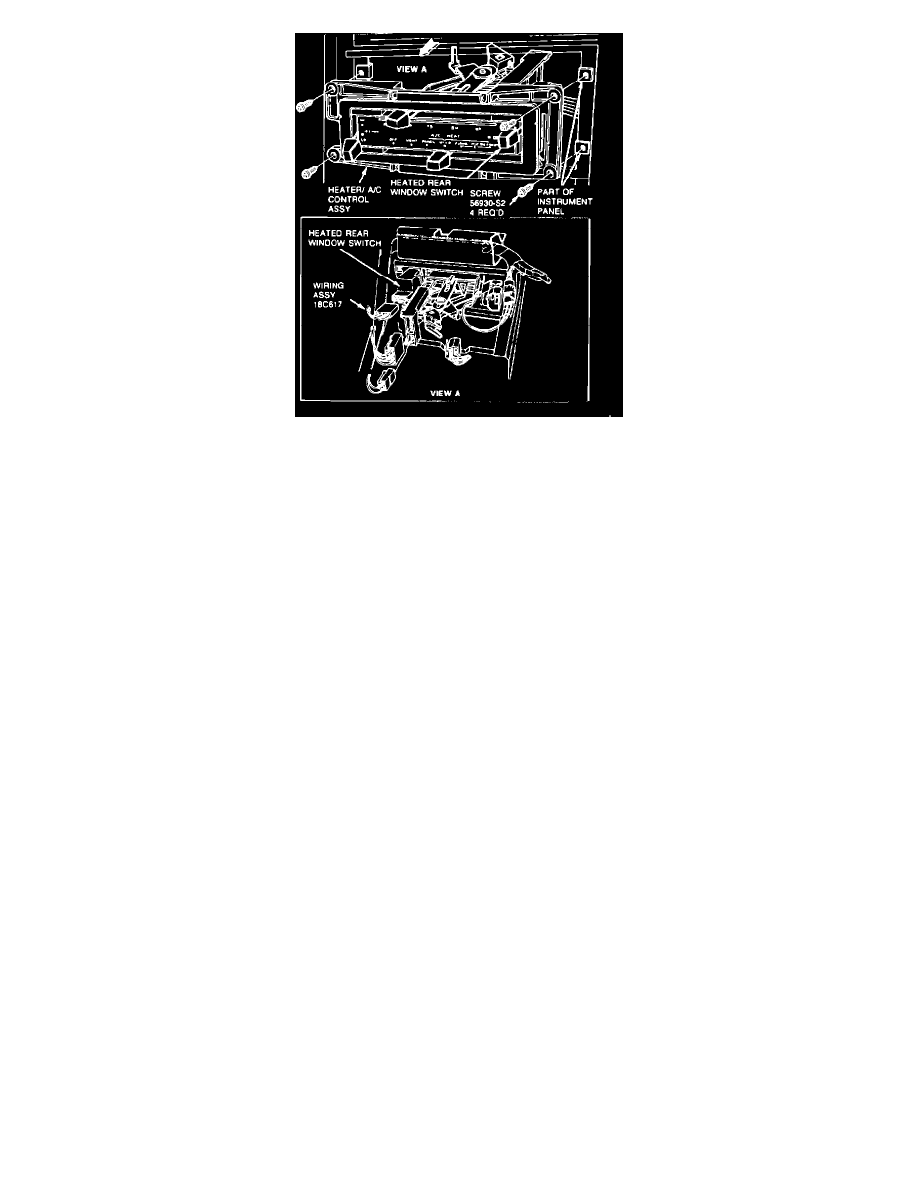
FIGURE 8 - Switch Assembly-Thunderbird/Cougar
Thunderbird/Cougar
The control assembly is mounted to the heater A/C control head. Remove the knob from the control lever. Remove the applique. Remove the screws
retaining the heater A/C control head to the instrument panel and remove the control head from its opening. Remove the control assembly from the heater
A/C control panel (Figs. 8 and 9).
Mustang
1.
Disengage the two locking tabs on the right side of control by pushing the tabs in with a small screwdriver and pulling on the right side of the
control.
2.
Using a screwdriver, pry the left side of the control out of the instrument panel.
3.
Pull the control completely out of the opening and disconnect the two connectors.
4.
To install, install the two connectors to the control and insert control into opening in instrument panel until the locking tabs on both sides of the
control snap in place.
Window
Disconnect wire leads at each end of the glass. Remove window. Refer to Section 43-11.
MAJOR SERVICE OPERATIONS
Grid Wire Repair
NOTE:
A single break or any breaks that total more than 25 mm (1 inch) in one grid cannot be repaired. The window must be replaced. For breaks less
than 25 mm (1 inch) long, use the following procedure:
NOTE:
If the first layer of the heated rear window grid (brown color) is damaged or missing, it will be necessary to apply brown Acrylic Lacquer
Touch-Up Paint AL81- 5477-B (ESR-M2P100-B) or equivalent on the glass prior to applying the silver Grid Repair Compound D8AZ-
19562-A (ESB-M4J58-A) or equivalent.