
Sable V6-3.0L DOHC VIN S (2002)
Seat Belt Height Adjuster: Service and Repair
General Procedures
D - Ring Installation Kit
SPECIAL TOOL(S)
1. Remove the height adjuster.
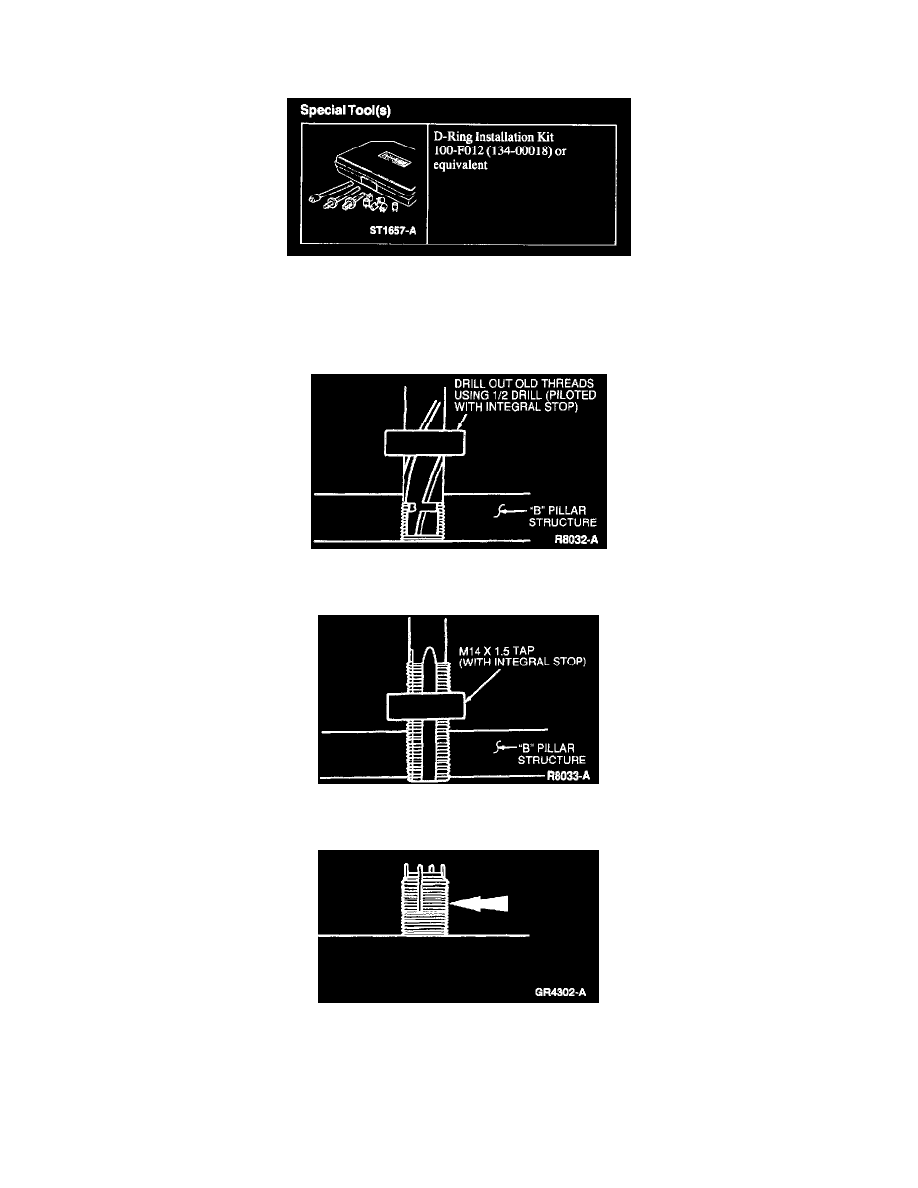
2. Use the half-inch drill with integral stop provided in D-Ring Installation Kit to drill out the damaged threads in the weld nut(s) in the upper pillar
structure.
3. Apply a suitable lubricant to the M14 x 1.5 tap with integral stop provided in D-Ring Installation Kit and tap new threads. After each rotation,
back off the tap slightly to remove new cuttings, and be sure to blow out any chips before proceeding.
4. Use a threaded insert (part number N807170-S190) provided in D-Ring Installation Kit and screw it into the retapped hole until it is slightly below
the surface.