
Sable V6-3.0L VIN 2 Flex Fuel (2005)
4. Remove the dished washer and the dust cover.
Assembly
1. NOTE: Make sure the dished side of the washer is facing away from the strut mounting bracket.
Install the dust cover and the dished washer.
2. NOTE: Make sure the cupped side of the washer is facing away from the strut mounting bracket.
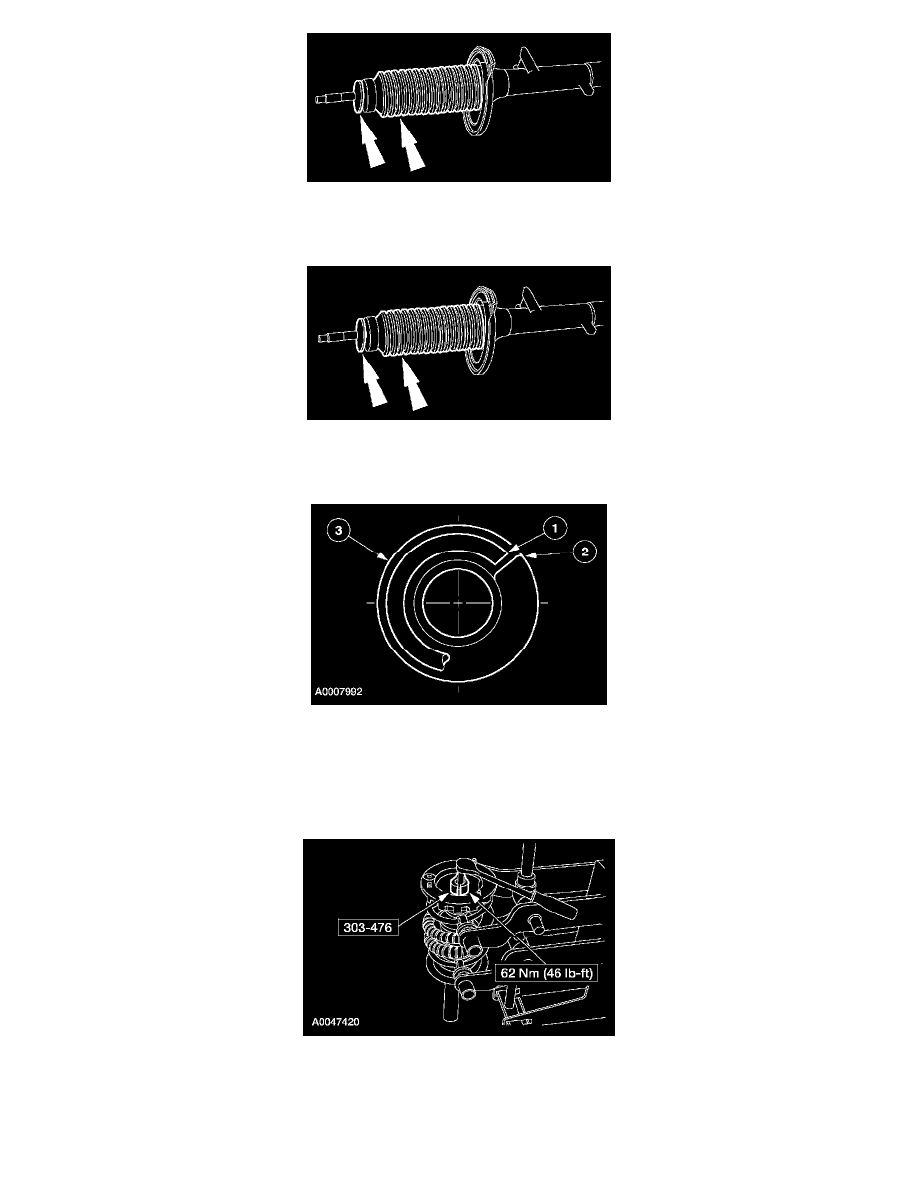
Make sure the rear spring is correctly positioned in the strut mounting bracket and rear spring seat lower mounting insulator.
1
The end of the spring must be located within 10 mm (0.39 inch) of the step in the strut spring seat.
2
Step in the spring seat pocket.
3
Strut assembly.
3. CAUTION: Do not attempt to remove or install the strut rod nut by turning the shock absorber rod and holding the nut. The nut must be turned
and the rod held stationary to avoid the possible fracture of the shock absorber rod at the base of the hex.
CAUTION: Do not use pliers on the strut rod as the finished rod surface can be damaged.