
Sable V6-3.0L VIN U (1999)
Liftgate Window Glass Weatherstrip: Service and Repair
REMOVAL
1. Open liftgate rear window.
2. Squeeze and remove electrical connector for heated rear window grid at each upper, inner corner of liftgate rear window.
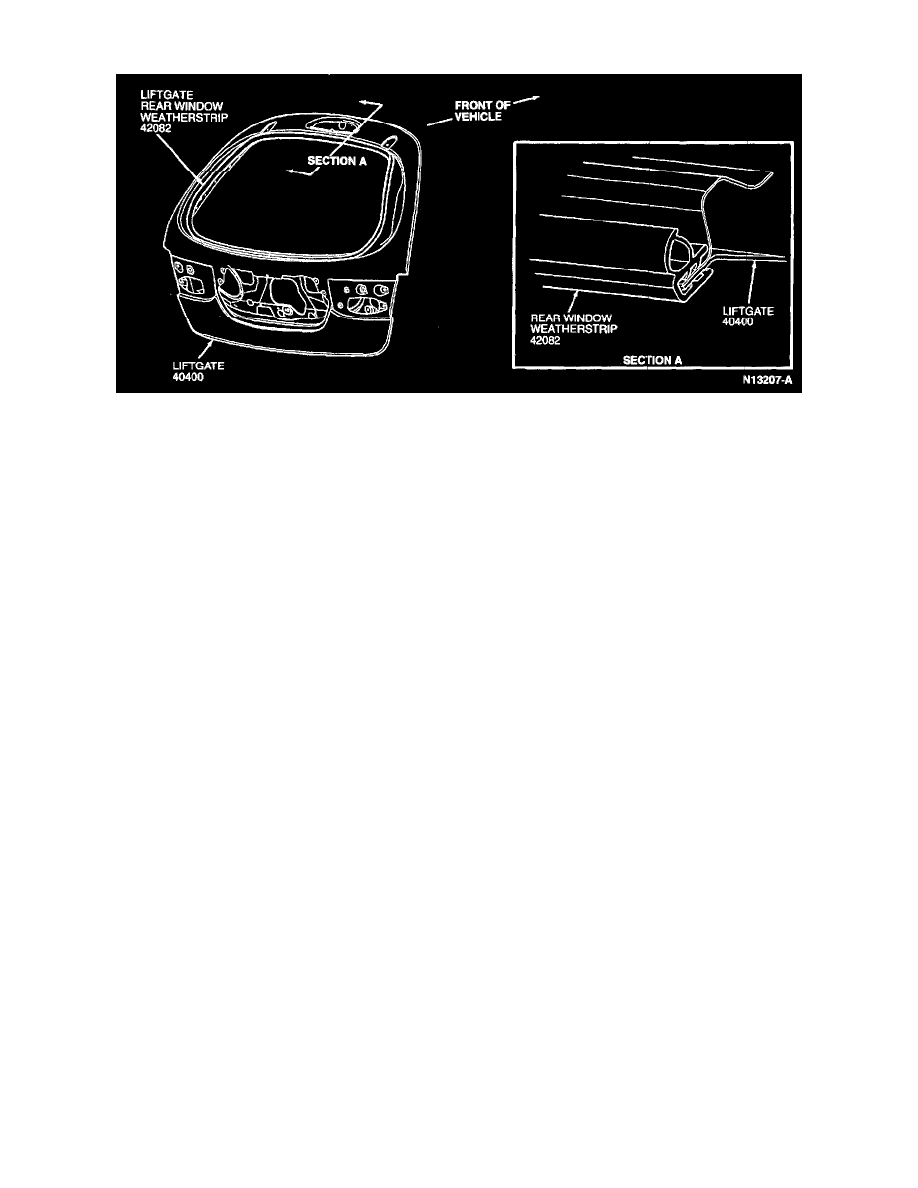
3. Starting at window latch, pull rear window weatherstrip up off flange. Discard worn/damaged rear window weatherstrip.
NOTE: The liftgate rear window weatherstrip may contain a stringy sealer which can stick to the liftgate opening when the liftgate rear window
weatherstrip is removed. Cover the interior trim panels to prevent getting sealer on them.
4. Work in small sections and continue until rear window weatherstrip is completely removed.
5. Correct any damage to the weatherstrip mounting flange with locking pliers or a hammer.
6. Install liftgate rear window weatherstrip beginning at upper corners. Press gripper edge over flange. Work down sides and end at latch.
NOTE: Liftgate rear window weatherstrips are mechanically retained. No adhesive is required for retention.
7. Locate upper moulded corners of liftgate rear window weatherstrip at upper corners of liftgate back window opening.
INSTALLATION
1. Follow removal procedure in reverse order.
2. Install liftgate rear window weatherstrip using palm of hand to seat until completely installed.
3. Reconnect connectors to two rear window grid blades.