
Sable V6-3.0L VIN U (1999)
Drive Belt: Service and Repair
WARNING: DO NOT ALLOW DRIVE BELT TENSIONER TO SNAP BACK AS DAMAGE TO DRIVE BELT TENSIONER OR
PERSONAL INJURY COULD RESULT.
NOTE: Minor cracks in the V-grooved portion of the serpentine drive belt are considered normal and acceptable. If the drive belt has chunks missing
from the ribs, the drive belt should be replaced.
NOTE: Conditions requiring drive belt replacement are excessive wear, rib chunk-out, severe glazing, frayed cords or other conditions. Replace any
drive belt exhibiting any of these conditions.
Drive belt installation
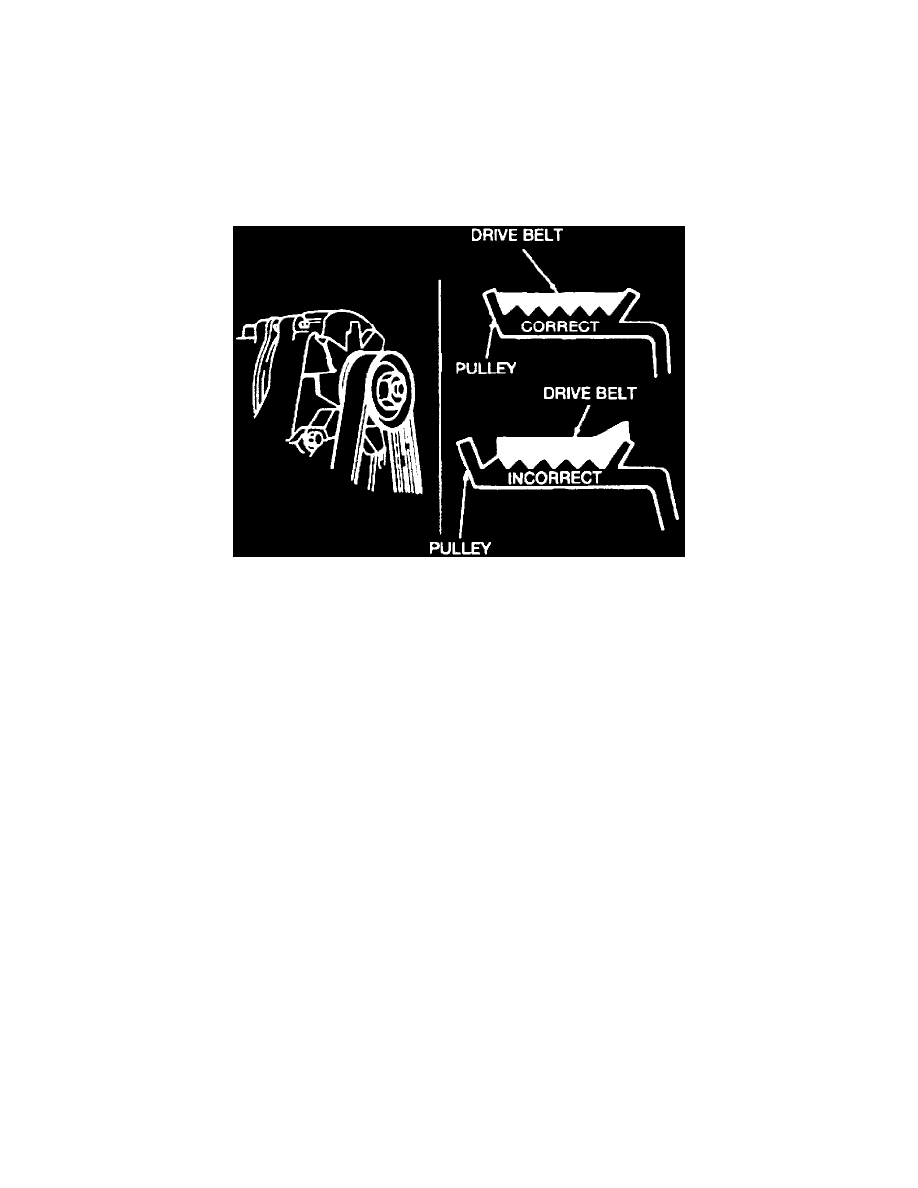
NOTE: When installing drive belt on pulley, make sure that all V-grooves make proper contact with pulleys.
Removal
1. WARNING: USE CAUTION WHEN REMOVING OR INSTALLING DRIVE BELT TO MAKE SURE THAT TOOL DOES NOT SLIP
FROM DRIVE BELT TENSIONER OR PERSONAL INJURY AND/OR DAMAGE TO DRIVE BELT TENSIONER AND DRIVE
BELT MAY OCCUR.
Using a 15 mm socket or wrench on bolt attaching drive belt tensioner pulley, rotate drive belt tensioner clockwise on 3.0L (2V) and 3.0L (2V)
FF, rotate the drive belt tensioner counter clockwise on 3.0L (4V) to remove drive belt from pulleys. Make sure spring keeper engages into slot.