
Sable V6-3.0L VIN U (1999)
Pulley Remover 412-001 (T71P-19703-B).
INSTALLATION
1. Clean the A/C clutch pulley bearing surface of the A/C compressor head to remove any dirt or corrosion.
2. Install A/C clutch pulley and bearing on A/C compressor. The bearing is a slip fit on compressor head and, if properly aligned, should slip on
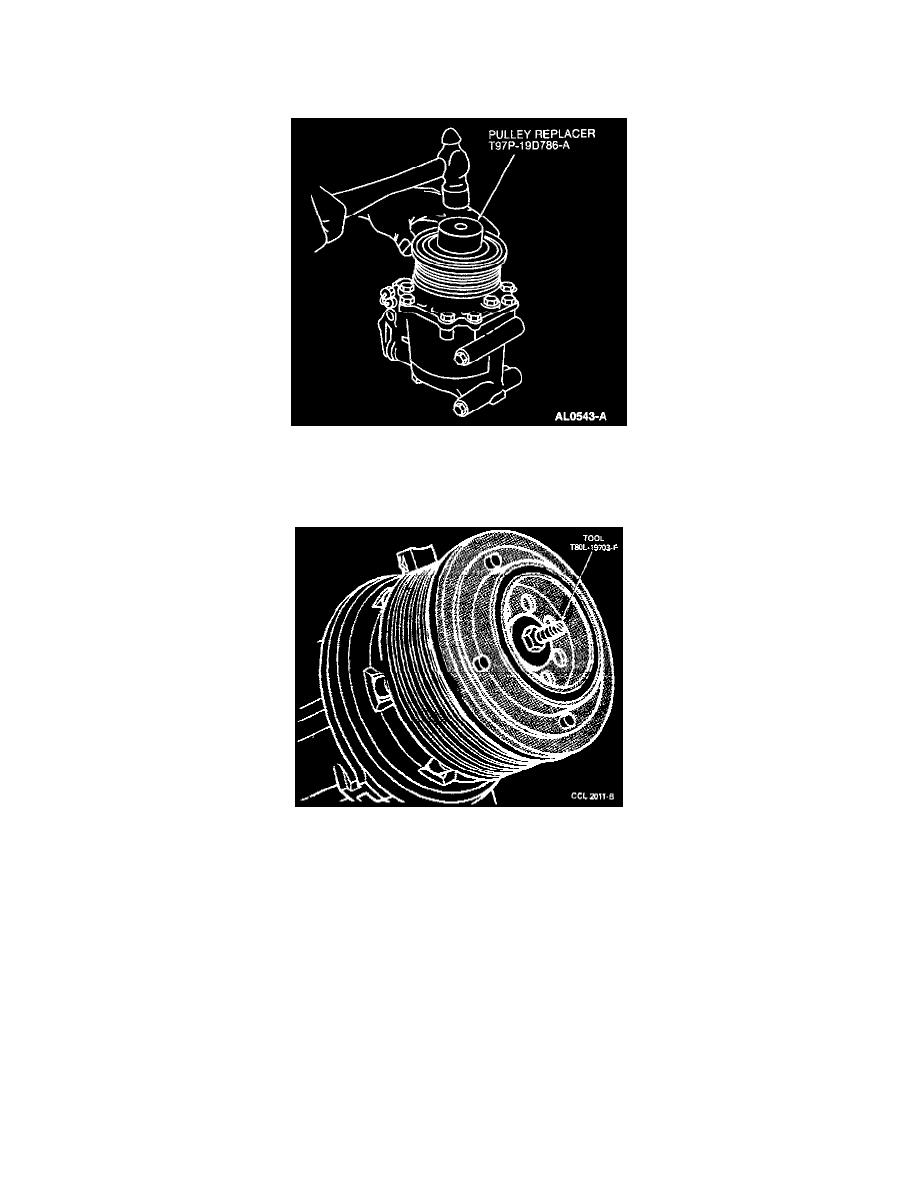
easily. If difficulty is encountered installing A/C clutch pulley, gently tap A/C clutch pulley on A/C compressor using Pulley Replacer 412-109
(T97P-19D786-A). Make sure the A/C clutch pulley bearing is aligned with compressor head.
3. Install A/C clutch pulley retaining snap ring with bevel side of snap ring out.
A/C Clutch Hub - Installation
4. Install A/C clutch on compressor shaft using A/C clutch hub spacer between A/C clutch and end of compressor shaft. Make sure shaft key is
aligned with keyway of A/C clutch. Use Hub Driven Plate Replacer 412-017 (T80L-19703-F) to press A/C clutch on compressor shaft, if
necessary. Use only specified tool if A/C clutch will not easily slide on compressor shaft.
CAUTION: Do not attempt to drive the clutch hub on the compressor shaft as damage to A/C compressor will result.
5. Install A/C clutch lock washer and retaining nut on compressor shaft. Tighten nut to 13-20 N.m (10-14 Lb-Ft). DO NOT USE AIR TOOLS.
6. Check and adjust A/C clutch air gap.
7. Install A/C compressor onto vehicle.