
Sable V6-3.0L VIN U (1999)
Condenser HVAC: Testing and Inspection
ON-VEHICLE LEAK TEST
If an A/C evaporator core or A/C condenser core is suspected of leaking, the leak must be verified prior to removing the component from the
vehicle. DO NOT rely solely on the results of an electronic leak detector as chemicals other than R-134a will activate the leak detector.
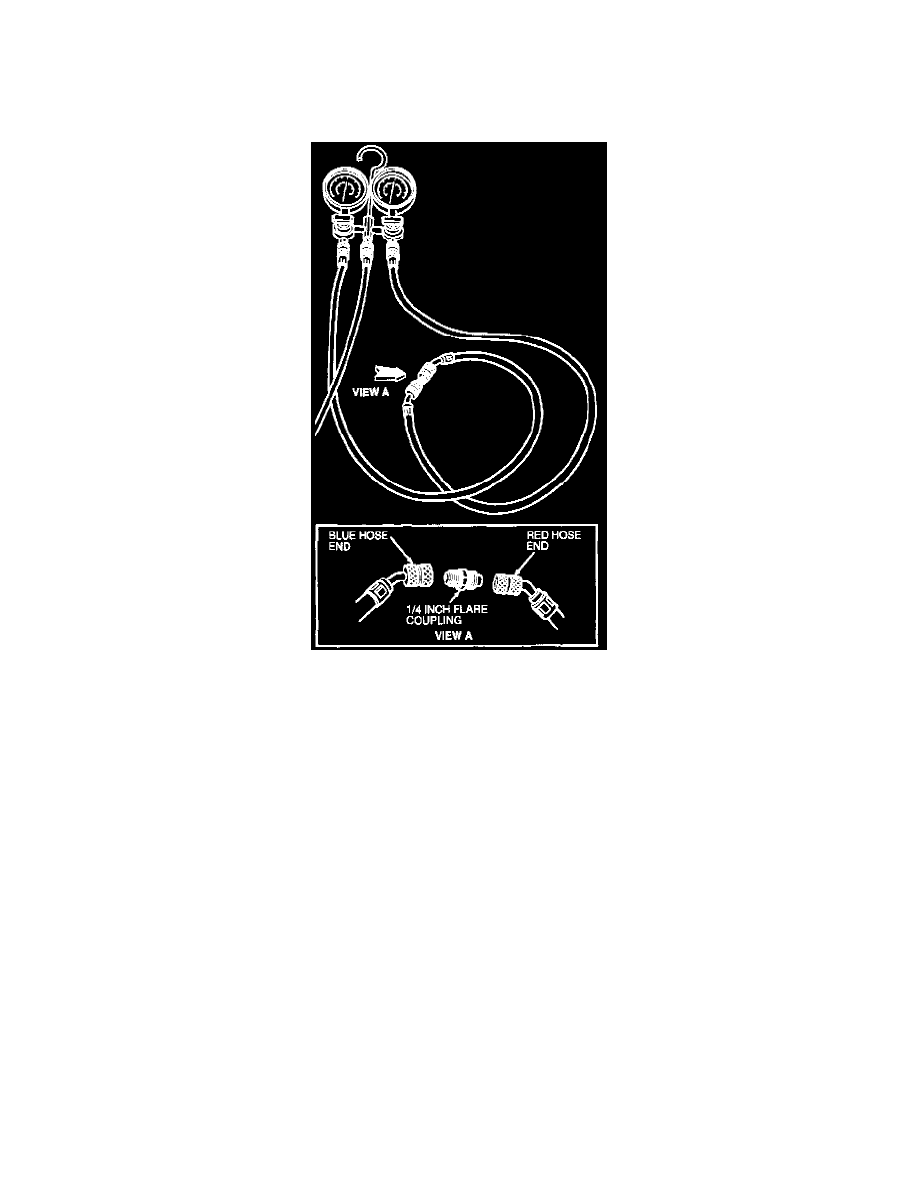
1. Verify that the manifold gauge set is capable of holding vacuum.
a. Connect the red and blue hoses together using a 1/4 inch flare coupling.
b. Connect the gauge set yellow hose to a known good vacuum pump.
c. Turn the vacuum pump ON and open both gauge set valves.
d. Operate the vacuum pump for one minute and close both gauge set valves. The low-side gauge should indicate approximately 101 kPa (30
in-Hg) of vacuum.
e. Allow the gauge set, with vacuum applied, to sit for at least 30 minutes.
f.
If the gauge reading drops during that time, the gauge set hose connections, gauges or valves are leaking and should be repaired before
proceeding with the leak test.
2. Discharge the A/C system.
3. Disconnect the suspect A/C evaporator core or A/C condenser core from the A/C system. DO NOT leak test an A/C evaporator core with the
suction accumulator/drier attached to the core tubes. Refrigerant outgassing from oil and desiccant in the suction accumulator/drier will
indicate a false leak condition.
4. Clean the evaporator or condenser core tube fittings.
5. Connect the appropriate test fittings from Rotunda A/C Test Fitting Set 412-DS028 (014-00333) or equivalent to the evaporator or condenser
tube connections.