
Sable V6-3.0L VIN U (1999)
Tail Lamp: Service and Repair
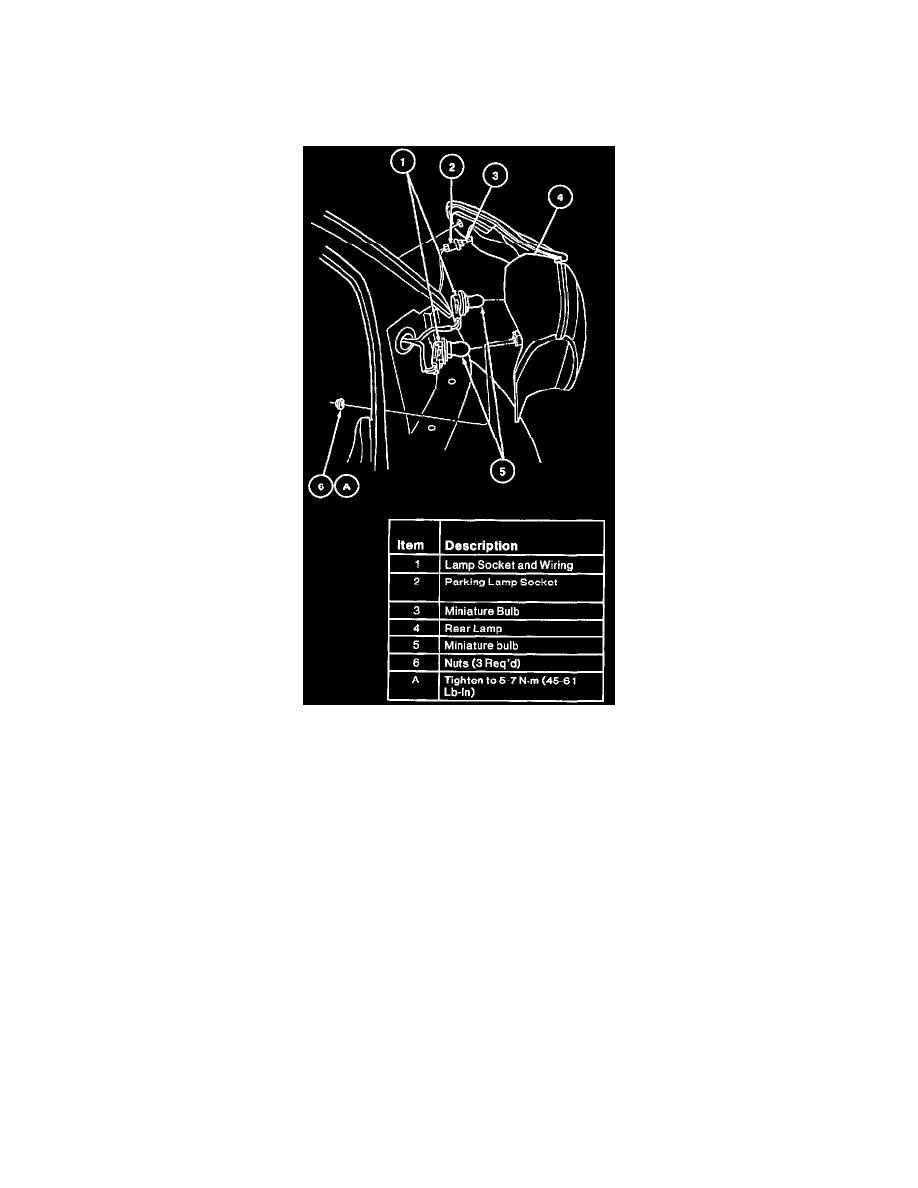
Stop/Turn/Rear Bulb
Sedan
REMOVAL
1. Open luggage compartment door and remove quarter trim panel.
2. Remove three retaining nuts from rear lamp mounting studs.
3. Pull rear lamp away from vehicle.
NOTE: To avoid damaging the vehicle paint, carefully pull the rear lamp straight out.
4. Remove electrical connector.
5. Twist bulb socket counterclockwise approximately 1/4 turn and remove from rear lamp.
6. Carefully remove old bulb from socket by gently pulling it straight out of socket.
NOTE: Do not rotate bulb to remove.
INSTALLATION
1. Install new bulb by pushing straight into socket until it snaps and locks into position.
2. Align indexing tab on socket and install bulb/socket into rear lamp and twist clockwise until it locks into position.
3. Align indexing tab and install electrical connector into socket base until it snaps and locks into place.
4. Carefully install rear lamp to quarter panel.
5. Install three retaining nuts and tighten to 5-7 Nm (45-61 lb-in).
Wagon
REMOVAL
1. With liftgate in full open position, locate two rear lamp attachment screws and remove. Rear lamp should remain attached with a locator pin.
2. Carefully grasp rear lamp at attachment screw location and under forward-most portion of lens. Pull outward firmly to disengage the locator pin