
Sable V6-3.0L VIN U (1999)
Transmission Position Switch/Sensor: Service and Repair
AX4N
Special Tools
Removal
1. Disconnect battery ground cable.
2. Place manual control lever in NEUTRAL.
3. Remove engine Air Cleaner (ACL) and air cleaner outlet tube.
4. Disconnect electrical connector from Transmission Range (TR) sensor.
5. Remove manual control lever from transaxle.
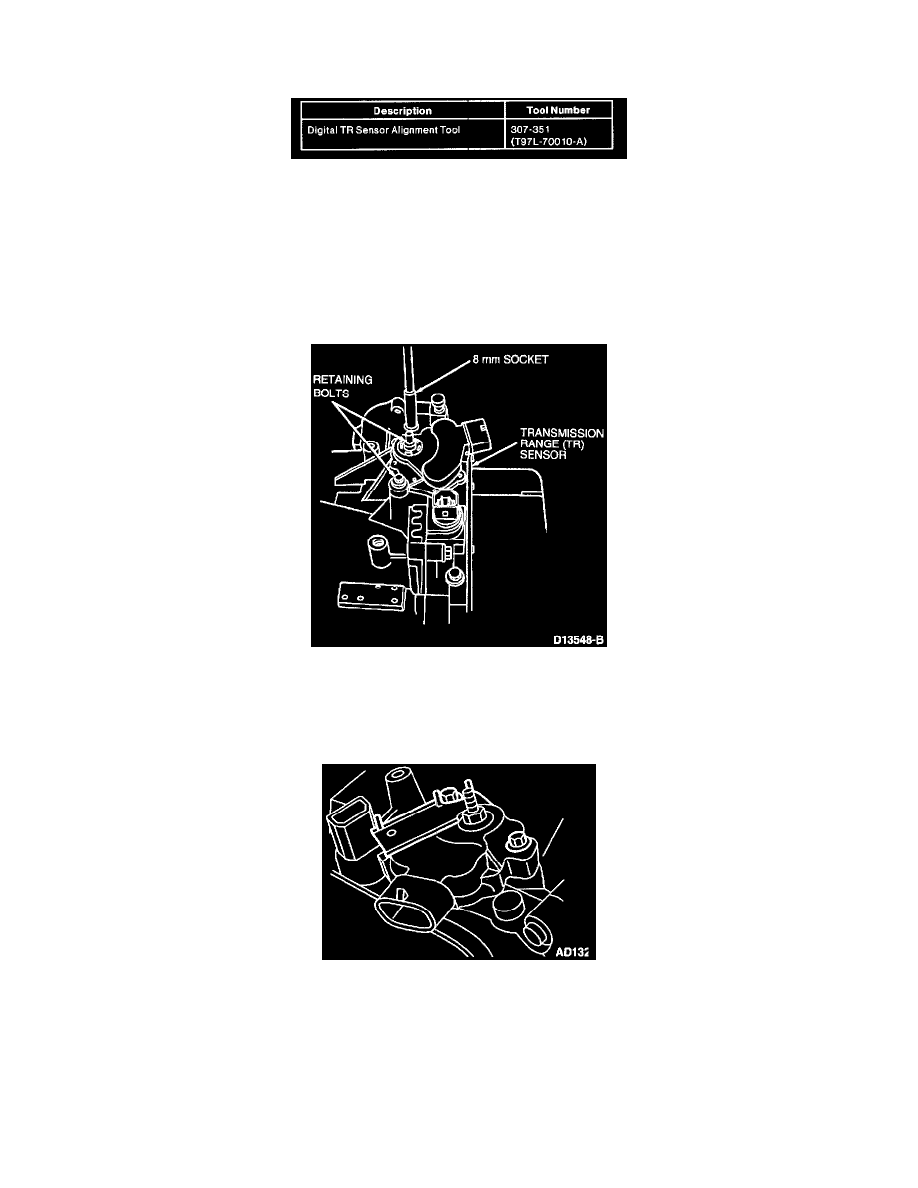
6. Remove two TR sensor retaining bolts.
7. Remove Transmission Range (TR) sensor.
Installation
1. Make sure manual control lever is in the NEUTRAL position.
2. Install transmission range (TR) sensor and loosely install two retaining bolts.
3. Align TR sensor slots using Digital TR Sensor Alignment Tool 307-351 (T97L-70010-A).
4. Tighten TR sensor retaining bolts to 9-12 Nm (80-106 inch lbs.) and remove tool.
5. Connect electrical harness to Transmission Range (TR) sensor.
6. Install transaxle manual control lever. Tighten to 11-16 Nm (98-141 inch lbs.).
7. Install air cleaner outlet tube and engine air cleaner.
8. Connect battery ground cable.
9. Check for proper operation with parking brake control engaged. The engine should start only in PARK or NEUTRAL.