
Sable V6-3.0L VIN U (1999)
Fluid Pump: Service and Repair
AX4S
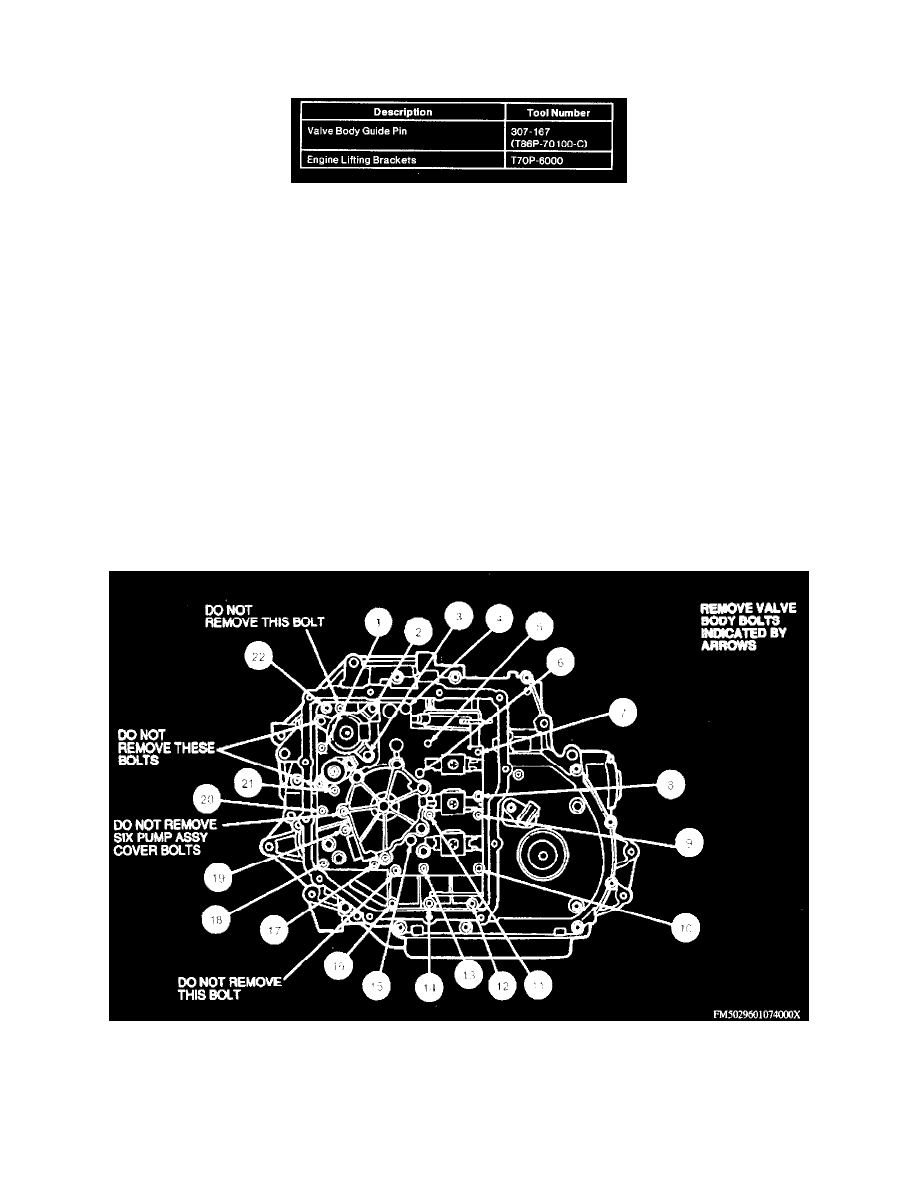
Special Tools
Removal
1. Remove Air Cleaner (ACL) assembly.
2. Disconnect battery ground cable and positive battery cable.
3. Remove battery and battery tray.
4. Disconnect digital Transmission Range (TR) sensor and transaxle harness electrical connectors and reposition engine wire harness.
5. Place digital TR sensor manual lever in PARK position.
6. Install Three Bar Engine Support 303-D063 (D88L-6000-A) or equivalent with Engine Lifting Brackets 303-050 (T70P-6000) and support engine
assembly.
7. Remove main control cover upper retaining bolts.
8. Raise and suitably support vehicle on hoist.
9. Remove LH front wheel tire and wheel assembly.
10. Remove LH front fender splash shield.
11. Remove LH engine support and insulator.
12. Position drain pan under transaxle main control cover and remove remaining lower transaxle main control cover bolts and remove transaxle main
control cover and gasket.
13. Disconnect Transmission Fluid Temperature sensor (TFT sensor) from main control valve body and solenoid electrical connectors.
14. Remove transaxle wiring harness from chain cover.
15. CAUTION: Do not remove pump assembly cover bolts.
Valve Body Bolt Removal
Remove main control valve body retaining bolts, disconnect manual linkage and carefully slide pump assembly and main control valve body off of
pump shaft and remove from transaxle.
Installation