Sable V6-3.0L VIN U (1999)

Windshield Washer Switch: Service and Repair
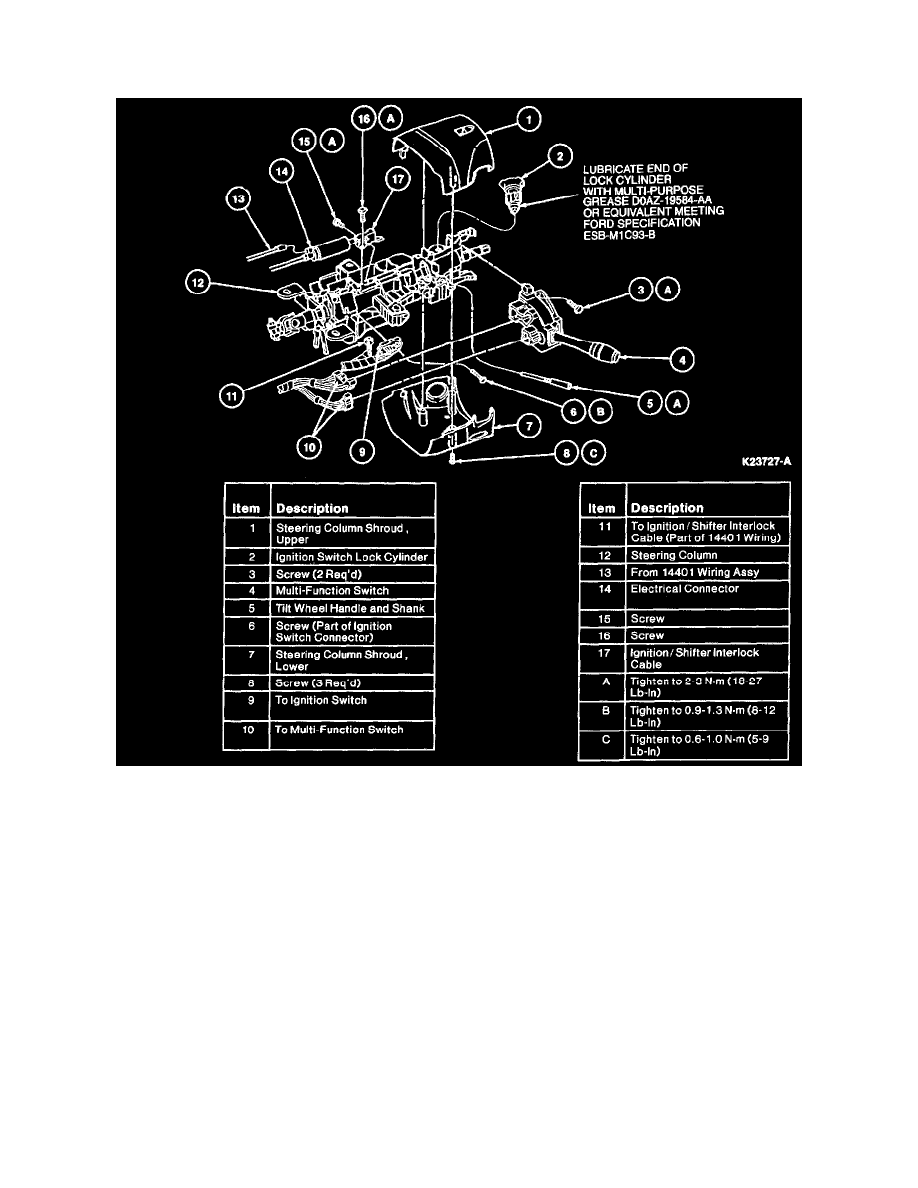
Multi-Function Switch
REMOVAL
1. Disconnect battery ground cable.
2. Tilt column to lowest position and remove tilt wheel handle and shank.
3. Remove ignition switch lock cylinder.
4. Remove shroud screws and remove upper steering column shroud and lower steering column shroud.
5. Remove two self-tapping screws retaining multi-function switch to steering column casting. Disengage multi-function switch from steering
column.
6. Disconnect the two electrical connectors and remove multi-function switch from vehicle.
INSTALLATION
1. Install two electrical connectors to the multi-function switch until fully engaged.
2. Align multi-function switch mounting holes with corresponding holes in the steering column casting. Install two self-tapping screws making sure to
start the screws in the previously tapped holes. Tighten to 2-3 Nm (17-26 lb-in).
3. Install upper steering column shroud and lower steering column shroud with screws. Tighten screws to 0.6-1.0 Nm (5-9 lb-in).
4. Install ignition switch lock cylinder.
5. Install tilt wheel handle and shank.
6. Connect battery ground cable.
7. Check steering column controls and multi-function switch for proper operation.
