
Sable AWD V6-3.5L (2008)
Taurus X (Part 2)
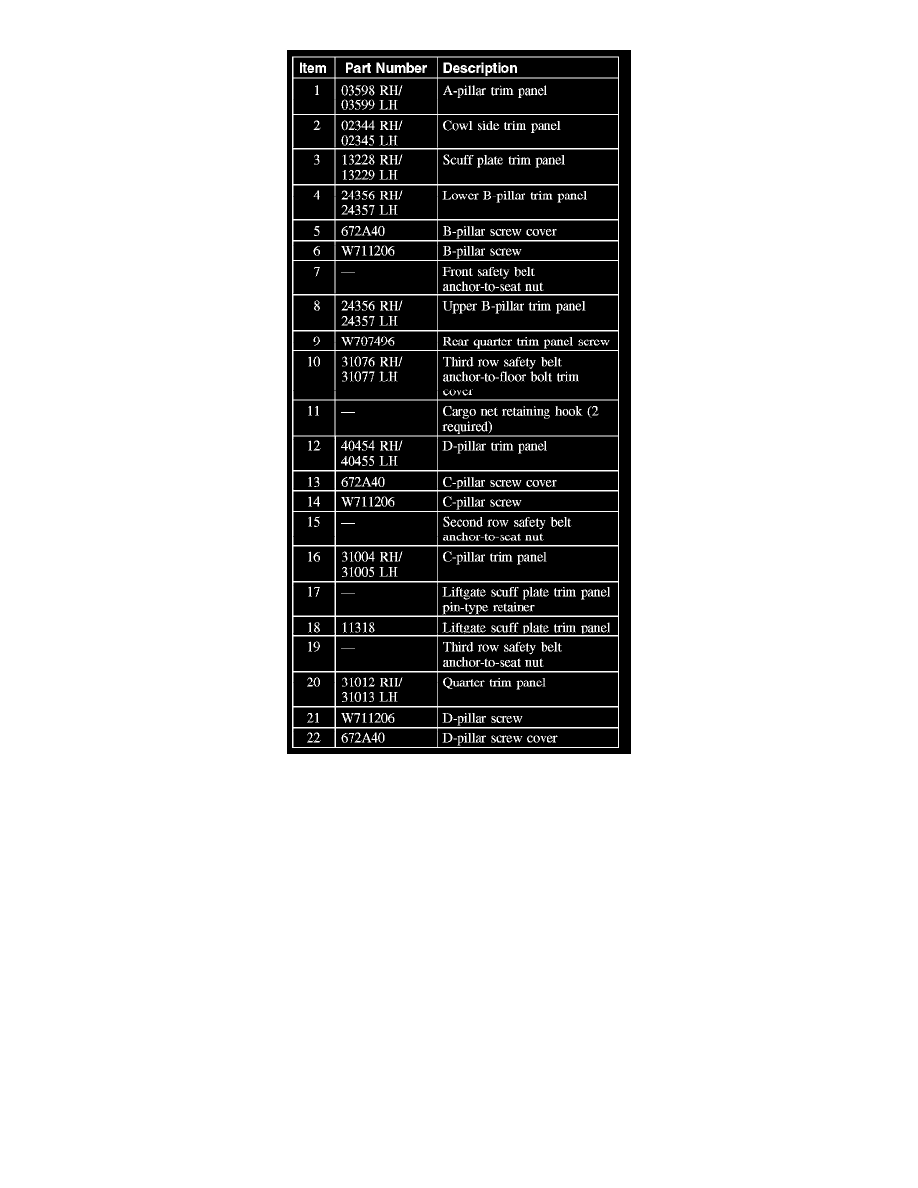
Removal and Installation
1. Position aside the door opening weatherstrip.
2. NOTE: The upper and center A-pillar trim panel retaining clips are equipped with a 2-stage high retention feature that is designed to prevent the
trim panel from striking the occupant in the event of a side air curtain deployment.
Pull the A-pillar trim panel toward the center of the vehicle to release the first stage of the upper and center A-pillar trim panel retaining clips and
the lower A-pillar trim panel retaining clip.
3. Move the A-pillar trim panel forward and rearward while gently pulling the A-pillar trim panel inward to disengage the second stage of the upper
and center A-pillar trim panel retaining clips.
4. Pull the A-pillar trim panel rearward and upward to remove the A-pillar trim from the instrument panel.
Installation
1. Install new upper and center A-pillar trim panel 2-stage high retention retaining clips.
2. Install the lower A-pillar trim panel tabs into the instrument panel.
3. Align the 3 A-pillar trim panel retaining clips and the A-pillar trim panel locator pin to the A-pillar retaining clip holes and the A-pillar locator
hole.
4. Install the A-pillar trim panel onto the A-pillar.
-
Make sure that the 3 A-pillar trim panel retaining clips are seated correctly.