
Sable AWD V6-3.5L (2008)
Install a new solenoid body filter assembly by pushing it straight down on to the alignment tabs.
2. CAUTION: Make sure not to pinch the turbine shaft speed (TSS), output shaft speed (OSS) or transmission range (TR) sensor wiring
harnesses when installing the solenoid body. Damage to the wiring harness will occur.
NOTE: Install the different length bolts in the locations noted during disassembly.
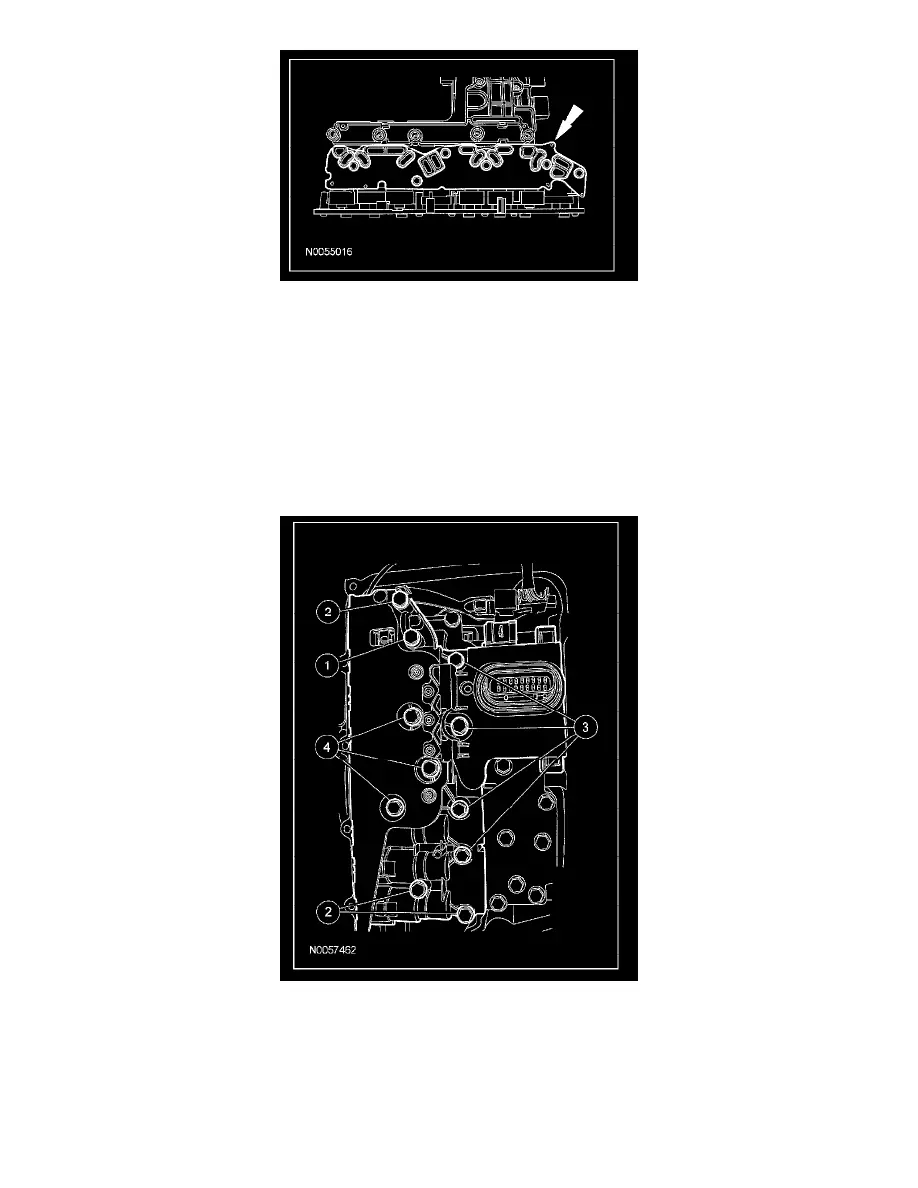
Install the solenoid body and the 11 bolts.
1
42 mm (1.65 inch) bolt
2
63 mm (2.48 inch) bolts
3
80 mm (3.14 inch) bolts
4
95 mm (3.74 inch) bolts
3. Tighten the solenoid body bolts in the sequence shown.
^
Tighten to 12 Nm (9 lb-ft).