
Topaz L4-140 2.3L CFI (1985)
3.
Pull inner race and bearing assembly out until it rests on circlip, then, using suitable pliers, spread stop ring and move it back on shaft.
4.
Slide inner race and bearing assembly down shaft to expose circlip, then remove circlip.
5.
Remove inner race and bearing assembly and, if necessary, remove boot.
INSTALLATION
Except Inboard Constant Velocity Joint & Boot, 5 Speed Manual Transmission
1.
Install new stop ring, if removed. Ensure that stop ring is properly seated in groove.
2.
Install new circlip in groove nearest end of shaft. To avoid over-expansion or twisting of circlip, start one end in groove and work circlip over stub
shaft end and into groove. Interconnecting shafts are different depending on application. These shafts are non-symmetrical. Outboard end
is approximately 1-4 inch longer, from end of shaft to end of boot groove, than inboard end. Be careful to install inboard and outboard
constant velocity joints to proper ends of shaft.
3.
Install constant velocity joint boot, if removed, ensuring that boot is seated in groove. Tighten clamp securely, but not too tight.
4.
Before positioning boot over constant velocity joint, pack joint and boot as follows:
a. On inboard constant velocity joint, fill boot with 45 grams of grease and pack joint with 90 grams of grease.
b. On outboard constant velocity joint, fill boot with 45 grams of grease and pack joint with 45 grams of grease. Use only lubricant
E2FZ-19590-A or equivalent.
5.
Position boot upward toward end of shaft, then position constant velocity joint onto shaft and tap into position using plastic mallet. Joint is fully
seated when circlip locks in groove cut into joint bearing inner race. Check for proper seating by trying to pull joint from shaft.
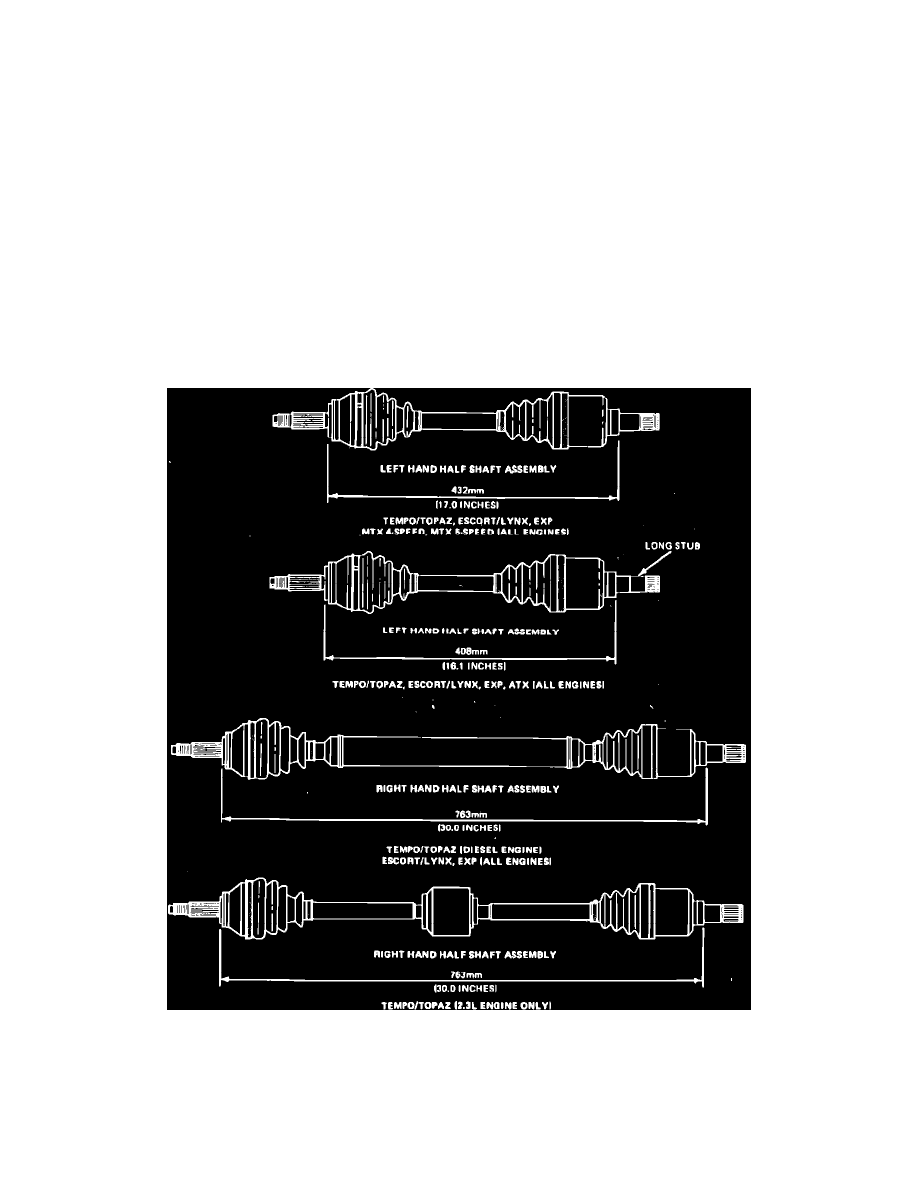
Fig. 16 Halfshaft assembled lengths. Late 1983 & 1984---85 models