
Topaz L4-140 2.3L HSC (1984)
5.
Connect eyelet of jumper harness lead wire to the positive battery terminal of the starter relay.
6.
Start engine and set A/C system for Maximum. Check for compressor clutch engagement and engine cooling fan operation.
PART NUMBER
PART NAME
CLASS
E3TZ-9345-A
Mechanical Relay
A
E43Z-19B573-A
Clutch Coil Jumper
C
Assembly (1984)
E53Z-19B573-A
Clutch Coil Jumper
C
Assembly (1985)
OTHER APPLICABLE ARTICLES: Supersedes 86-25-4
WARRANTY STATUS: Eligible Under Basic Warranty Coverage
OPERATION: SP872007A
TIME:
0.8 Hr. DLR. CODING: Basic Part No. 19B573 - Code: 28
Technical Service Bulletin # 87207
Date: 871007
A/C Compressor - Clutch Slippage
AIR CONDITIONING - COMPRESSOR CLUTCH
Article No.
SLIPPAGE - PULLEY AND HUB WEAR
87-20-7
FORD:
1984-85 TEMPO
LINCOLN-MERCURY: 1984-85 TOPAZ
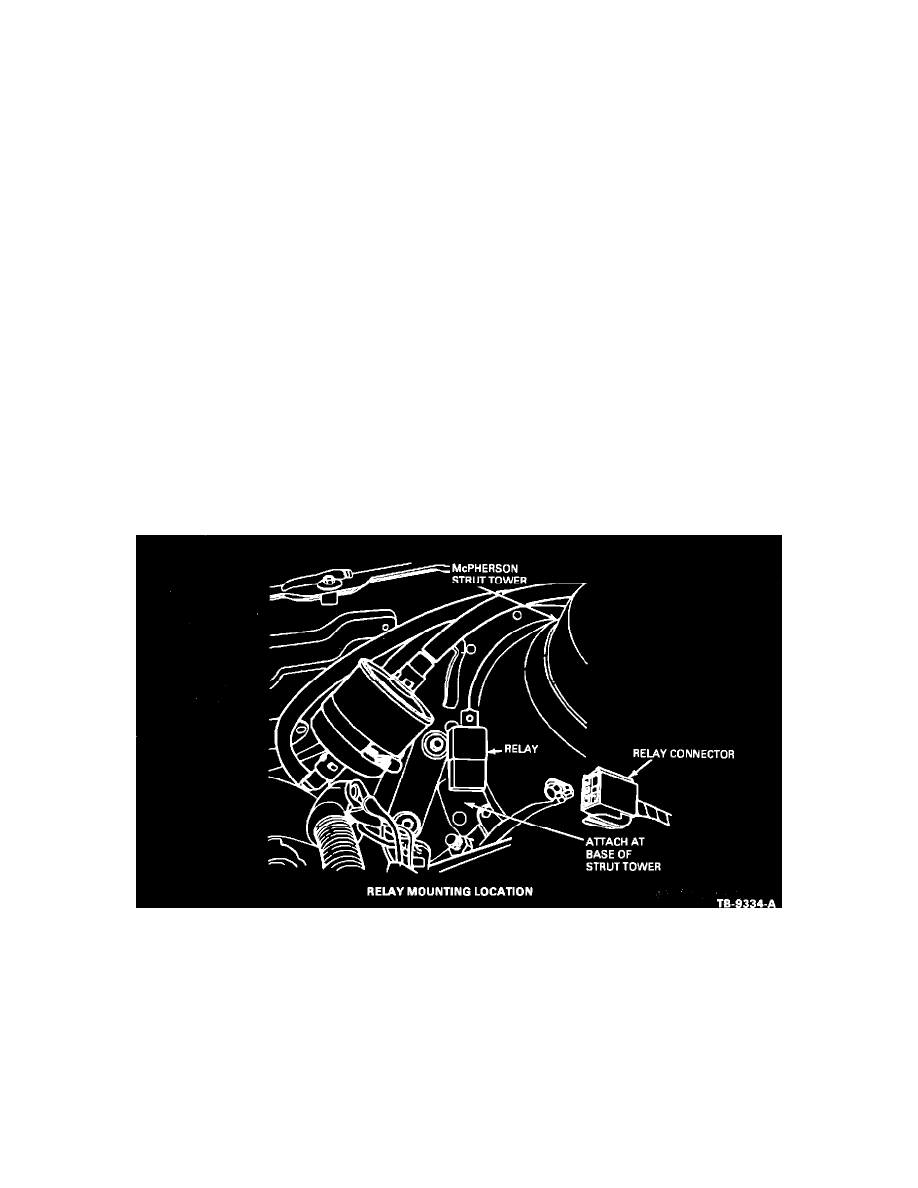
Figure 24
This TSB article is being republished in its entirety to correct the service procedure and the position of the relay on the fender splash shield, Figure 24.
The old position may allow moisture to enter the relay.
ISSUE:
Compressor clutch slippage may result from high system pressures or low supply voltage to the clutch field coil. This condition will cause
pulley and hub wear.
ACTION:
To correct this, install a new jumper wire harness and relay using the following procedure.
1.
Check compressor clutch for damage and replace as needed. Refer to the 1984 or 1985 Car Shop Manual, Section 36-39-3.
2.
Check voltage, using Rotunda DVOM 007- 00001, at clutch coil connector (black wire with yellow hash) and find out which of the following