
Topaz L4-140 2.3L HSC (1984)
1. Remove shift lever shaft from bore, then the back-up lamp switch. Use caution when removing shift lever shaft as the reverse inhibitor plunger is
spring loaded and may fly from its bore when shaft is removed.
2. Using screwdriver, remove reverse relay lever retaining C-clip, then the reverse relay lever. It is not necessary to remove pivot pin.
3. Remove control selector plate from case.
4. Position shift shaft into center detent position, then drive spring pin through selector plate arm assembly and through input shift shaft into recess in
clutch housing case.
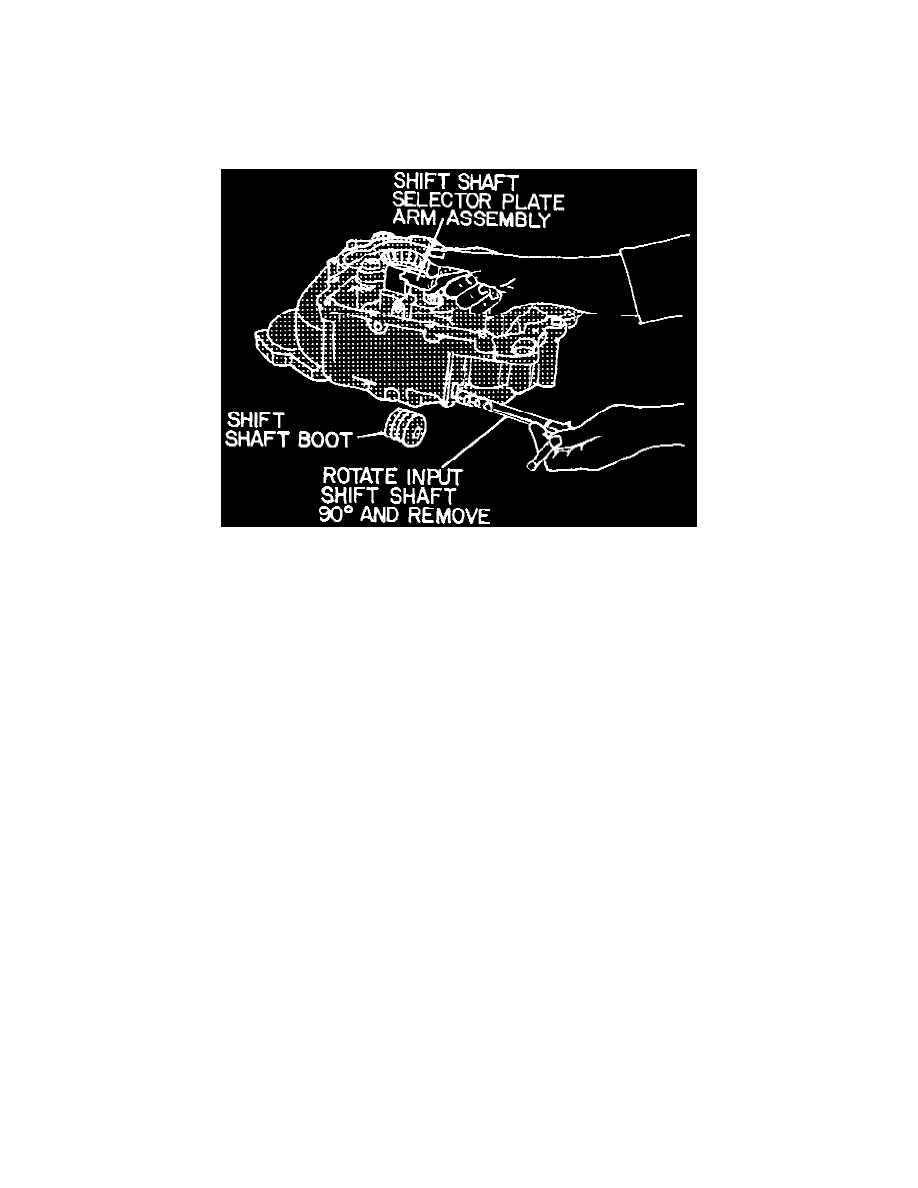
Removing Shift Shaft Selector Plate & Arm Assembly
5. Remove shift shaft boot, then using a drift rotate input shift shaft 90°. Depress detent plunger from shaft detent notches inside housing and pull
input shaft outward. Remove input shift shaft selector plate arm assembly and spring pin.
6. Using suitable magnet, remove input shift shaft detent plunger and spring.
7. Remove transmission input shift shaft oil seal assembly using tools T77F-7288A and 750T-100A or equivalent.
8. Reverse procedure to install noting the following:
a. Use caution not to damage oil seal when installing input shift shaft. Lubricate seal lip of new oil seal prior to shaft installation.
b. Torque selector plate attaching bolts to 6-8 ft lbs (8.1-10.8 Nm).
c. Apply suitable sealant to threads of reverse relay lever pivot pin before installing.
d. Apply suitable sealant to threads of back-up lamp switch and torque switch to 14-18 ft lbs (19-24 Nm).
5 Speed Manual Transaxle (MTX)