
Topaz FWD L4-140 2.3L CFI (1987)
Technical Service Bulletin # 8879033088
Date: 880301
Accessory Drive Belt - Seating Procedure
ACCESSORY DRIVE BELT - TENSION SETTING PROCEDURE FOR ENGINES WITHOUT AUTOMATIC BELT TENSIONERS
NOISE - ACCESSORY DRIVE BELT "SQUEAL" - ENGINES WITHOUT AUTOMATIC BELT TENSIONERS
Article No. 88-7-9
FORD:
1987-88 TEMPO 1988 ESCORT, TAURUS, CROWN VICTORIA
LINCOLN-MERCURY: 1987-88 TOPAZ 1988 SABLE, GRAND MARQUIS, LINCOLN TOWN CAR
ISSUE:
Accessory drive belts that are replaced or reinstalled after servicing the vehicle must be properly seated into the pulley grooves. The
accessory drive belts on vehicles without automatic tensioners do not completely seat in the pulley grooves until after the engine has run for
several minutes. After the accessory drive belt is seated, it will be necessary to reset the belt tension because the initial bell tension may fall
below the specified tension range which could result in higher than normal belt wear or belt "squeal".
ACTION:
To make sure that the accessory drive belt is properly seated in the pulley grooves and properly tensioned, reset the belt tension after the
engine has been run for five (5) minutes. Refer to the following service procedure. When checking belt tension, take tension readings in the
mid-span of belt between the pulleys, not on spliced sections of the belt. Use the same belt area when rechecking belt tension.
NOTE:
The accessory drive belt must be kept seated in the pulley grooves. Do not allow the belt to relax while resetting the belt tension. If the belt
does unseat from any pulley during the tension resetting procedure, the procedure will have to be repeated.
1.9L Alternator & Power Steering Pump Belt Information
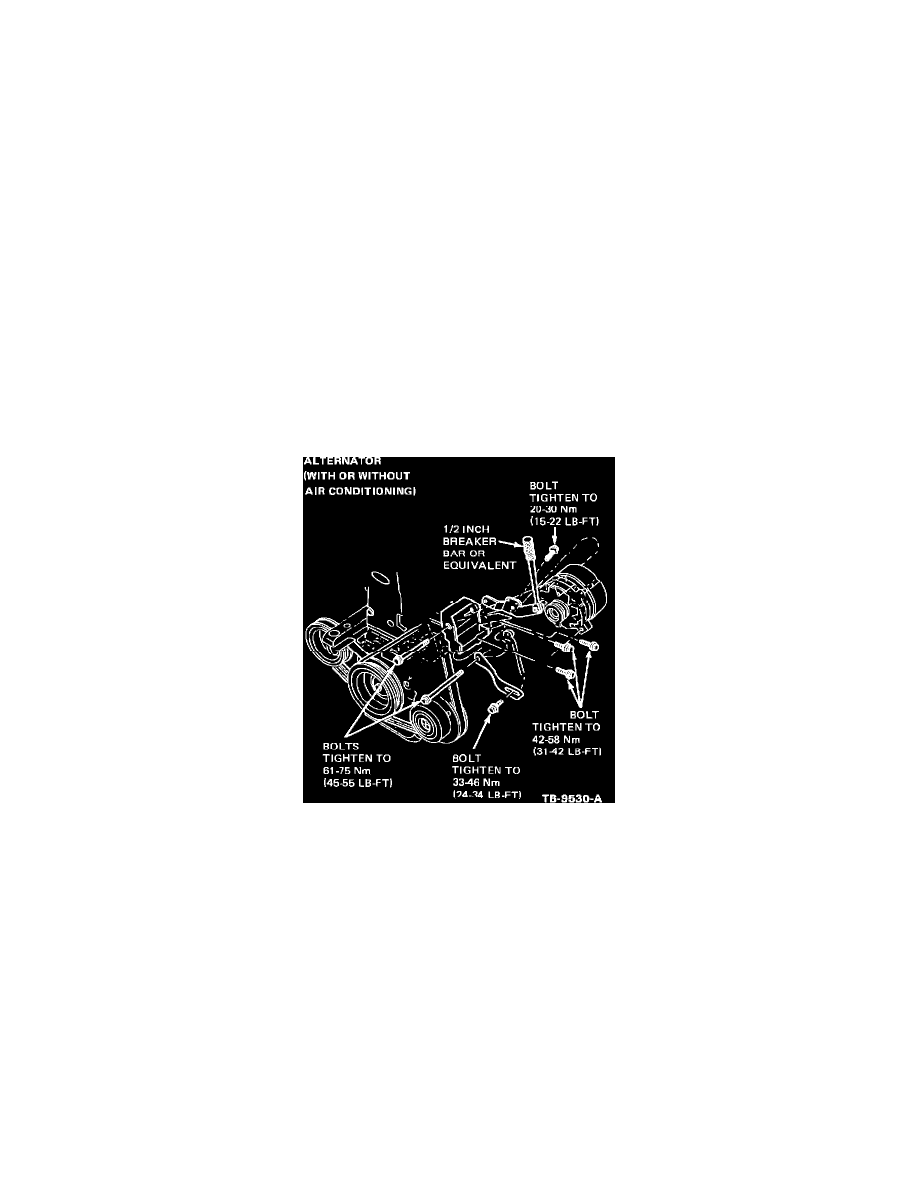
FIGURE 4
1.9L Alternator Belt (With or Without Air Conditioning)
1.
Install V-ribbed alternator belt on pulleys.
2.
Install a 1/2 inch breaker bar to the support bracket located behind the alternator, Figure 4.
3.
Apply tension to the belt using the breaker bar. Using a belt tension gauge, set belt to proper tension: new alternator belt 140-180 lbs. (623-800 N)
and 120-140 lbs. (532-623 N) for a used belt.
4.
Secure alternator pivot bolt, leaving it loose enough to allow alternator to move. Maintaining correct belt tension, torque alternator adjustment bolt
to 24-34 ft.lbs. (30-46 N-m).
5.
Remove belt tension gauge and breaker bar.
6.
Idle engine for five (5) minutes.
NOTE:
When retensioning a loose belt, it is important not to allow the belt to relax.