
Tracer L4-110 1.8L DOHC (1995)
2.
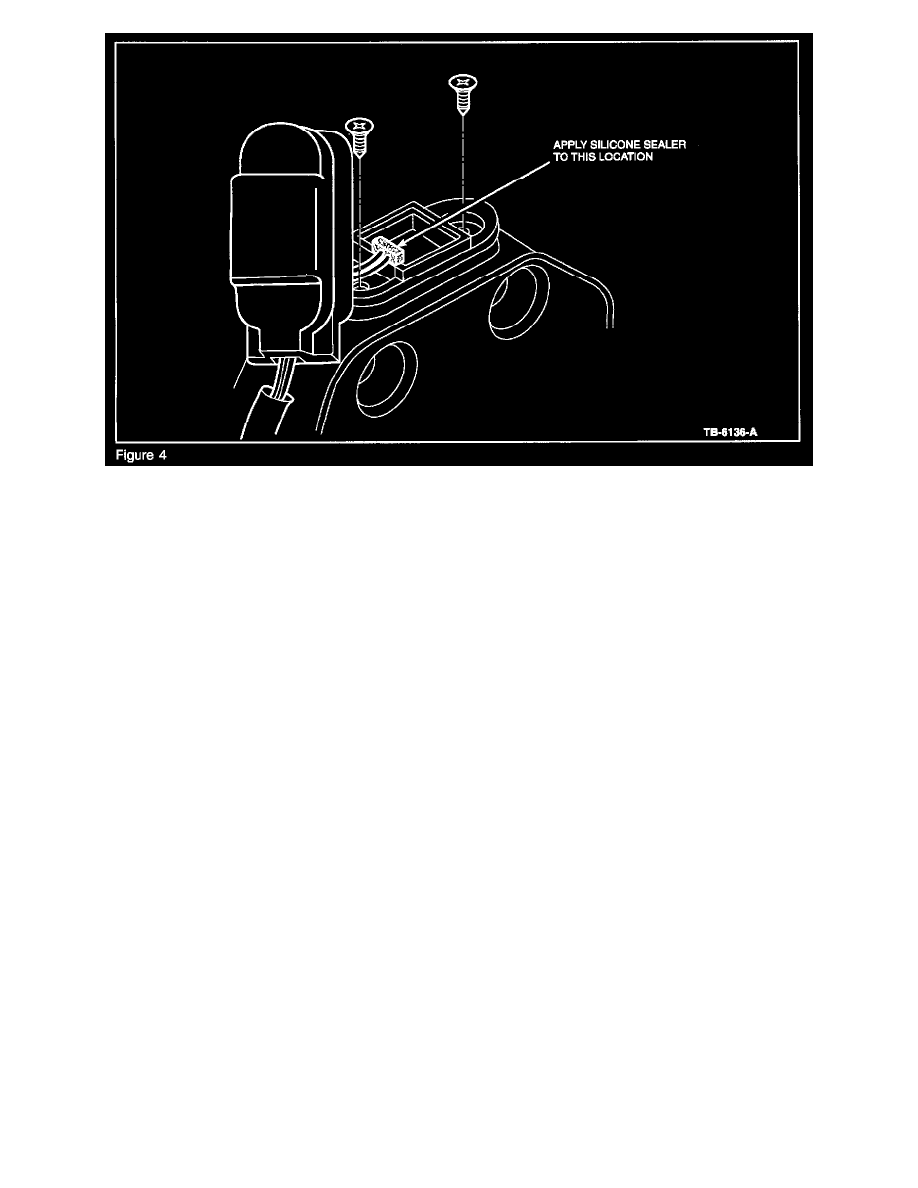
Apply Silicone Sealer (F7AZ-19554-EA) or equivalent to the latch where the wiring harness is soldered to the switch (Figure 4).
3.
Secure the new rubber cover over the latch switch and tie strap the wiring harness back to the original position on the door latch assembly (Figure
2).
4.
Install the door latch assembly. Torque fasteners to 5-6 N.m (44-53 lb-in).
5.
Install the inside door handle to the remote rod (Figure 1).
6.
Connect the door latch switch electrical connector.
7.
On vehicles equipped with power locks, connect the actuator rod (Figure 1).
8.
Connect the door latch control cylinder rod (Figure 1).
9.
Connect the door latch control rod (Figure 1).
10.
Connect the outside door handle rod to the door latch assembly (Figure 1).
11.
Position back the door weathershield. Reseal if necessary to prevent water intrusion.
12.
Install the door trim panel. Follow instructions in Service Manual, Section 01-05.
13.
Connect and install the window regulator switch housing (if equipped).
14.
Install the front window regulator handle (if equipped).
15.
Restore battery connection and remove memory saver.