
Tracer L4-110 1.8L DOHC (1995)
Evaporator Core: Service and Repair
NOTE: If a leaking evaporator core is suspected, leak test the core before removing it from the vehicle. If the core needs to be replaced, replace the
evaporator/blower unit as an assembly.
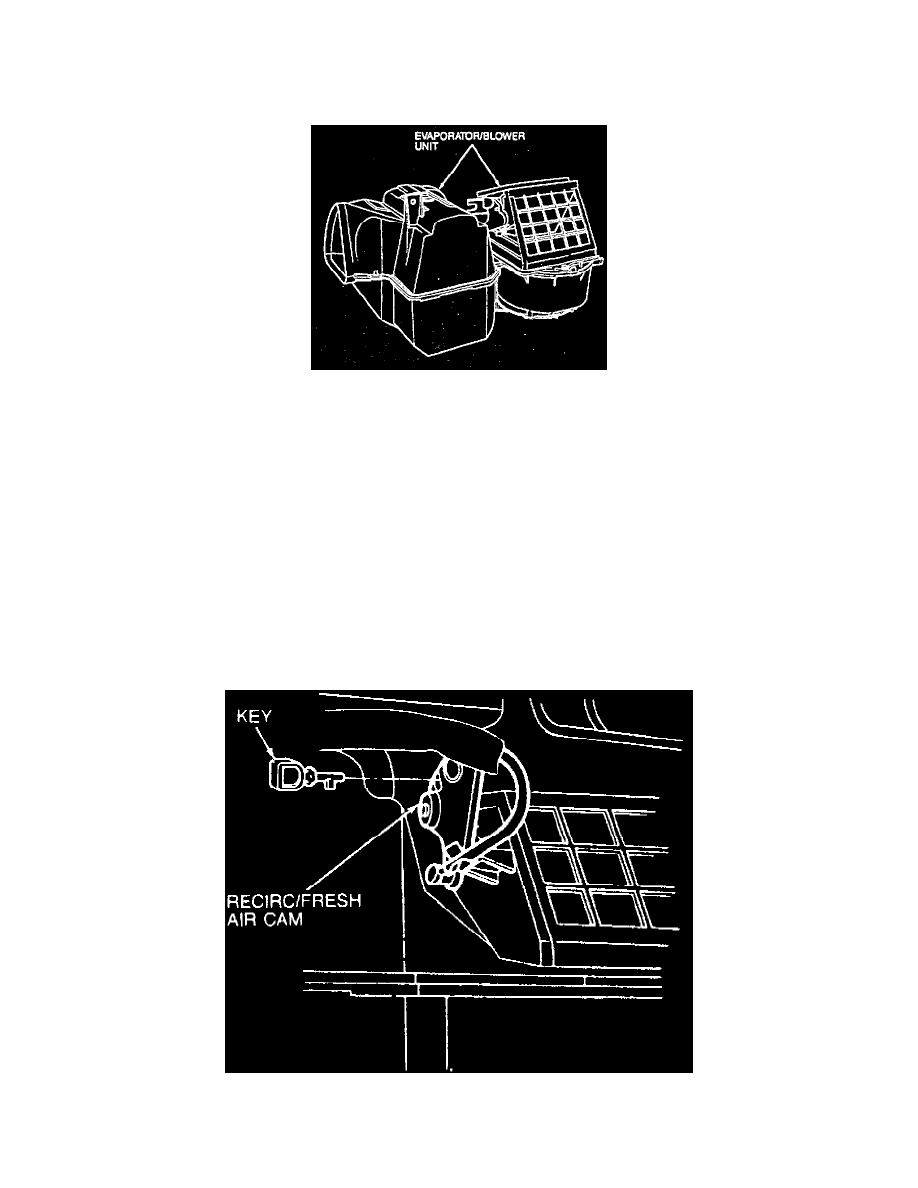
Fig. 2 Evaporator Core
1. Disconnect battery ground cable, then discharge A/C system. Refer to: Heating and Air Conditioning, Service and Repair, Refrigerant
Recovery, See: Service and Repair/Refrigerant Recovery
2. Using a suitable spring coupling tool, disconnect high-pressure line and accumulator/drier inlet tube from evaporator core at bulkhead. Plug ports
to prevent entrance of dirt or moisture.
3. Remove glove compartment, then remove trim panel below glove compartment.
4. Disconnect two electrical connectors from resistor assembly, then electrical connector from blower motor.
5. Remove right dash side panel, then right lower dash trim panel and capscrews.
6. Remove support bar and bolts, then support plate and bolts.
7. Disconnect cable from recirc/fresh air cam and retaining clip.
8. Loosen capscrew that secures evaporator to heater clamp, then remove four mounting nuts from evaporator/blower unit.
9. Remove evaporator/blower unit.
10. Reverse procedure to install, adjusting recirc/fresh air cable as follows:
a. Move air cable to the FRESH position on climate control assembly.
b. Remove glove compartment.
c. Insert Cable Locating Key tool No. E7GH-18C408-A, or equivalent, through the fresh air door cam key slot and recirc door key boss opening
to secure cam in its proper position.
d. Disconnect cable from retaining clip next to Recirc/Fresh air cam, then connect cable to retaining clip.