
Tracer L4-110 1.8L DOHC (1995)
Fuel Return Line: Service and Repair
Steel Fuel Line Repair
WARNING: Fuel supply lines will remain pressurized for long periods of time after engine shutdown. This pressure must be relieved before
servicing of the fuel system is begun.
REMOVAL
1. Relieve fuel system pressure. Refer to Fuel Pressure Release Procedure. See: Fuel Filter/Fuel Pressure Release/Service and Repair
2. Drain the fuel from the fuel tank.
3. Disconnect the line(s) at the fuel tank and at the engine. Remove the lines from the holding clips along the underbody. Remove all damaged hoses
and tube sections.
INSTALLATION
CAUTION: The use of copper tubing is not recommended due to fuel contamination. Electronic Fuel Injection (EFI) systems are equipped with a fuel
pump that provides fuel to the engine at higher pressure than conventional fuel systems. Bulk rubber fuel hose must not be used to service tubing in high
pressure fuel systems.
1. Cut a new section of tubing to approximately the same length as the section to be replaced, allowing for the threaded connectors/fasteners.
2. Bend the tube section to conform to the contour of the original tube.
3. Square the ends of the cut tubing with a file. Remove burrs. Blow out any particles with compressed air.
4. Position the lines in the underbody clips. Do not tighten at this time.
NOTES:
^
The metal underbody tubes must be cut and formed out of rolls of fuel system service tubing available at the dealerships.
^
Electronic Fuel Injection (SEFI) systems are equipped with a fuel pump that provides fuel to the engine at higher pressure than conventional
fuel systems.
^
Bulk rubber fuel hose must not be used to service tubing in high pressure fuel systems.
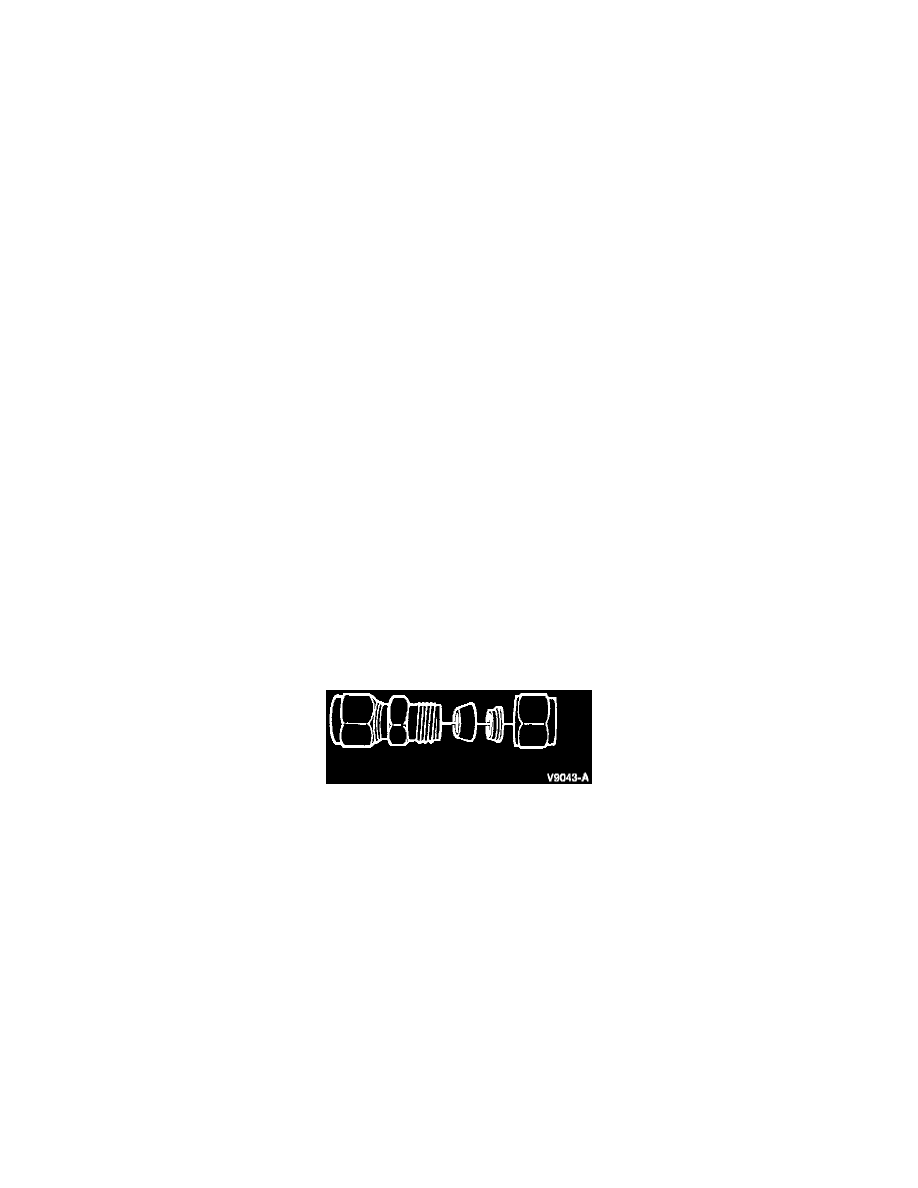
Ferrule
CAUTION: Make sure that the ferrule is assembled correctly before installing it on the tube.
5. Assemble the fitting by sliding the nut over the tubing with the threaded (open) end out.
6. Slide the ferrule on the tubing with the cutting edge out; the large head end should be inside of the nut.
7. Lubricate the ferrule and the threads on the fasteners with oil.
8. Bottom the tube in the fitting, and tighten the nut until the ferrule just grips the tube. When the tube can no longer be turned by hand, the ferrule
has started to grip the tube.
9. After the ferrule grips the tube, tighten the nut one full turn.
10. Tighten the fuel line to the underbody clips to secure the fuel lines.
NOTE: After disassembly of the flareless fitting joint, such as at the fuel hose to fuel line connection, the flareless fitting can be reassembled. To
reassemble, reconnect the threaded fitting and seat the ferrule to be finger-tight. When the ferrule is seated, draw the nut up approximately
one-sixth to one-third of a turn with a wrench to complete the tightening operation.