
Tracer L4-116 1.9L SOHC (1991)
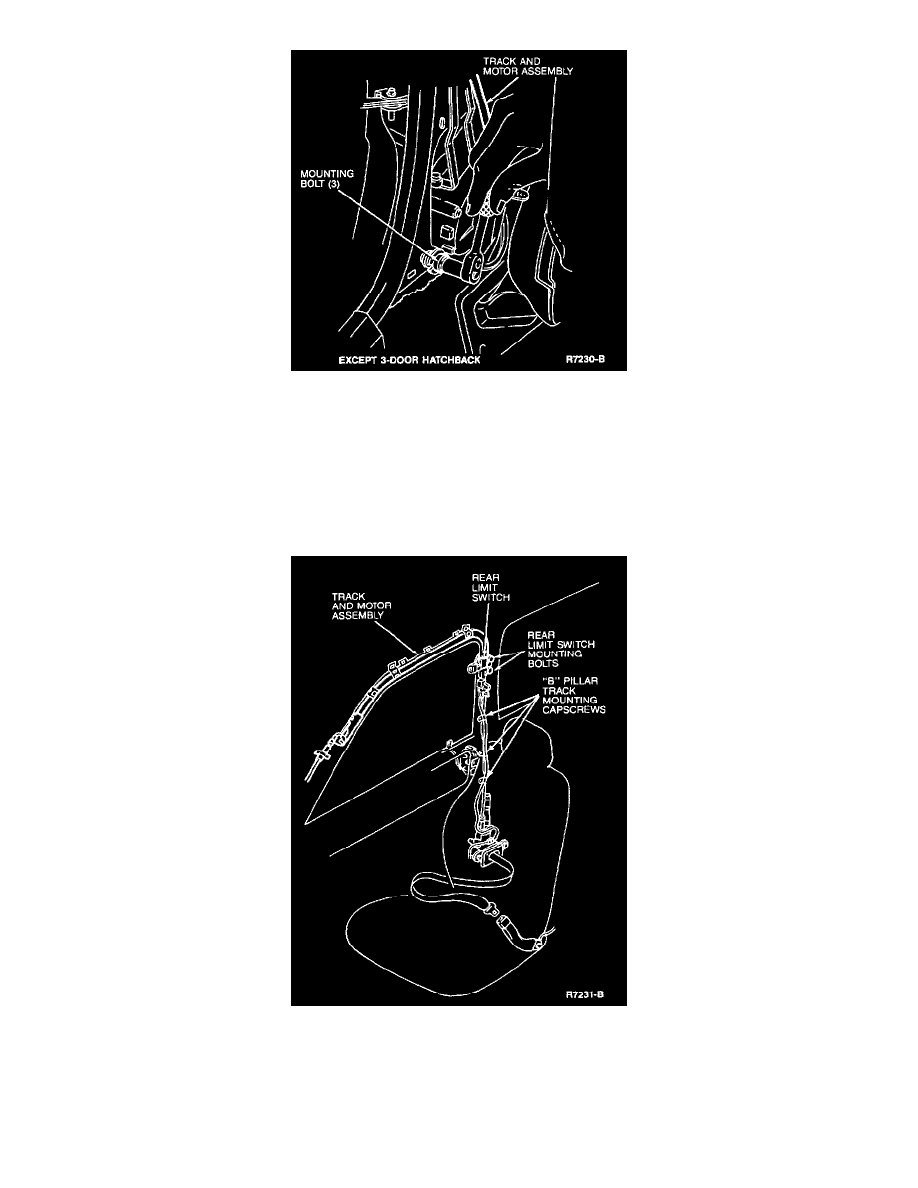
8. Remove all track and motor assembly mounting bolts and capscrews.
9. Remove the track and motor assembly.
INSTALLATION
1. Position the track and motor assembly into its mounting position and install one of the track mounting bolts to hold the assembly in place.
2. Connect the two motor electrical connectors.
3. Install the motor mounting bolts. On 3-door hatchback models, tighten the bolts to 38-78 Nm (28-58 ft lbs). On all other models, tighten the bolts
to 8-12 Nm (69-104 in lbs).
4. Install the two track mounting bolts at the rear limit switch and tighten them to 18-25 Nm (13-19 ft lbs).
5. Install the track mounting capscrews at the "B" pillar and tighten them to 1.9-3.7 Nm (16.8-32.7 in lbs).
6. Install all remaining track mounting bolts and capscrews. Tighten the bolts to 8-12 Nm (69-104 in lbs).
7. Connect the front limit switch electrical connector.
8. Install the "A-B" pillar trim panel.
9. Install the "B" pillar trim panel.
10. Connect the shoulder belt to the carrier.
11. Connect the negative battery cable.