
Villager V6-181 3.0L SOHC VIN 1 EFI (1997)
Piston: Service and Repair
NOTE: The pistons and connecting rods can be serviced without removing the engine from the vehicle.
REMOVAL
1. Remove the cylinder heads.
2. Remove the oil pan.
3. Remove the two oil pump screen cover and tube bolts and the oil pump screen cover and tube. Discard the oil pump inlet tube O-ring.
4. Turn the crankshaft until the piston to be removed is at bottom dead center (BDC).
5. Remove the carbon from the upper portion of the cylinder bore. If a ridge can be felt or seen at the top of the bore, it must be removed. If
necessary, install Cylinder Ridge Reamer T64L-6011-EA in the cylinder bore and remove the ridge.
NOTE: Following directions of the ridge reamer manufacturer, remove the ridge until the bore is straight to the top edge of the cylinder.
6. Remove the connecting rod nuts.
NOTE: The connecting rod caps and connecting rods are marked with numbers designating to which connecting rod each cap belongs. These
numbers also correspond with piston-to-cylinder locations.
7. Remove the connecting rod cap and the lower half of the connecting rod bearing.
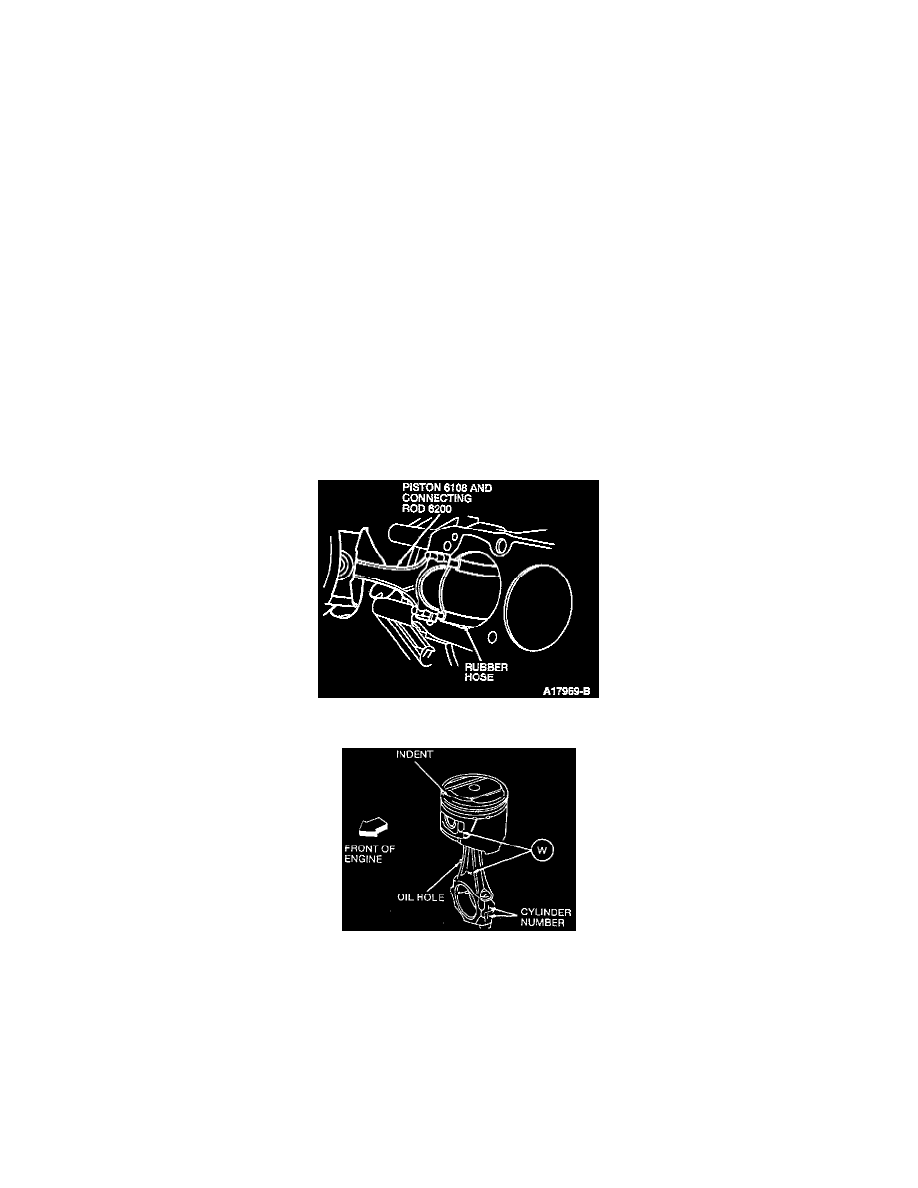
8. Slip two pieces of snug-fitting rubber hose over the connecting rod bolts to prevent bolt-to-crankshaft journal contact during installation.
9. Use a hammer handle or piece of wood to tap the connecting rod and piston upward until the piston rings clear the top of the cylinder block.
Remove the upper half of the connecting rod bearing.
10. Place the piston and connecting rod assemblies with their respective connecting rod caps to ease installation.
INSTALLATION
1. Slip two pieces of snug-fitting rubber hose over the connecting rod bolts to prevent bolt-to-crankshaft journal contact during installation.
Piston & Rod Assembly
2. Prior to installing the pistons in the engine, ensure that the indent on the top of the piston and the W on the front of the piston and on the
connecting rod are facing forward. Also check that the number on the connecting rod matches up with the cylinder number.
NOTE: Installation of the piston is easier if the crankshaft journal is in the BDC position.