
Villager V6-181 3.0L SOHC VIN 1 EFI (1997)
Valve Spring: Service and Repair
REMOVAL
NOTE: If the valve or valve seat has not been damaged, valve springs and valve stem seals may be replaced by holding the affected valve against its
valve seat using compressed air. Use a compressed air line and an adapter installed in the appropriate spark plug hole. A minimum of 965 kPa (140
psi) line pressure is required. If air pressure does not hold the valve shut, the valve is damaged or burnt and the cylinder head must be removed and
serviced. The appropriate piston must be at Top Dead Center (TDC) when removing the valves to prevent the valves from falling down into the
cylinder.
1. Remove the front valve cover or the rear valve cover as required.
2. Remove the rocker arm shaft and rocker arms from the cylinder head.
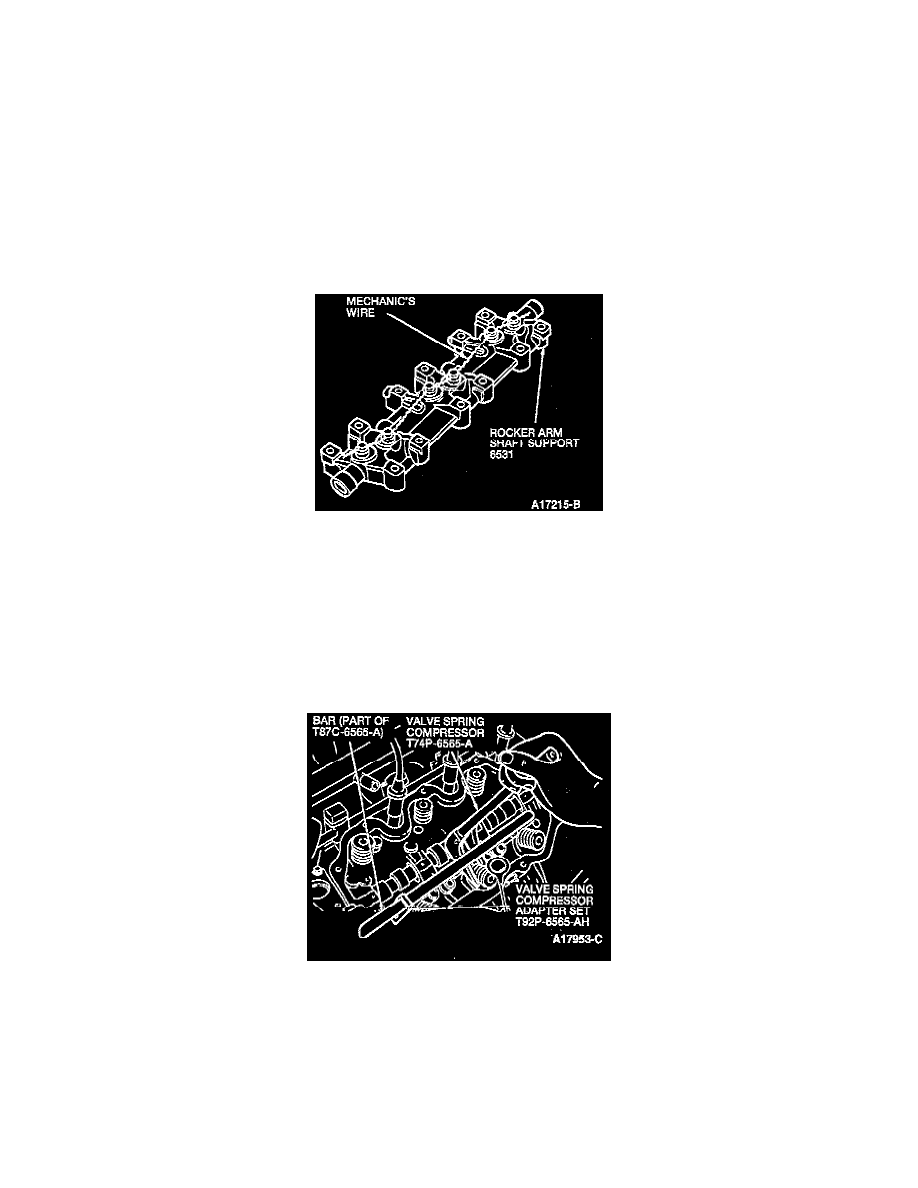
3. Secure the valve tappets to the rocker arm shaft support using mechanic's wire.
NOTE: Use mechanic's wire to hold the valve tappets in the rocker arm shaft support during removal.
4. Remove the rocker arm shaft support with the valve tappets.
NOTE: Make a note of rocker arm shaft support location prior to removal.
5. Bring the appropriate piston to TDC.
6. Remove the spark plug. Install an appropriate adapter and apply a minimum of 965 kPa (140 psi) of air pressure to hold the valve shut.
7. Use Valve Spring Compressor Adapter Set T92P-6565-AH, Bar (part of T87C-6565-A) and Valve Spring Compressor T74P-6565-A to compress
the valve spring and remove the valve spring retainer keys with a magnet.
8. Release the valve spring compressor adapter set, bar, and valve spring compressor and remove the valve spring retainer, valve spring, and lower
valve spring seat.