
Villager V6-181 3.0L SOHC VIN 1 EFI (1997)
Exhaust Manifold: Service and Repair
Front Manifold
NOTE: Throughout this section LH side components will be referred to as "front" components. The term "front" is used in relation to the engine
compartment.
REMOVAL
1. Disconnect the battery ground cable.
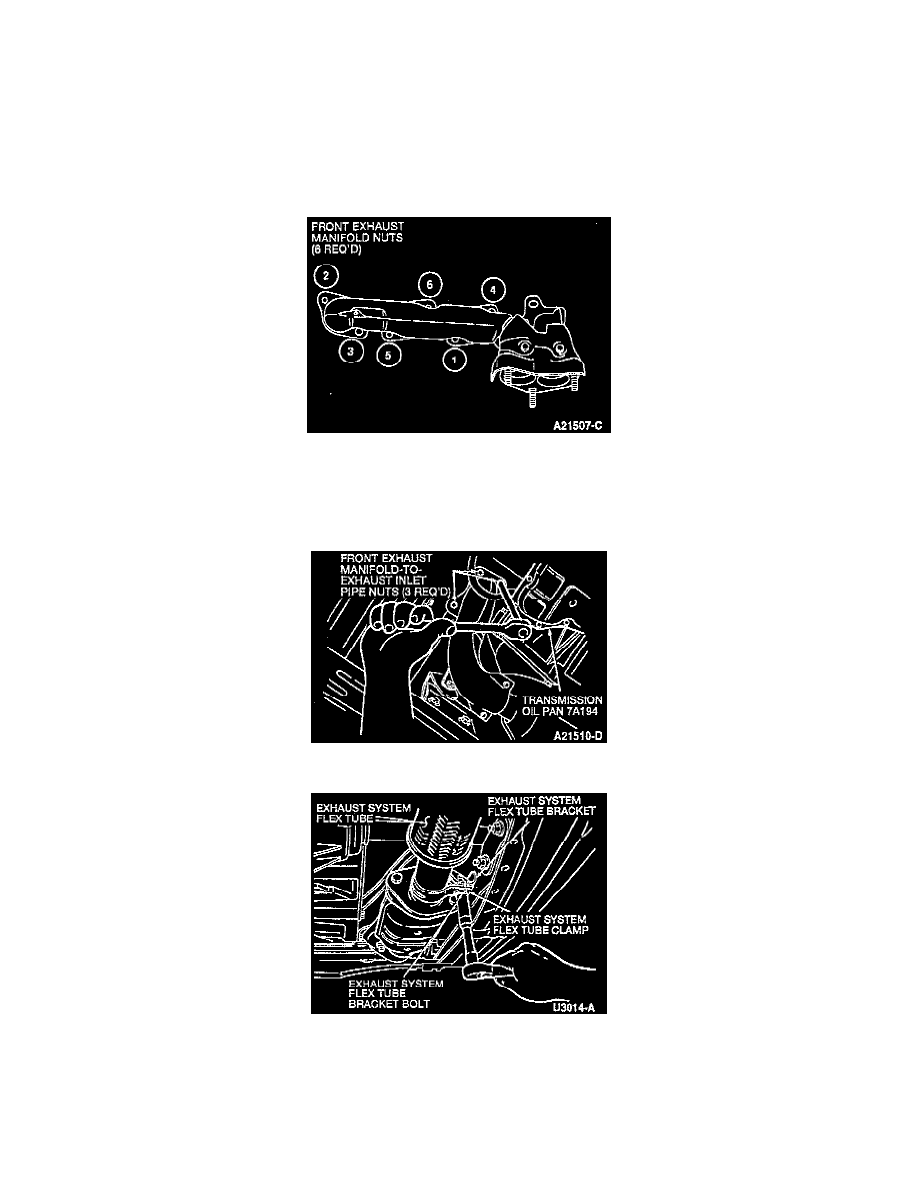
2. Remove two nuts and one bolt securing the front exhaust manifold to the rear exhaust manifold crossover tube. Discard the gasket.
3. Remove the transmission fluid level indicator tube heat shield.
4. Loosen the front exhaust manifold nuts in two steps in the sequence shown. Remove the three upper front exhaust manifold nuts, but do not
remove the three lower front exhaust manifold nuts.
5. Remove the front exhaust manifold-to-mounting bracket bolt.
6. Raise and support the vehicle.
7. Disconnect the upstream heated oxygen sensor (H02S) electrical connector.
8. Remove the three front exhaust manifold-to-exhaust inlet pipe nuts.
9. Remove the exhaust system flex tube bracket bolt.
10. Remove the LH inner engine and transmission splash shield bolts and screws and remove the LH inner engine and transmission splash shield.
11. Remove the lower three front exhaust manifold nuts.
12. Remove the front exhaust manifold. Discard the front exhaust manifold gasket.
INSTALLATION
1. Position a new front exhaust manifold gasket in place and install the front exhaust manifold.