
Villager V6-181 3.0L SOHC VIN 1 EFI (1997)
Starter Armature: Initial Inspection and Diagnostic Overview
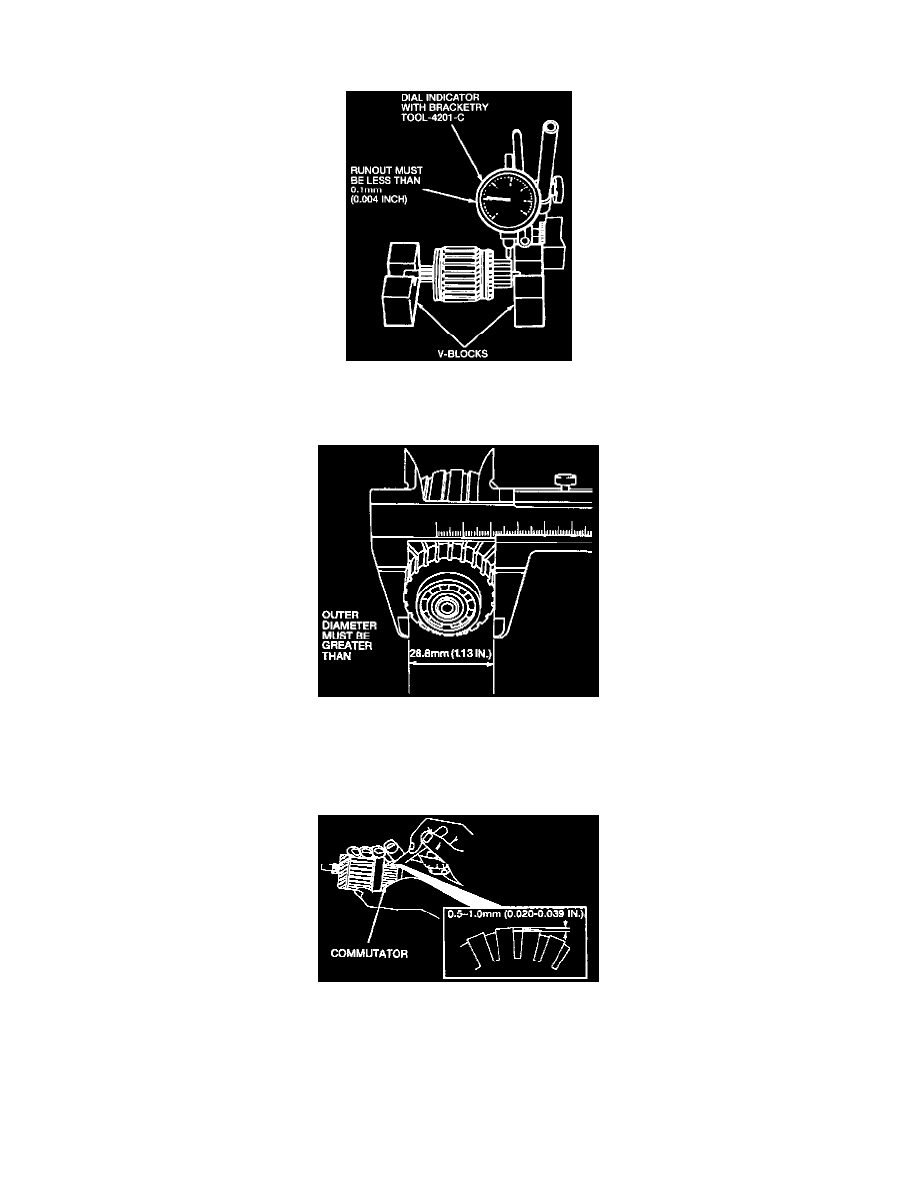
Armature Coil
1. Place the starter motor armature on V-blocks and use Dial Indicator with Bracket tray TOOL-420 1-C or equivalent to measure the commutator
runout. If the runout is more than 0.05mm (0.002 inch), use a lathe to repair the commutator. If the runout is excessive, replace the starter motor
armature.
2. Replace the starter motor armature if the commutator outer diameter is 28.8mm (1.13 inch) or less.
3. The commutator face should be clean and free of burned spots and scoring. If the commutator surface is dirty, wipe it with a cloth. Remove burn
spots with a fine crocus cloth. If the commutator is excessively scored, use a lathe to refinish the commutator face.
CAUTION: Do not use emery cloth on the commutator face.
4. If the depth of the groove between commutator segments is 0.2mm (0.008 inch) or less, undercut the insulating material using a hacksaw blade
that has been cut to a sharp point. Undercut until a groove depth of 0.5-1.0mm (0.020-0.039 inch) is reached.
5. If the starter motor armature laminations show signs of having contacted the field coil pole-pieces, check that the pole-pieces are tight in the starter
frame. Then check the starter motor armature for excessive runout (bent shaft). If the starter motor armature shaft is bent, replace the starter motor
armature.